Index:
UPDATED ✅ Want to learn more about moving shapes in Microsoft Word SmartArt graphics? ⭐ ENTER HERE ⭐ and learn everything FROM ZERO!
Microsoft Word is commonly used to write, review and correct texts. However, within the numerous tools that it presents, especially its latest versions, we will find other additional functions.
One of them is that of create diagrams very easily, through SmartArt. With this utility, just choose one of the pre-designed schemesinsert and enter the corresponding information.
However, these samples They do not always fully fit what we need.. That is why it is sometimes necessary to modify them slightly. If you want to learn more about how to do itwe recommend this post.
What should we consider before moving a shape in a SmartArt graphic?
The first thing we must take into consideration is that it is a matter of moving or changing the parameters of an internal element and not of the whole scheme. If you need the latter, you should do it as if it were any other graph.
Second, it is important that you know that moving some of its pieces may result in overlapping with other. Although it should not worry us too much, since it is easily solvable.

Lastly, we should mention that scrolling of the objects that make up the SmartArt graphic is externally limited by the size of the graphic itself. In other words, if you need to move any of its elements to a greater distanceyou must enlarge full chart.
Steps to move shapes in SmartArt graphics in Word
Because sometimes we need change the place of any of the elements of these graphics, whether for an aesthetic reason or for functionality, it is important to do it correctly. This is because the behavior of these objects that make up the scheme may not be identical to that of any graph.
If you need to move these shapes, follow these steps:
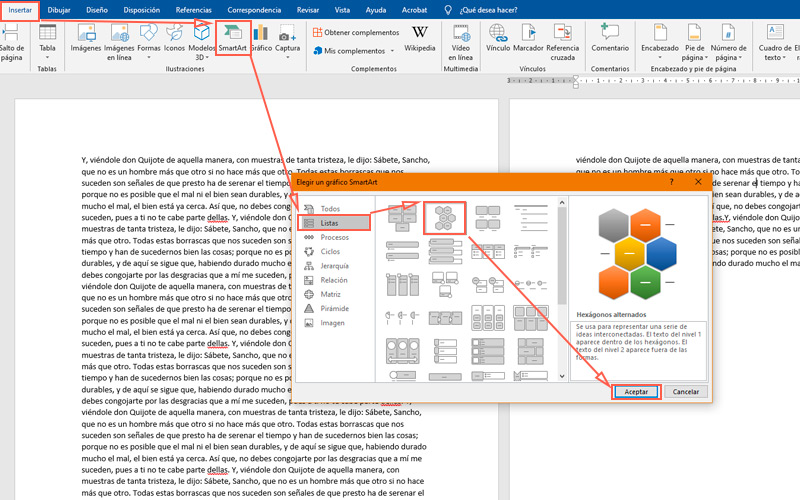
- For this example we will use the Smart Art called “Alternating Hexagons”. To find them, the first thing you should do is start Microsoft Word.
- Next, create a blank document.

- Go to the menu “Insert” and inside the section “Illustrations”press “Smart Art”.
- In this case a drop-down will not open, but a window will appear with all the layouts set sorted by category. The mentioned is in the second option of “lists”.
- Once the schema is created, add content, writing over some or all of the available elements. It is also possible to customize the general appearance and colors of the graph in the upper panel (provided that element is selected).
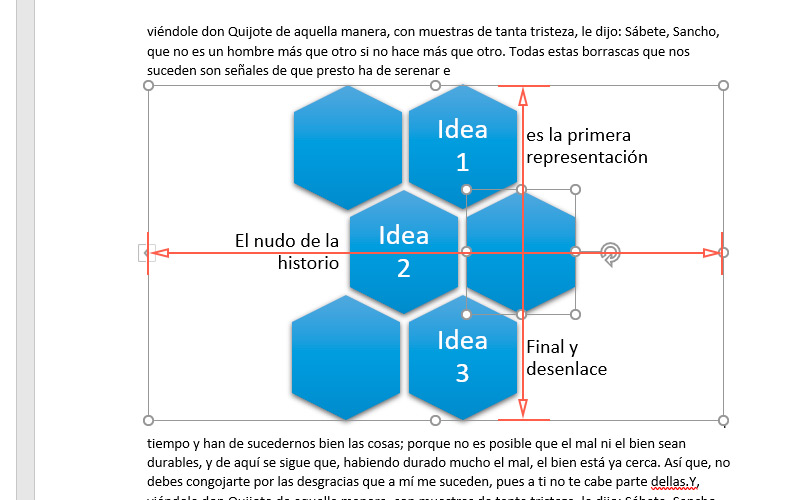
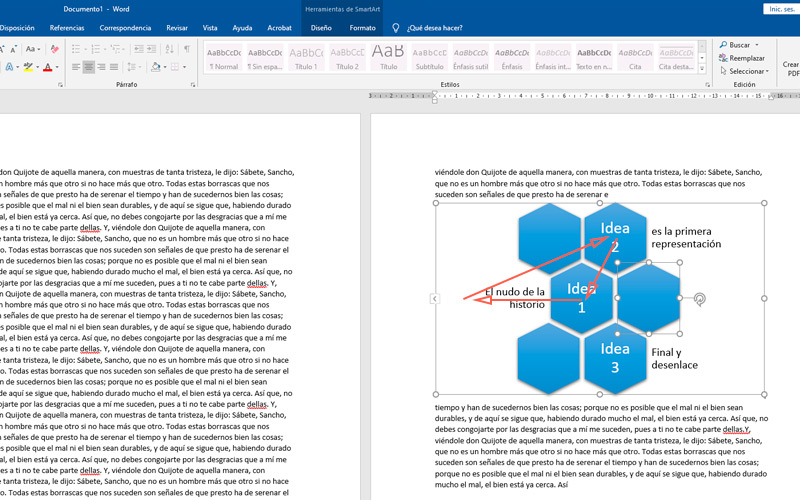
- Now let’s assume that the hexagon in the center should appear at the top. Then, select the first one with the left mouse button. The transform controls will be displayed.

- Press over the center of the element without releasing and move it to the sidein such a way that it does not overlap with another object.
- Do the same with the secondbut this time place it in the final place. We recommend that you use while doing it, pressing the key “Alt”. This will make it move as if it were in a group. As for the key “Shift” will allow a linear movement in the X or Y axisthus helping to maintain a more precise layout of objects.
- To finish this process, move the first elementwhich we put aside, to its final site.
- Another issue, which you may not know is that, if you need to duplicate any of these objects, you must select, copy and paste at the location site. In this sense, it is also allowed to delete themas long as you keep the minimum number with which it was designed initially (in the case of the example, 6 hexagons).
- Concluding with the text, we must tell you that this method works with shapes, such as text boxes that are inserted in the Smart Art.
Software