
Index:
UPDATED ✅ Want to disable and enable Slack notifications on your devices? ⭐ ENTER HERE ⭐ and Meet the Best ⭐
slack It has become one of the best applications for workspaces and organizations.so surely a large amount of important information is handled in it.
This is how each of the notifications you receive there will help you to stay informed at work that interests you, whether you use it from the computer or mobile devices.
Nevertheless, On many occasions, it is a very good alternative to be able to deactivate them.. This is how we will teach you how to how to turn slack notifications on or off in a very simple and fast way.
Learn step by step how to turn notifications on and off in Slack on any device
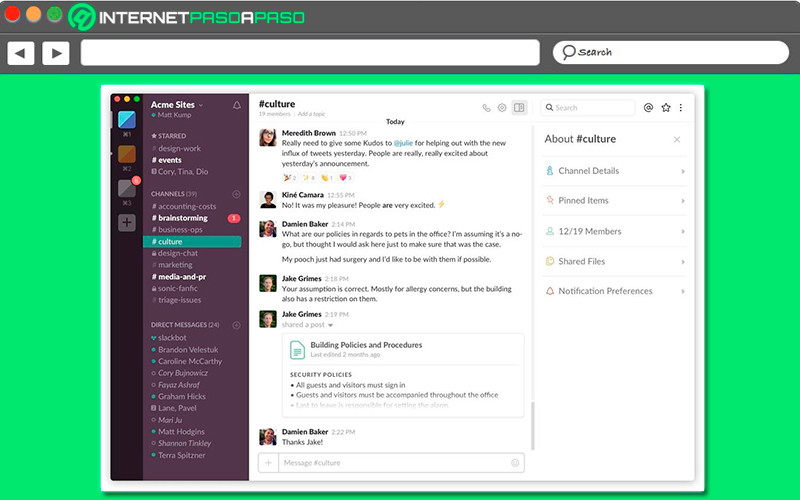
in many you can want a little silence and get out of work even for a momentthe best way to do it if you workspace is Slack is pausing your notifications, for this you can use the mode “Do not disturb”. In this way the members of this application can pause the notifications in those moments where they do not want to hear the noise of the notifications and want peace of mind.
When the mode is activated “Do not disturb” All notifications and mentions will be automatically paused, when you resume all this you will be able to review each of the messages you have received during that time. Also, you should know that the icon of “Do not disturb” will appear next to your name, they can override this mode with a direct message if they wish to notify you of something urgent or last minute.
Taking all this into account, here we are going to show you how you can activate and deactivate the notifications of the application on any device, to do so, follow each of these methods:
On your Android mobile
If you are one of the people who uses Slack from your Android mobile device, So here we are going to teach you how to perform this procedure easily.
To do this, follow each of these steps:
Activate “Do not disturb” mode
- The first thing you will have to do is click on the tab “You” located at the bottom of the screen.
- Next you must select the option of “Do not disturb”.
- now you must select a period from the list or click on the option to “Personalize” so that you can set yourself the period for which said mode will be activated.
Turn off or change Do Not Disturb mode
- Again access to the tab “You” within the app.
- Once there you must get into to the option of “Do not disturb”.
- When you have accessed there you must select the option of “Deactivate” if you want remove this mode already or simply choose a new period in case you want to change iteither.
In the computer
If for some reason you are one of the people who prefers to work from the computer for greater comfort or because you spend most of it at home and prefer to do it from the PC, So here we are going to explain how you can start turn this feature on and off in Slack.
To do this, follow each of these steps:
Activate Do Not Disturb
- Once you find yourself in slack from the computer, you must click on your profile picture located at the top right of your screen.
- Then you must place select the option of “Pause notifications” clicking on it.
- There you must choose a period from the menu or select the item of “Personalize” so you can set your own custom period.
Turn off or change Do Not Disturb mode
- Again from your computer You must access the app and select your profile image located in the upper right corner of your screen.
- There you must click on the option of “Pause notifications”.
- Next, you must click on the option of “Deactivate” or hover over “Set time” and there you must select the new time span for the function.
On your iOS mobile
Now if you are one of the people who has a ios mobile device, then you will also have the opportunity to Activate Y deactivate this function whenever you want. Note that the procedure is very similar to those mentioned above.
To do this, follow each of these steps:
Activate Do Not Disturb mode
- Once you are inside the application slack on your Smartphone, you must select the icon of “your” located at the bottom of the screen.
- Then you must click on the option “Do not disturb”.
- When you are there you must select a period from the list or click on “Personalize” if you want to set your own time period for the function.
Turn off or change Do Not Disturb mode
- Again you must access the option “You” from the main screen Slack.
- Then select the item “Do not disturb”.
- When you are there again you must click on the option “Deactivate” to turn off Do Not Disturb mode or simply choose a new period for the feature in case you want to shorten or lengthen it.
Learn how to schedule a time of day to not receive notifications from Slack and not be disturbed while you work
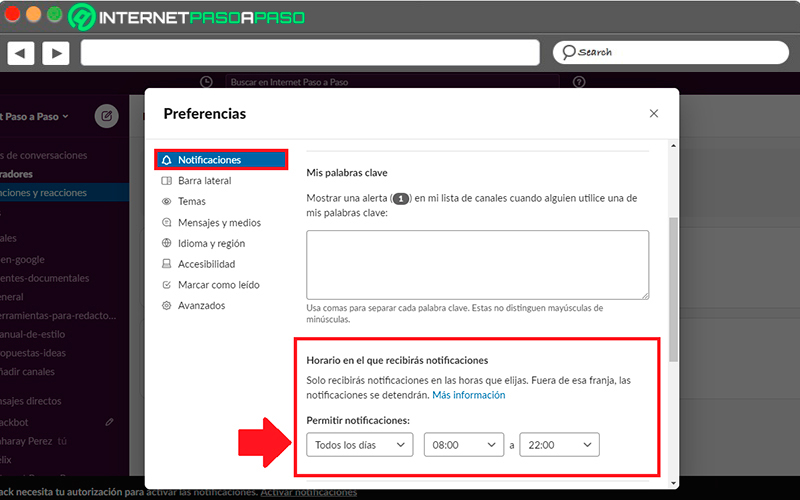
Another advantage offered slack is that it will give you the possibility of schedule a notification schedulethis will allow you to avoid receiving notifications at those times where you would normally you are not online. This will prevent other users from disturbing you while you work or do any other activity.
Therefore, with a schedule already established, you will only receive notifications on the days you have chosen and the hours you have selected.. All the time I’m out of this schedule notifications will remain paused.
In this way, here we teach you how to program a schedule on your different devices, for this follow each of these methods:
On your Android mobile
For users who make use of a android device will be able to carry out this procedure slack scheduling in a very easy way.
To do this, they simply have to follow each of the steps that we indicate below:
- One time you are inside the application slack You must click on the tab “You” located at the bottom of the screen.
- Next, you must select the option “Notifications”.
- When you are in that section you must click on the item of “Notification schedule”.
- Now you must select “Enable notifications” located at the top of the screen and there select an option from those you have there: “Every day”, “Business days” or “Custom”, if you choose the latter, then a button will appear where you will be able to deactivate the days on which you do not want to receive any notification.
- It is also important that you choose a start time and an end time for notifications, for everyone days or business days you must select start or end to be able to choose when you will receive notifications on those days. If you have selected the option to customize, then select the days and then select your own start and end times. Every adjustment you make there will be saved automatically.
In the computer
If you like to use Slack from your computer and you want to start scheduling notification times to avoid being disturbed while performing a specific task on the machine, So here we are going to explain how you can perform this procedure easily and quickly..
Go for it:
- Once you have accessed slack from your computer, You must select the image of your profile located in the upper right of your screen.
- Now you must click on the item of “Pause notifications” and then select “Set a notification schedule” in the menu that appears there.
- The next thing will be to open the drop-down menu under “Enable notifications” and among the available options click on any of these options “Every day, Business days or Custom”. If you want to choose this last option, then you only have to uncheck the boxes of the days where you do not want to receive notification.
- You should always select a start and end time for notifications, any changes made will be saved automatically. When you’re done, just click on the “To close”.
On your iOS mobile
Finally if you use this application from your iOS smartphone, then here we are going to explain to you what the procedure is so that you can start programming the schedule of your notifications and thus prevent your work space are bothering you when you do any other activity like resting.
Therefore, to do this you simply have to follow each of these steps:
- To get started you need to go to the Slack app from your iOS mobile and from the main page press the tab “You” located at the bottom of the screen.
- Then you must select the section “Notifications”.
- The next thing is to click on the option “Notification schedule”.
- Now you must select the item of “Enable notifications” located at the top of the screen and there you must select any of the following options: “Every day, Business days, or Custom”. If you want to set the schedules yourself, then you must click on the last option, there you must select the days where you do not want to receive notifications and then deactivate the notifications.
- You should choose a start time and an end time for the notifications. In the case of the first two options, choose a schedule for her and if you have selected the option of personalize, then tap any day and then select your start and end time for that day.
The best alternatives to Slack to work as a team and be more productive at work
Taking into account everything mentioned above and knowing that not all applications are to the liking of all users, it is also important to be able to consider some others alternatives to Slack and that they give you equally interesting and professional results. That is why we are going to teach the best alternatives so you can work as a team and be much more productive.
To do this, follow the list that we will show you below:
Facebook Workplace Groups
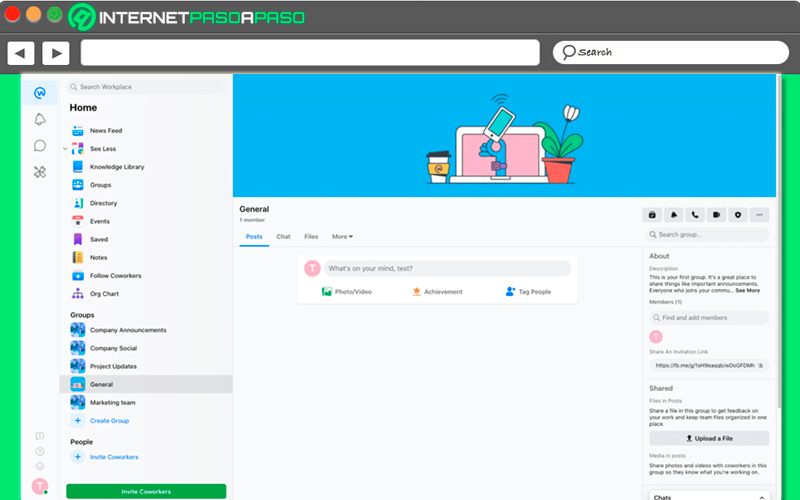
Without a doubt, this work tool is one of the best alternatives for most users, and it is that this Facebook business collaboration toolbox will offer you an excellent work suite. The best of all is that Facebook’s Workplace Groups It is not only available with a paid version, but also offers a free plan for all those users who for some reason cannot pay.
It stands out for offering a service of video calls group in your free plan, as well as channels for group chats, deep message searches, screen sharing, private messages, live video, web, mobile and desktop applications, video and audio calls, among others. All this makes this work tool an excellent option for small businesses that want to reduce some expenses in their meetings.
In the case of individual groups they will have a kind of forum quality, while the default visa of the groups will be that of the messages. It also has a chat room, so each group has their own private chat room, where they have the opportunity to use many messaging features. There they can share files, documents, voice notes, configure surveys, send gifs, among others.
Chanty
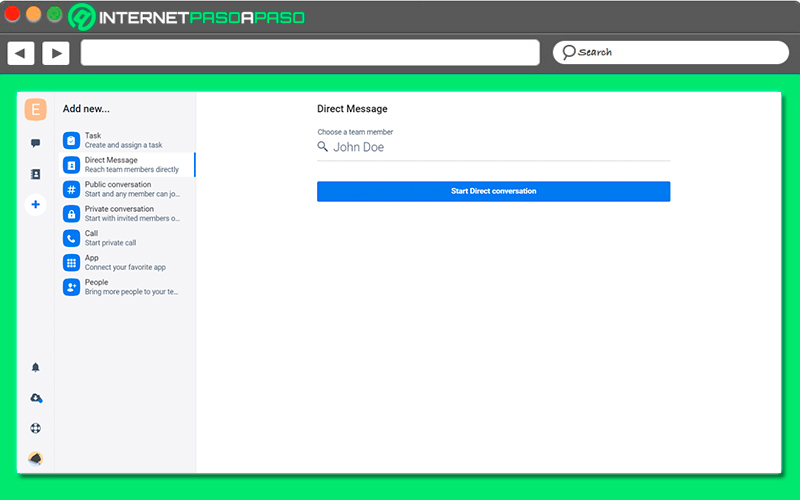
Chanty is another of the most interesting applications when you want to get a workspace for your team. This tool specialized in communication and collaboration in real time is characterized by including many interesting functions that go far beyond a chat. Thus Chanty it can be used to carry out many activities such as videoconferencing or creating and assigning tasks between different team members.
This program It has been created mainly to help small businesses in everything they need and for free. For this, it has channels, private messages, screen sharing, video and audio calls, group calls, AI searchesamong many other functions available there.
In this case the channels are known as public conversations, but they are displayed the same way in the app. It also stands out for being very easy to use and for having a very well designed interfaceso you can create public conversations, assign tasks, make calls, just by clicking the option “+” of the app.
Fleep
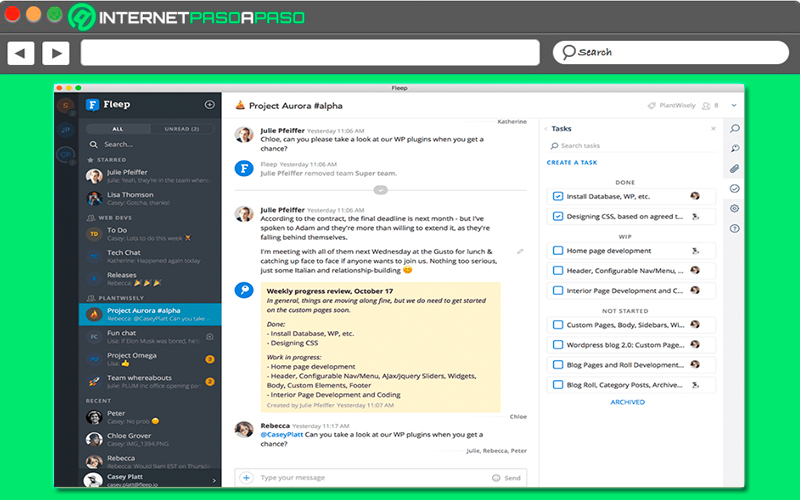
To complete this list we present Fleep, a work tool whose mission is to help you work smarter, better and much faster. In this way Fleep It is considered as a tool that goes beyond a simple team chat or collaboration application.. It is related to project management, bulletin boards, teams and file management, tasks, among others.
In the same way, it stands out for offering many interesting functions such as channels or group conversations, private messages, task management, teams, bulletin boardsvideo and audio calls, among many other functions that will help you get the most out of this tool.
It should also be mentioned that the interface of this program includes tasks in a categorized task list format, so it will minimize the risk of team members forgetting for some reason. execute the tasks that have been assigned by the chat. As for the free plan, it includes up to 10 GB of file storage and up to a total of 3 group conversations.
Applications