The development of wireless technologies has evolved and impacted favorably on society, so much so that it is no longer necessary to be connected by cables to a device. This option not only allows the ease of having several users interconnected in the same network. If not, they also do not need the use of MB to surf the internet from your phone or computer.
Wireless networks do not need to have a plan or fee on your mobile to access the internet, so if you do not have any mobile data service contracted, you can also access some WiFi network and do use it for free . In addition, these are generally more stable than conventional mobile networks and, although their connection speed is more limited , they tend to be much cheaper since they do not work with data packets, but accounts With an unlimited internet connection that you can use without worrying about the consumption of megabytes.
In this guide you will know the steps to learn how to activate the WiFi connection and how to connect to the nearest networks from any device and operating system, be it Windows, Mac, iOS or Android . We assure you that it is an extremely easy process that will not take you more than a few seconds.
Index:
Steps to connect and configure the WiFi connection of your device
The procedure to configure and connect to a WiFi point is quite simple. The only thing to keep in mind is that you should be near an area that has access to the wireless network. In this case you must set a previous configuration , if it is not previously saved. Otherwise, if the connection is already registered on the device, it is automatically linked to the network .
On Android devices
It should be noted that in each device the configuration varies a bit, since this depends on the brand and model of the Android . However, these steps will help you configure and connect your phone easily.
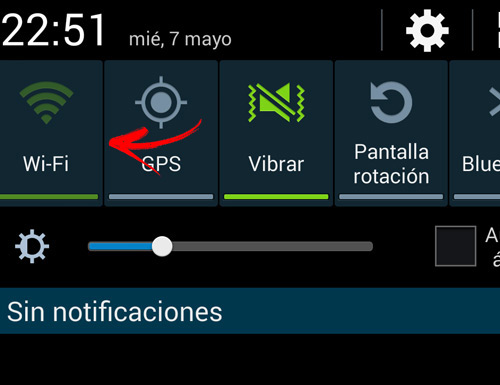
- Access the “ Settings ” or “ Settings ” of your phone.
- Locate the section of “ Connections Wireless and Network ”and select“ WiFi ”.
- Once in the section, you must activate the wireless connection, which you must do by tapping on the corresponding switch.
- You will then see a list with the closest networks . If any of these needs a password, a lock icon will appear .
- Select the network you want to connect to and then enter the password , if needed, the mobile will be connected and saved automatically so you don’t have to do this on future connections.
- If the network is already in the device, you just have to activate it and it is will connect to the connection automatically .


On iOS
- Search your device for the “ Adjust ” menu,
- Go to the “ Mobile data ” section and then click on “ WiFi ”.
- Activate the button, which is similar to a switch that indicates on or off. The mobile will immediately look for the signal from the closest networks.
- A series of networks with their respective names will be displayed. Locate the connection you want to link to and press “ Connect “. If it is a private network, it will request the entry of a password . Enter it and the device will connect instantly.
- If you want to evaluate the signal strength, the WiFi symbol will appear at the top of the screen, so you will be able to observe the intensity level of the connection .


In Windows 7
In any of the versions of Microsoft Windows you must enter the Windows Device Manager «, to allow the system to make use of this type of networks close to the computer. Here we explain step by step how to activate wireless networks.
- In the computer’s start menu, click on “ Control Panel ”.
- In the configuration settings of the device, select the option “ System “. Followed by “ Device Manager ”.
- If requested, enter the administrator password .
- A list will be displayed With all the devices linked to your computer, in the “ Network Adapters ” section click to expand it.
- Choose the wireless adapter you want to use. Then by right clicking with the mouse click on “ Enable ” and voila, now you can make use of these nearby networks to which you can connect.

Once this is done, to connect to a WiFi network in Windows 7 follow these steps:
- Click on the Wi-Fi icon at the far right of the taskbar.
- Automatically will show all available networks >, select the one you are going to connect to and wait for it to identify it.
- Enter the network credentials ( password ).
- Wait a few seconds and if the password is correct the process will be over .

In Windows 8
- From the home screen of your device, press the “ Windows + C ” key and click on “ Settings ” and then on the « Red accoun.
- Choose WiFi with internet access.
- Enter the password of security and connect.
- If you wish you can select to connect automatically every time you turn on your computer.
In Windows 10
- Access the “ Settings” from the start menu or the taskbar.

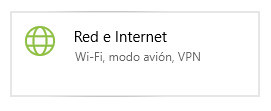
- Now go to « Network and Internet «.

- On the left side of the screen click where it says « Wi-Fi «.
- Right in the central area you will have the option to enable or disable This function, in addition to being able to display all the networks that your computer captures to be able to manage them.

- In this case, Windows 10 allows the activation of WiFi automatically . To do this you must deactivate the network and when you want to activate it again, it will ask you if you want it to be activated manually, within an hour, within four hours or within a day . Select the option you like and it will be activated according to what you have specified.
In Ubuntu
Except in some cases, the Ubuntu operating system brings with it the previous installation of the WiFi connection. However, some of the wireless network cards require the installation of a driver in order to have a functional connection.
If needed, the driver must be downloaded through the different Ubuntu Software updates . To do this you must follow these steps.
- Select the Ubuntu logo that is located on the desktop, in the upper right. Then press “ System Settings “.
- In Software and updates, go to the “ Additional Drivers ” tab. There you will be able to verify if you need a proprietary drive for the wireless network card.
- If needed, you will have to establish your internet connection through a direct network cable to the device . So you can start the download and go, you can connect to the network.
Now, to activate Wi-Fi and connect to the internet you must do the following:
- Select the WiFi image located in the upper right corner of the desktop .
- Click on the WiFi network you have access to, select it and click in “ Connect ”.
- If it is private , you will request a password. If it’s public , you can navigate without any problem.