
Index:
UPDATED ✅ Do you want to define the power source of your Arduino boards without damaging them? ⭐ ENTER HERE ⭐ and Learn Everything From Scratch!
It not only consists of create an Arduino project and already, but also several factors that can affect its development must be taken into account, as well how the plate works. That is why at the time of create a project with Arduino or any other microcontroller it is essential to know how are you going to feed and in case of using batteries, what autonomy should they have.
This will be essential for its useful lifeit should also be borne in mind that at the time of power the microcontroller they are feeding too actuators and sensorsif the electrical limitations of each of them are not taken into account, the project may not work correctly.
Currently there are different ways to power an Arduino board, one of the most common is via USB keeping it plugged directly into the computer. However, there are other ways to do it, which is why we are going to show you here. how to power the Arduino safely without damaging your boardfor this, follow in detail everything that we will teach you below.
What should we take into account when powering my Arduino boards?
Currently Arduino boards are very versatile and support different ways of being powered. However, before carrying out the feeding process It is essential to take into account several aspects, since this will prevent the occurrence of an error or malfunction is provided that can cause plaque damage.
In this way, here we show you the different aspects to take into account to carry out the power supply of this plate with the following process:
adapter type
In this case, you have to be very careful with the type of adapter that is used, since one of the most common mistakes users make is to take any type of power and assume that all power sources are the same and that they are capable of being used with the Arduino boards.
The most recommended type of adapter to use should have a power source of 12 volts 1 amp with direct current output. Most problems in these cases are caused because most older adapters have a AC output and these are not suitable for use with Arduino.
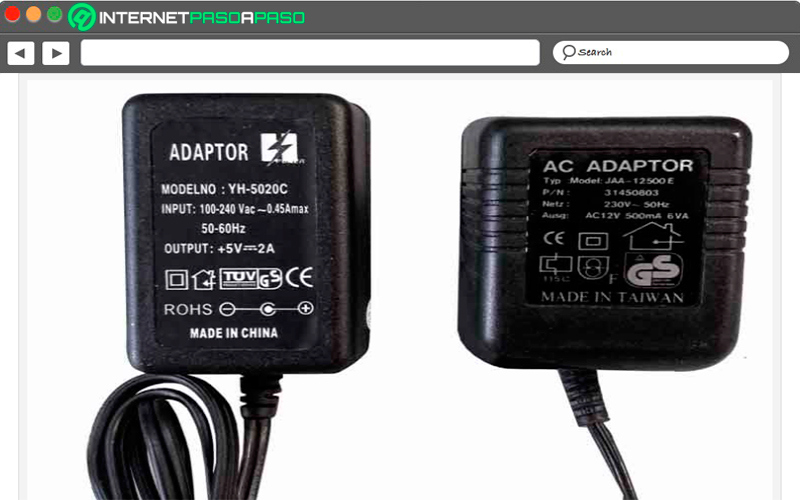
In this image you can see that the adapter on the left uses a power supply with 12 VDC output, while the adapter on the right has a source with 12 VAC output.
The plate voltage
Being able to take into account the voltage of the plates is essential for these processes, especially since in some cases it is necessary to increase the operating voltage or total battery capacity. That is why it is essential to be able to know in detail the operation of series and parallel battery arrangements.
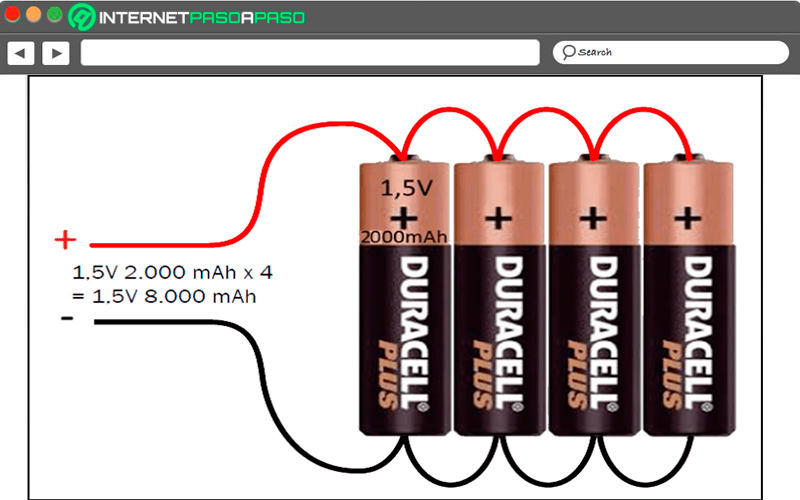
If required increase battery capacityit is possible to use battery arrangements connected in parallel, this means that it must be connect the positives of the batteries all togetheras shown in the following image.
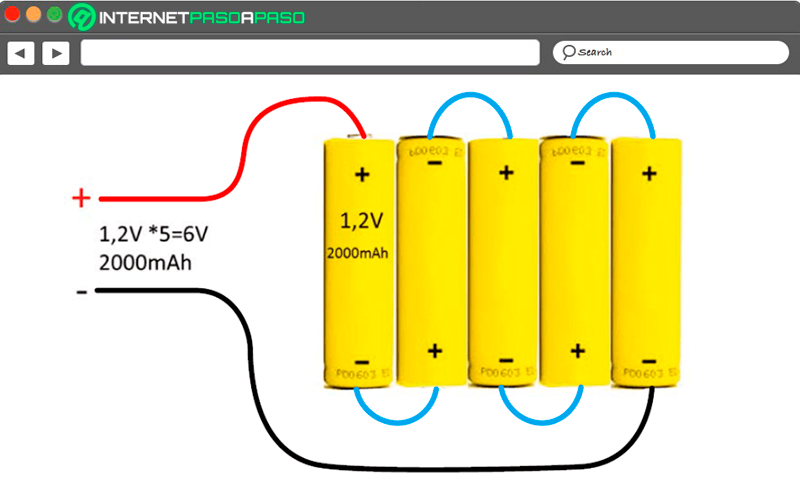
Now if a higher voltage is needed, then batteries connected in series can be used, for example, to get the voltage for the feeding of a Arduino UNO a total of can be used 5 rechargeable 1.2 volt batteries.
Limitations of the current regulator
This is another of the most common problems that can be found when wanting power an Arduino boardand this is caused when done through the external power jack where the on-board regulator can overheat.
In order to understand the main reason for all this, it is necessary to know how the voltage regulator NCP1117ST50T3G, which is presented in SOT-223 encapsulation on Arduino boards. Therefore, this integrated circuit is a linear voltage regulator, which means that it is a regulator that varies its internal electrical resistance to maintain a vconstant output voltage at the output.
As it behaves like an electrical resistance, it will tend to heat up proportionally to the current and the differential voltage between output and input. In this way, if the difference between the input and output voltage increases, the power dissipated in regulator will increase. In order to understand this much better, some basic calculations have been made that are necessary to know.
This is the maximum recommended current for different input voltages, assuming that a 2 Watt dissipation is allowed in the regulator:
- 7 volt power supply: I = 2 / (7-5) = 2/2 = 1A
- 9 volt power supply: I = 2 / (9-5) = 2/4 = 500mA
- 12 volt power supply: I = / (12-5) = 2/7 = 258mA
As you can see, the higher the input voltage, the lower the current that can be drawn from it. the regulator without it getting hot. In order to work at the most optimal point, it is necessary to have a 7 volt AC/DC adapter.
use direct current
when you want power an Arduino board It is extremely important that the current used for this is a direct currentthis is not usually a problem nowadays because modern fonts often use this type of stream. However, the problem arises when using ancient Fonts, since some of them have alternating current output.
Note that alternating currents they are not suitable for use with Arduinosince the use of them can cause a irreparable damage to your Arduino boardso you should be very careful with it.
What are the main power inputs of an Arduino?
Taking into account the main aspects to keep in mind before carrying out the power of an Arduino and the risks that these can causethe next thing will be to teach you What are the main power inputs on these boards.
Luckily, today there are different methods to do it and which we will show you below:
USB
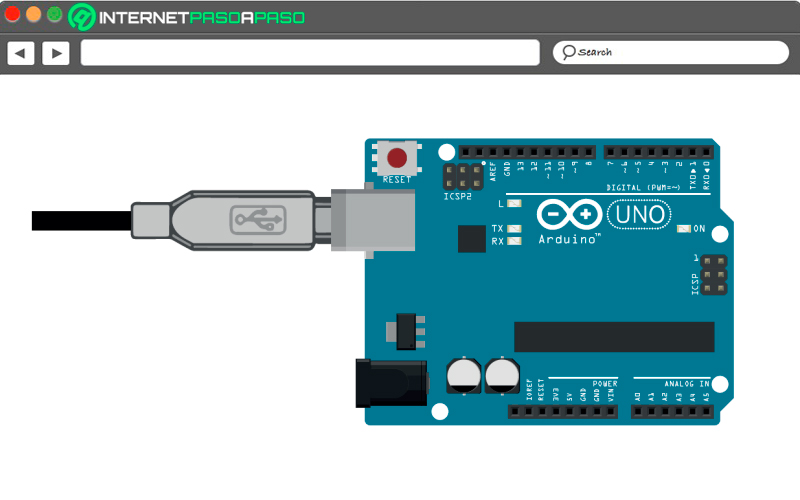
The power to Arduino through a USB Cable is the most used method that can be found, it is perhaps the easiest way to carry out this process, the same supports a power input of only 5 volts. These 5 volts are obtained from the USB port of the computer or any other USB compatible device, how can it be a sound equipment with USB input or a TV.
You should keep in mind that the cables used for these are those mobile phone adapters with usb output or through emergency chargers Also available for mobile phones. USB ports They usually have a PPTC fuse that limits the current than the Arduino and all its components can sue the port USB. Therefore, the maximum current in this case is limited.
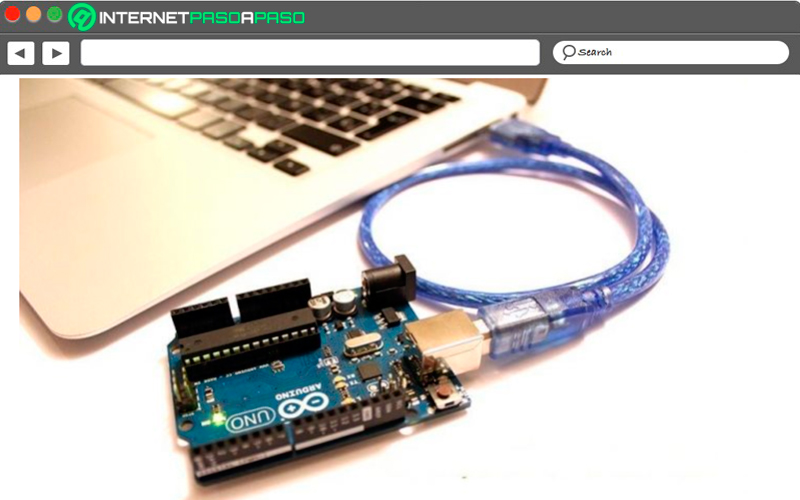
This type of power on Arduino it is recommended to use for when they are required small loads and no voltages greater than 5 volts. If this is so, there is no need to worry about the polarity / voltagesince it is standard in all USB devices.
The Power Jack
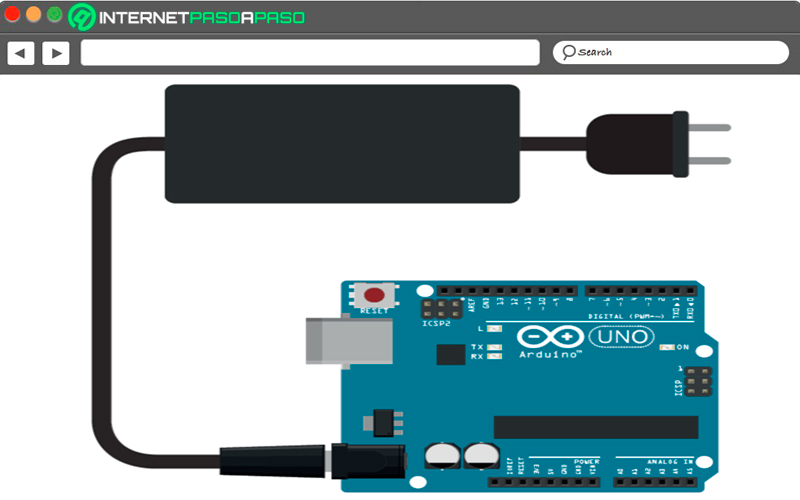
In the case of the Arduino board is It is designed to accept power through the standard jack found in many electronic equipment, mostly a power adapter (AC/DC) or as it is also popularly known in many countries “An eliminator.” Being a direct current input, the eliminator connection has a polarity that must be respected.
In this case the positive pole must go towards the center of the connector and the most suitable voltage to use in these inputs is 7 to 12 volts DC. For the voltages less than 5 to 7 volts in this input can cause the internal regulator of the Arduino can’t work constantly. For the voltages greater than 12 can cause overheating quickly on the controller, even though the connected accessories are not that big.
Finally, it should be mentioned that this entry has a protection diode for polarity reversalso if said polarity is not respected, no damage will occur, but the Arduino board just won’t work.
Pin VIN
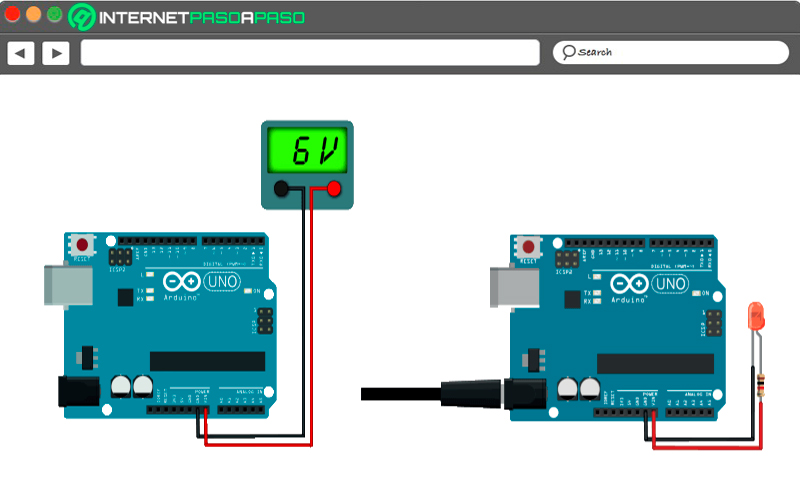
This is another way to carry out the power of the Arduino boards, in this case the pin VIN located in the power pin group and land fulfills double function.
Which we show you below:
- The first one is that it allows to apply an external power supply in the range from 12 to 6 voltsit is applied directly at the input of the arduino board controller. But it should be mentioned that for this case there is no no protection against reverse polarity or over current. When the voltage is applied directly to VIN pinyou should not apply simultaneously a voltage at jack.
- It also works as a voltage output when the board is being powered by the power jack. In this case the voltage present in VIN will be the one that is being applied to the Jack, subtracting the voltage drop in the polarity reversal protection diode, which has a value about 0.7 volts. Keep in mind that it is not recommended to connect loads greater than the 1000mA on this pin, since we can damage the protection diode.
In either of these two cases, the negative pole of the power supply will be connected to either of the the pins labeled as GND. where the connection of a 6-cell AA battery holder will be as you can see in the following image.

Finally, it can be said that you should use the VIN pin to power the Arduino with unregulated sources of direct current or with a set of AA or AAA batteries 4 to 6 batteries. If the power supply is done with a battery, it is recommended that it be through this pin when batteries provide a quantity of 6 volts, since there is no protection diode here that could cause additional voltage drops.
Pin 5V
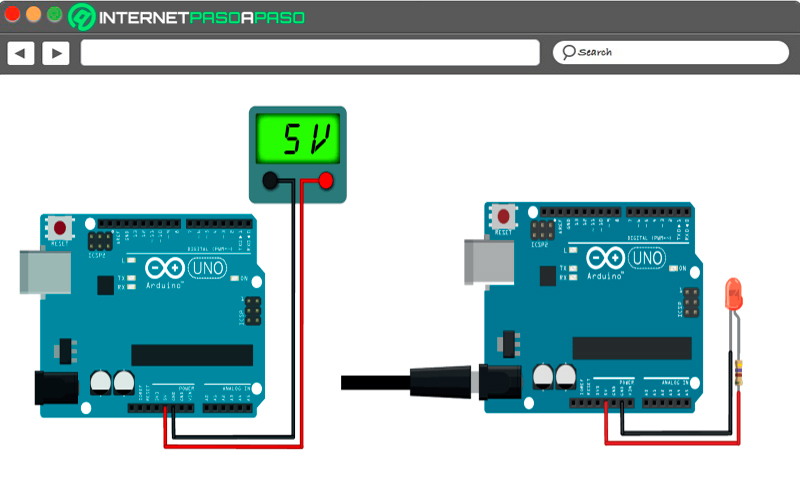
Finally, you can find what the power supply is through the 5V pin, just like the VIN, it has two ways of using it, which we show you below:
- The first one is that this pin works as a 5 volt output for other circuits. Thus, the 5 volt pin connects directly to the regulator output on the board. When the Arduino is powered via the USB cable or the power jackthe output of 5 volts from the regulator or USB will be present on this pin.
- The other way this works is that it allows you to use the 5 volt pin so directly power the Arduino with a stabilized power source and regulated at 5 volts when there is no cable USB that is connected or in such a case a power adapter that is connected to the power jack.
Lastly, at the time of power the Arduino board through the 5V pin will not have no reverse polarity protection, either over voltage or another circuit, since all the protection mechanisms on the board are found before reaching this point in the circuit. This feeding method should only be used when planning to have a output source fixed 5 volts and a permanent connection with the Arduino to avoid errors.
Learn step by step how to power an Arduino board without risk
It is important to remember that when power an Arduino board it is essential to use power supplies that provide a direct or direct current to the boardthis will allow a process to be carried out without any type of risk, in the event that a source with alternating current, then will damage the Arduino.
To carry out these procedures can be done by the following methods:
With an unregulated power supply
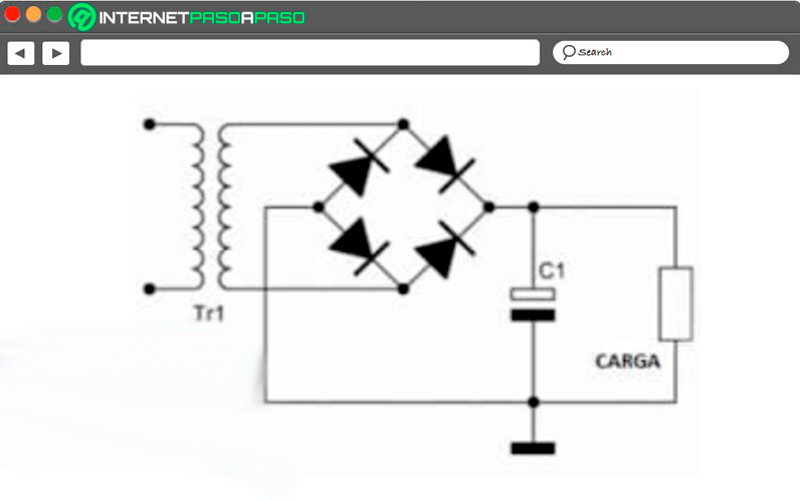
This type of unregulated power will always have a transformer that converts the 230 V of the network to a much lower valuealso with a bridge diodes as rectifier and finally with a electrolytic capacitor for filtering. These types of power supplies are those that offer less reliabilitythis means that the same It is not highly recommended to use it.for this we offer you other options that can be much more favorable.
With linear regulated source
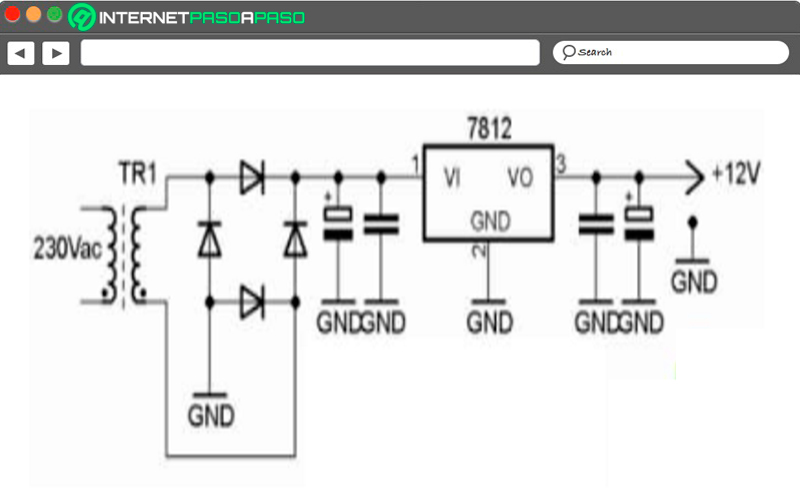
This type of fountain stands out for having a voltage regulator and capacitors with filter and anti-return functions. In terms of tension, it is very stable where it only presents maximum variations of 0.1 v above the nominal value, regardless of the current.
However, this type of source also has a problem, in this case it is about its performance, which is quite low, it has a performance between 40% and 60%, where the regulator dissipates much of the power. In this way, it can be said that an input voltage equal to that of the net electrical 230V.
With a switching power supply
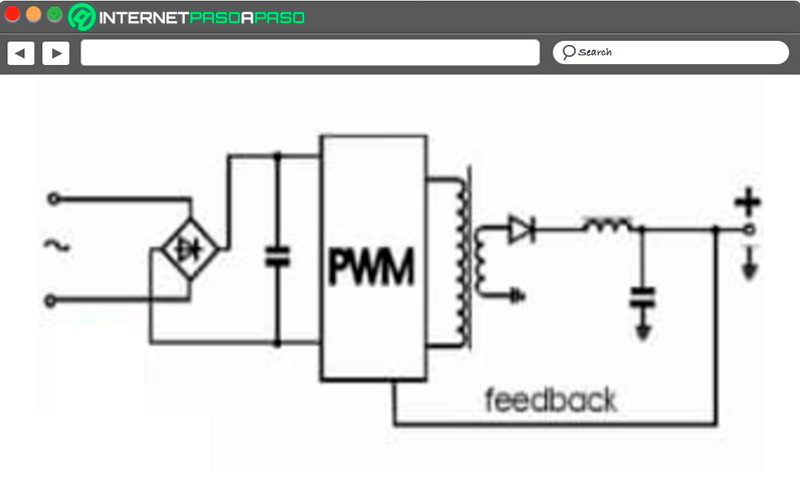
It is characterized by using a system of work with a high frequency and in turn is capable of regulating the output voltage both at a lower input value and at a higher value. Regarding the design of these systems, it is much more complex than the linear ones, which offer a high efficiency as a 80-90% and stabilization of them is excellent.
However, considering the regulated linear models, they generate quite a bit of high frequency noisethey can mostly work with a large number of input voltages that go from (100-240Vac).
with batteries
Lastly, you can also power the Arduino board via batteries and batteries, this will allow you to give portability to your project. Today you can find different types of batteries and batteries that will allow you feed your platethat is why here we are going to show you each of them so that you can take them into account at all times.
To do this, follow the list that we will show you below:
9 Volt batteries
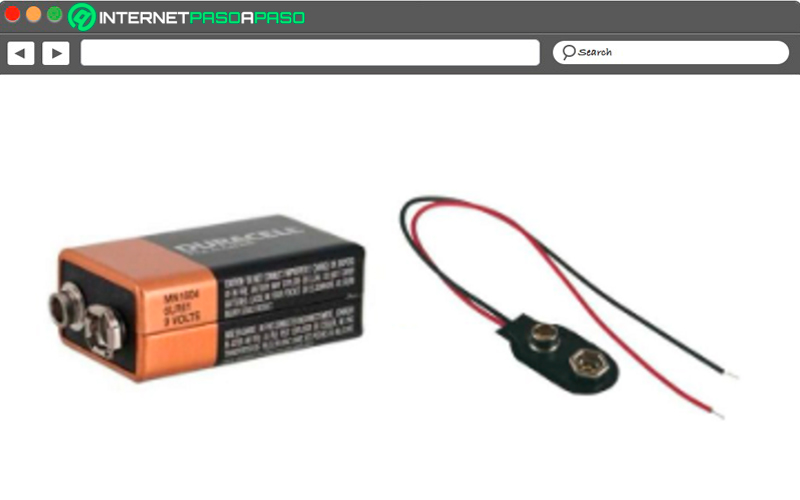
This type of battery is mainly used for those cases where you want to mount a pretty basic circuit or to simply tinker a bit with what it is the Arduino environment. Therefore, if this is what you are looking for, this is your best alternative, since it is very easy to employ and find, so you can get it at any store. However, as everything also has a drawback, in this case it is that it has a low capacity that goes between the 500 – 600 mAh.
On the other hand, it has a maximum current which is only suitable for very simple assemblies, so it won’t work for something already advanced. One of its main advantages is that it has a fairly low price, but they cannot be recharged since its useful life is reduced to a single use, this can make them very unviable over time. The most ideal here is that connect the Vin input through the USB Cable or via input Jack via an adapter.
1.5V AA batteries
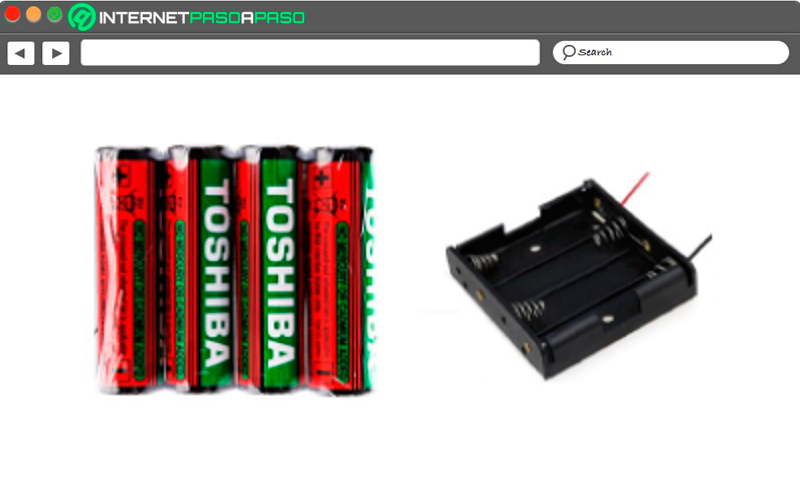
This is another of the available options for when users want to work on their projects with batteries, in this case it is best to use four or five AA batteries in series, this will allow you to get a total 6 – 7.5V, In this case, the voltage of each of the batteries is added to obtain a full voltage. Therefore, if you are developing a project that is not very demanding, this is going to be a very valid option for you. These batteries have approximate capacity 800-2500 mAhalthough the truth.
All this will depend mainly on the type of battery, but its maximum intensity can be 1 A As is the case with the 9V batteryits market price is also quite low, but these are not rechargeable either, so their useful life over time is not very viable. In most of you have the opportunity to find what the battery holders are, the most common in these cases are those with 4 batteries and not those with 5 batteries andBecause this makes it much easier to assemble for the project.
It is always best to use a voltage greater than 7 volts at the Arduino input, But if you can’t find a 5 battery holder, then this will not be a problem, since with The initial 6 Volts offered by the 4 battery holder will not be a problem. Finally, it should be mentioned that it should be taken into account when starting to consume the batteriessince the board will stop working quickly as it does not receive all the energy needed to keep running.
1.2V AA rechargeable batteries
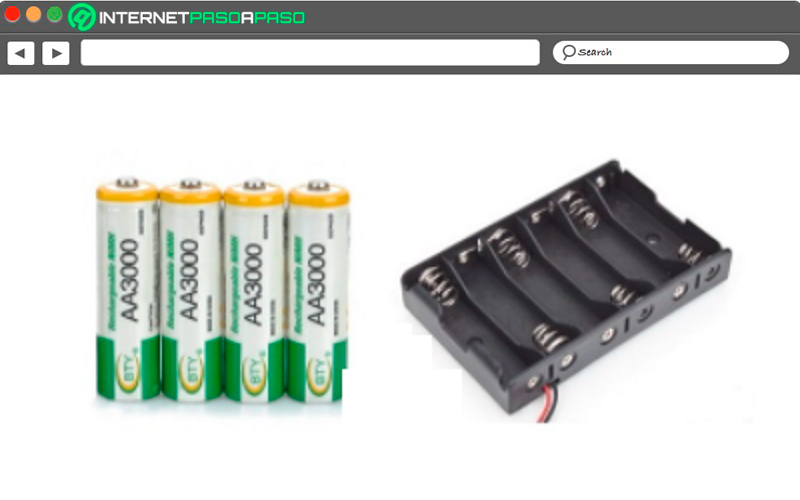
For this type of case, it is best to use 5 and 6 AA 1.2 Volt rechargeable batteriess, in this way it is possible to obtain between 6 and 7.2 Volts depending on the cases. The main difference with the battery mentioned above is that it is rechargeable, so it is considered to be a very good long term investmentits use being much more profitable since it will not require new expenses, at least in the near future.
In this type of batteries you can find two types such as the NiCd and NiMh. It should also be taken into account that as they are rechargeable batteries, their market price is higher than those of AA of 1.5 V. In addition, you must keep in mind that you will have to have a charger to be able to recharge them.
The capacity of 1.2 V AA rechargeable batteries range from 600-2500 mAh and it has a maximum intensity of approximately 1 A. By using a battery holder you can carry out a much simpler assembly, in these cases it would be a battery holder of 5 or 6, this will vary battery function what are you going to use
3.7v 18650 lithium batteries
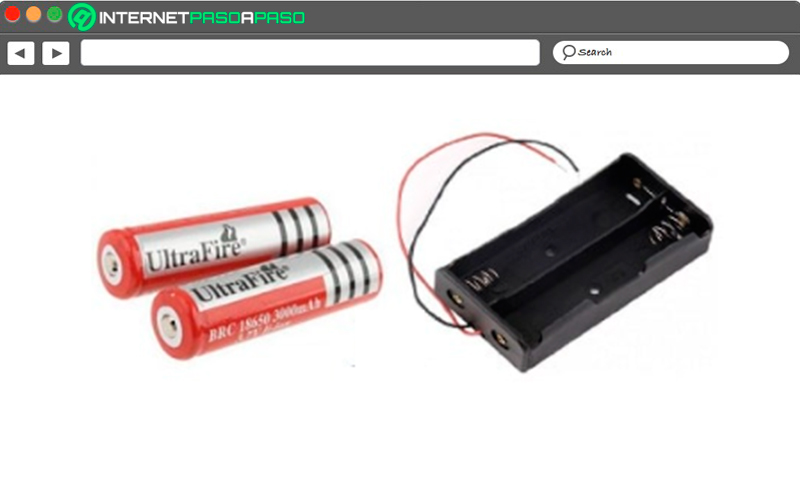
If you want to carry on arduino projects that have certain requirements in terms of current, then these types of batteries are a great option for you. The goal of all this is to be able to put two 18650 batteries in series in order to get a total 7.4-8.4Vthis being the maximum rated voltage.
One point in favor of all this is that they are rechargeabletherefore, they are very useful in the long term, but to be able to recharge them you will have to do it through a special charger that you will have to buy, although the investment at the beginning will be worth it, since this will make you forget about future battery purchases.
It is important to mention that this type of batteries can reach capacities of up to 4800mAhalthough in most cases, especially in those of 18650 chinesethis capacity is falsified, that is to say, they do not reach that capacity, but actually reach a 1500-2500mAh quantity. The discharge capacity in this case ranges between 1C – 2C, being almost 10A in the case of the 4800mAh, although the most recommended in these cases is to work at lower downloads, since this will avoid any type of risk.
Keep in mind that these are much more expensive batteries, but for obvious reasons. Finally, it should be mentioned that you must be very careful when working with this type of batteries, since improper use of them could lead to cause overheating and even catch fire to the Arduino board. To connect and fasten batteries lithium it is recommended to use a battery holder for two.
LiPo batteries
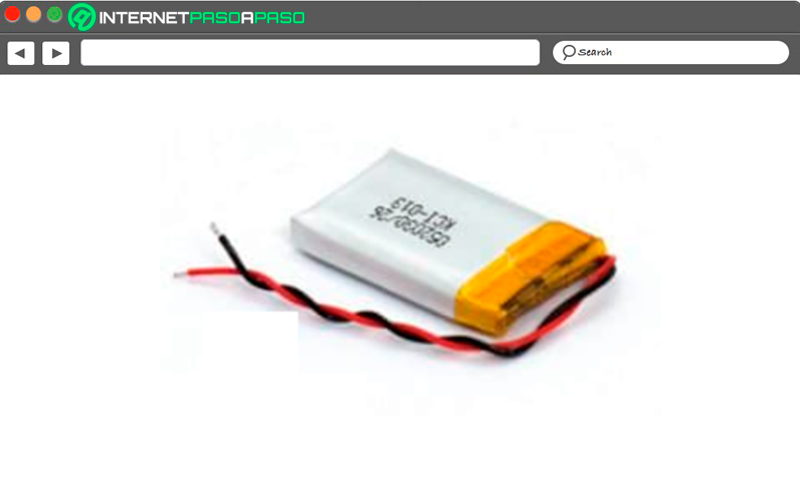
Now if what you want is create Arduino project that require a large current demand, then LiPo batteries They are the ideal option for it. Since they have become one of the most complete options that will allow you develop high current demand Arduino boards.
For this case, a specific battery will be selected based on the number of cells in it, this is how a battery can be used. 2 LiPo battery cells, what it will generate approximately 7.4-8.4 Volts, this will allow you to power an Arduino board without any inconvenience. The capacities of these batteries range from 500 to 5000mAh, where its download capacity is very high which ranges between 20C -25C, This allows reaching up to current of 100 A in the largest case.
Clearly, having this type of characteristics translates into a higher cost compared to those mentioned above, but luckily these are rechargeable, which makes them become a very good alternative to long term. It is also important to mention that not everything is positive in terms of LiPo batteriessince they can also be very dangerous.
And it is that a misuse of them could lead to serious damage to the arduino board, for this you only have to look at the storage that has to be carried out under controlled conditions. This has made LiPo batteries are only recommended for those users who truly have experience in its use and in projects that are really complex and deserve it.
Computing