
UPDATED ✅ Do you need to download all the free images from the iCloud cloud to a Windows PC or Mac and you don’t know how? ⭐ ENTER HERE ⭐ and Discover the best APPs ✅ EASY and FAST ✅
Technology every day gives us significant advances that bring numerous advantages to our lives. Local storage systems have been displaced for cloud storage services.
Definitely iCloud It is one of those fantastic services that allows us to host our files to keep them safe. Surely if you have an Apple device you have used it at some point. Although although it was developed by the apple company, It is currently also available on Windows and Android.
Its function lies especially in archiving all kinds of documents. In the case of Windows 10 to download them something complicated can be done, but still there are ways to achieve it. Next we will show you how download all our photos from iCloud to Windows or Mac computers.
Steps to download all iCloud photos at once on my Windows computer
if you use iCloud to store your content in the cloud, you will surely know that this is a great service that gives us advantages over local storage. It competes worldwide with Google Drive (Android), OneDrive (Microsoft) and Dropbox, but at the Apple level it enjoys much more popularity because it is its native OS. That is why if you are using an iPhone and want to save multimedia files, it is the best option.
Now, if you want to access the information that you have hosted in the cloud from any other platform, you can do it without problems. much more still You can also download your images stored in iCloud from your Windows computer, among other things.
Downloading the app
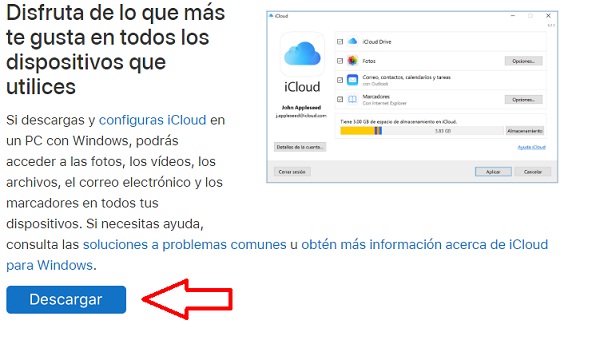
If we want to download all our photos to our computer in one fell swoop, we must Download the iCloud app for Windows from the official website. It’s super easy, you just have to click on the blue button described as “Discharge”once it is complete we can install it.
Download iCloud for Windows
Of course, before starting to use iCloud we are going to have to take a short break to restart the computer, this in order that everything is installed correctly.
Running and configuring iCloud
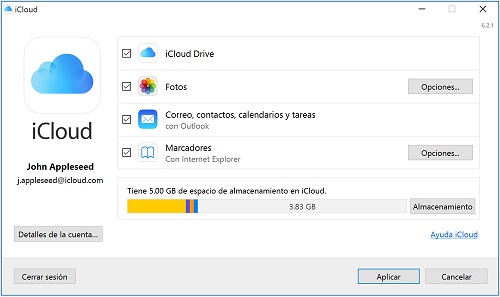
When we run the application for the first time we must access our Apple account. We will find ourselves in the main window with the possible elements that we can synchronize with our computer, then we make sure that have “iCloud Drive” and “Photos” turned on.
We also have to make sure that the option iCloud Photo Library is active. For this we will enter “Photos” and if it is not activated we will select it. Also We will select a folder where we will save the download of all our photos.
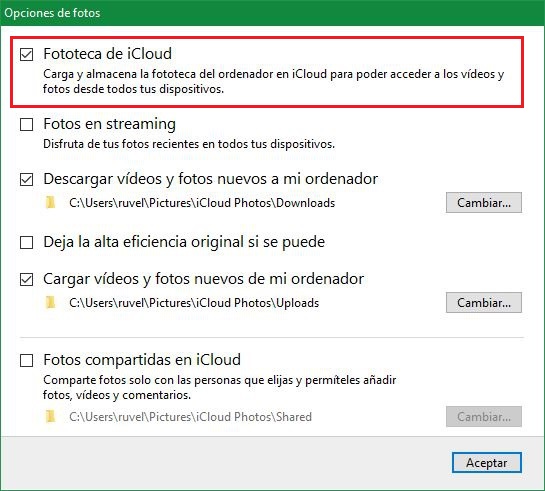
Downloading all our photos to the computer
When we have completed the previous step, we will have iCloud configured and ready to download our photos in one fell swoop to the Windows computer. In the Windows explorer we are going to go to “This computer”, in the devices and units section we will find “Photos in iCloud”there we will click and enter.
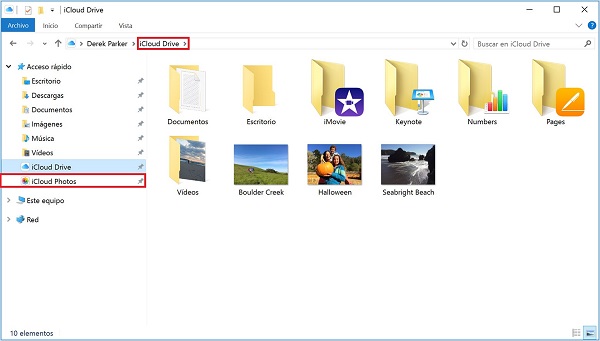
The following window will open and we will find two folders: “Uploads” and “Downloads”. Above and to the left we will find the option “Download photos and videos”, click there and a new window will be displayed that will show us the photos that we can download to the computer. We will simply select “All” and we will press “Discharge”.
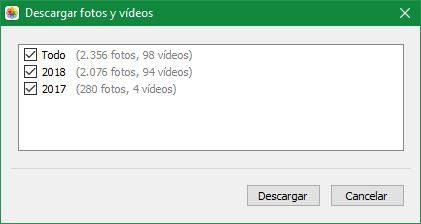
After executing the above step only we have to wait for the download to finish. When it’s ready we go to the folder “Downloads” and there we will have our photos downloaded from the cloud to our Windows computer.
How to export entire iCloud Photo Library from Photos on Mac computer?
If you are using a MacOS computer you can also download all the photos you have stored in iCloud in an easy and simple way if you follow the steps that we will describe below.
Activating the synchronization
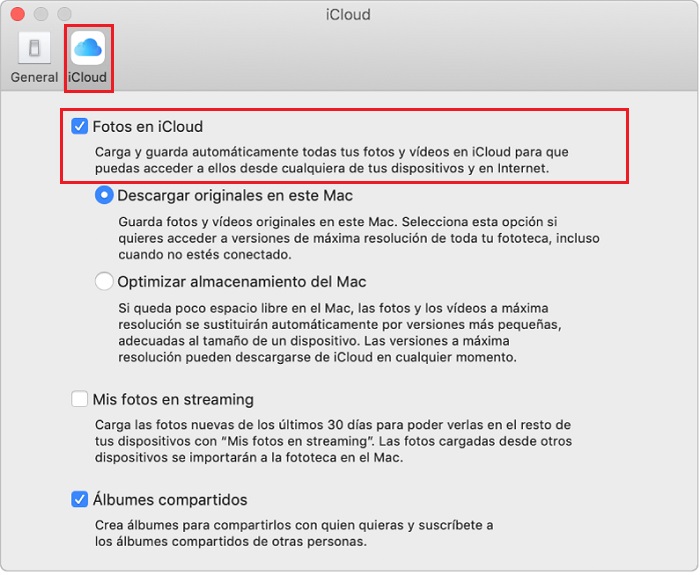
The first thing we have to do is go “System Preferences” > “iCloud”. There we will select “Options” next to photos and we will make sure that we have the option marked “iCloud Photo Library” or “iCloud Photos.”
Selecting and exporting photos
On the menu “Edition” we will click “Select all” or we will use the shortcut “Comd (⌘) +A” to take all the photos. We will wait a few seconds, depending on the number of files the process may take.
Then we will go to the menu “File, Archive” and we will select “Export”, there we will be shown a couple of options that are available to us.

The first of these two options is “Export (X) items” that will allow us to export all the images in their original quality, but if you have modified any using the application, it will keep the added edition.
The second option is “Export unmodified original for (X) items” which will serve to export the original images without any modification.
Once the desired option is selected, a window will appear in which we must select image format and video quality in case we have. We will check the box “Include location information”, then we will have the option to choose if we want to save the photos in a folder according to moments.
The next thing is to click on “To accept”, over there will start exporting these files. We must bear in mind that if there are a large number of files, this will take a long time.
Multimedia