UPDATED ✅ Do you want to create a retro arcade game machine with a Raspberry Pi and don’t know how? ⭐ ENTER HERE ⭐ and Learn how to do it ✅ EASY and FAST ✅
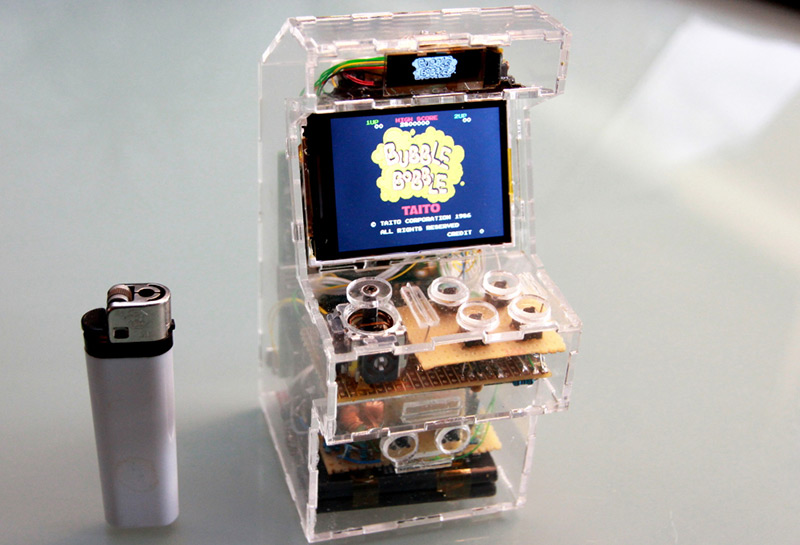
We can build our Retro Arcade console with games that we all like since our childhood through a Raspberry Pi, which gives us versatility at a low price.
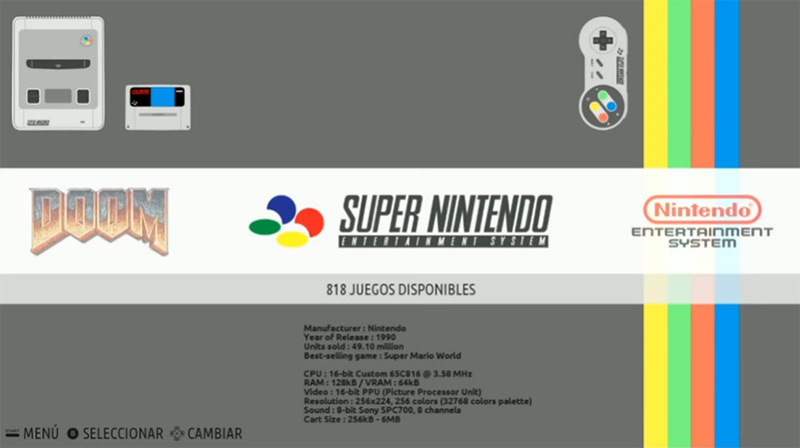
We can use this board thanks to two very complete operating systems such as Retropie and Recalbox. We will talk about each of them in the following paragraphs of this article.
In addition, we will show you all the necessary steps that we have to do to be able to install each of these operating systems on our MicroSD card. we will teach you the best websites to download roms and to be able to have them in the MicroSD.
What is a Raspberry Pi and what can I do with it?
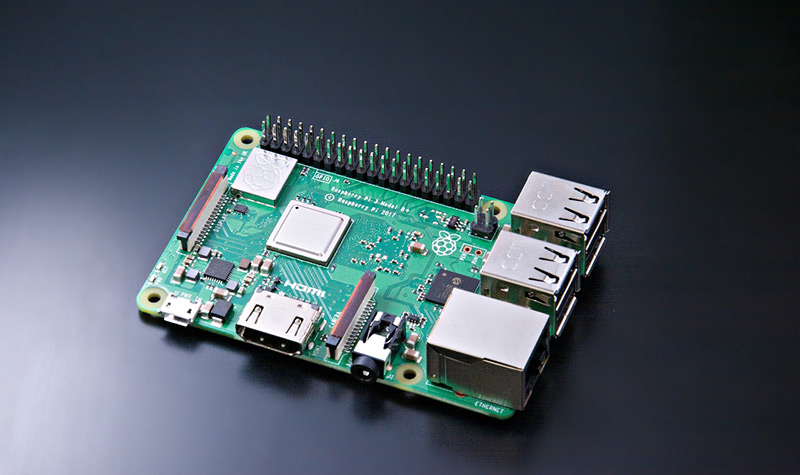
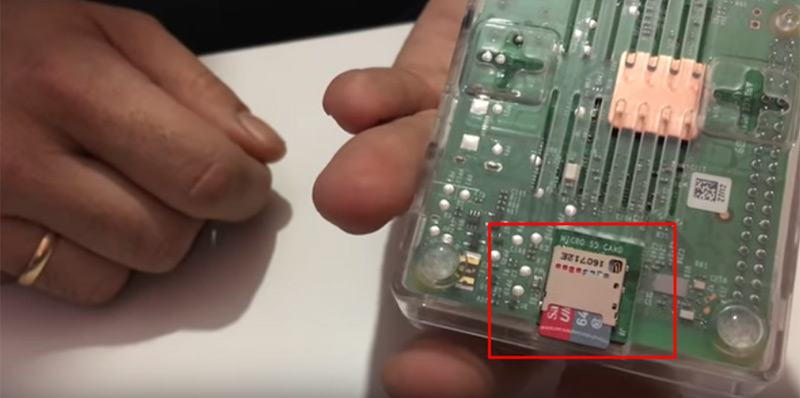
a raspberry pi It is a computer bus that has a microprocessor, a video computer and also a RAM memory on a board.. It has an entrance Micro SD cardwith these we would replace the hard drive of a computer, and one or more USB ports.
The operating system is based on Linuxfor example, it can be Android or Unix, that is, if we add a keyboard, a mouse, the monitor and different power cables we will have a complete computer.
There are two classes of Raspberry Pi, the A class which has 256 Mb of memory and a USB port and the model Bthe most used today, which doubles the memory with 512 Mb and offers the possibility of having cable connectors and many more USB ports.

We can say then that being a processor that works with a power of 700 MHz It will allow us to have different uses. They are:
- as a video game console: It is the historical function of this computer, since we can have games on our PC that we played in our childhood in a very simple way.
- Can be used as sensors for medicine: Thanks to this technology, doctors can detect different variations that exist in our body when they connect with specific health equipment.
- It serves to unite our computer with the television: Through WiFi and with the XMBC application, we can turn our Raspberry Pi into a multimedia center, where we can control the TV from our PC.
- Surveillance: If we have a webcam, we can capture photos and transmit a recording when the camera detects movements. For this it is necessary to download the Motion Detection program.
- Artificial intelligence: It is one of the points that has been studied and developed the most, since with this device we will be able to manufacture hardware that works like a robot so that it can carry out repetitive and synchronized activities, detecting the need independently. For example, you can pick up trash on the floor and open windows or doors among other things.
- personal design: The range of possibilities that exists to be able to use a Raspberry Pi is so great that we can put our imagination to work and create different recreational elements.
It is not recommended for editing images or browsing the Internet.
What do I need to turn a Raspberry Pi into a retro arcade machine?

In order to convert Rasberry Pi class B into a retro video game console we will need the following elements:
- a memory card Micro SD with storage capacity of 32 Gb and up
- Cable HDMI
- A plastic box that contains the Raspberry Pi board, they are generally transparent and have rubber supports so that they do not slip
- power cord 5 volts with 3000 mAh minimum
- 3 heat sinkswhich will be connected one below the plate and the other two next to the processor
- usb keyboardalthough it is true that we will use it very little with Recalbox, the same does not happen when we work with Retropie
- Display
- Mouse
- Computerwe need our PC to be able to pass the video games and create the MicroSD card that we will be able to insert into the Raspberry Pi
We will have to choose the command controls that can be:
- Pad or Arcadethe one we like the most according to its controls, duration and comfort
- Generic drivers
- 8Bitdo Wireless SF30 PRO for Android, 8Bitdo M30 or SN30 both for Bluetooth, or directly we can choose the 8Bitdo G BROS.
In addition to all this hardware, we will need to install different programs to format the card, update our Raspberry Pi and insert images into the MicroSD. We will see each of the software later.
Differences between Retropie vs Recalbox Which one is better for your console?
These software, which are used to reproduce a retro Arcade machine, have differences that we will mention below:
Retropie allows for better updatinghaving a community that follows it in greater numbers compared to its competition, so it allows different contributions to be made that will improve each of the versions.
Recalbox are not configurable like their competitor, since it practically comes configured from the factory. It is ideal for those people who want to play after an hour of assembling the Raspberry Pi.
Both have a Kodi multimedia system that allows for a very similar interface and design between them, so aesthetics are similar.
Another similarity, which both operating systems have, is that support update online. In addition, we can highlight the different configurations to be able to take screenshots, as well as recover different matches or pause the games.
With all this we can determine that the 2 tools are very good to be able to turn our Raspberry Pi into a retro Arcade machineit will depend on the intentions that we have for the configuration.
If we need to have everything installed and configured practically from the factory, we will have to lean towards Recalboxif we want is to be able to solve any inconvenience that arises we will choose Retropie.
Steps to turn a Raspberry Pi into a portable retro console with Retropie
The steps that we will mention below are necessary to be able to convert, through the Retropie operating system, a Raspberry Pi into a portable retro console.
Assembling the Raspberry Pi
The first step that we will have to carry out is to assemble all the hardware of our future console. Let’s place the heatsinks on the computer board.
We place the element to lower the temperature of the copper material under the computer bus and then we will put the other two above the plate, which will be close to the processor and the RAM memory.
Once we have assembled our Raspberry Pi, we will have to put it in the plastic box to protect it from dirt and bumpsfor this we enter our console in the box and with different screws we hold it.
We control the existence of all power cords that exist and their perfect functioning. We also check the connection of the HDMI cable.
OS update control
These are:
- Software installation and update
- We will have to download Retropie according to the model of Raspberry Pi that we have.
Let’s remember that one of the main characteristics that Retropie has is to have a permanent update, therefore we have to keep this information in mind to obtain the latest remasters.
To perform these tasks we can click on:
If we need more help on how to perform an official installation, we can follow the guide provided by the provider.
Memory card formatting
We need to format our MicroSD so that they do not detect any errors when we need to install the footer, for this we will use the program “EaseUS Micro SD Card Format” which is available for Windows.
The steps we will have to perform are the following:
- We choose the disk that we want to format
- Right click and choose “Format”
- Next, we click on “To accept”
Download Easeus for Windows
Installation of images
Right now we have to install Retropie on our memory card, following the steps below:
- Download us “Apple Pi Baker”, available for MacOS operating systems. If we use Windows we can carry out the same steps that we will mention later for the installation of Recalbox.
- With this program, what we will do is work on understanding the operating system. The process will be automatic and will only take a few minutes.
Download Apple Pi Baker V2 MacOS
We introduce the MicroSD in Raspberry Pi

Once we have Retropie downloaded on the memory card, what we do is connect it to our computer and then connect it to the Raspberry Pi.
At the moment we connect the Monitor to our Retro console through an HDMI cable
We enter Retropie
Once Emulation Station has been started we may have to enter the menu to be able to configure Retropie in the best way.
In order to carry out this task, we follow the following guide:
- We press constantly “F4”
- Continuation press together “Ctrl + C”
- In the command line we enter
and then
add games
We can look for it on pages like “emuparadise.me” where we will find a great variety of them.
Steps to turn a Raspberry Pi into a portable retro console with Recalbox
In order to convert our Raspberry Pi into a console using Recalbox we will follow these steps:
hardware assembly
As we did with Retropie, we will have to build our Raspberry Pi according to the steps that we have mentioned in the previous topic.
Recal box version
In order to have an updated version of Recalbox we have to download it through a file decompression program such as WinRAR.
Download Recalbox Windows
Format the MicroSD
We need to perform this step in order to get the most out of it and thus have the opportunity to install the images correctly.
To do this, we will do these steps:
SD Memory Card Formatter for Windows
SD Memory Card Formatter for Mac
- We download “SD Memory Card Formatter”
- We enter the MicroSD to our computer
- We choose the unit that we are going to format, the letter of each one of our PC will depend
- We click on “Option”
- Then we look for the option “Format type”
- We choose to click “Quick”
- We look for the alternative “Format size Adjustment”
- We click on “On”
Download SD Memory Card Formatter
We record the images
Next, we need to have the Recalbox image in our Micro SD, to be able to do it, we will have to download Win32 Disk Imager.
Once we have this application installed, on our computer we will carry out the following steps:
- With our MicroSD card in the computer, we open the program
- We go to its location, choosing the command that shows us the drive letter type
- Next, we click on “Write”
- We select the option “And it is”
- We wait a few minutes and click on “Okay”
Download Diskimager Windows
We enter Recalbox

At this time we can eject the SD card from the computer and connect the keyboard and finish making the necessary configurations. Once we have finished we will be inside Recalbox.
miscellaneous settings
Next, we will make different adjustments that will allow us to have a configuration according to our preferences.
We can change:
- Language
- Image Ratio
- Smooth game effects and set different commands
- Output audio volume
- Screen saver
- scraper
- processor frequency
- boot mode
- Recalbox Command Center
List of the best websites to find ROMs for your arcade machine with Raspberry
In order to install the best ROMs on our Raspberry Pi, we will present you with the most complete and secure websites.
These web pages are:
ArcadePunks.com
Without a doubt this is one of the best options, where you will find images configured with games and bios for your Raspberries fully operational and ready to play, what are you waiting for!
Romhulstler.org
This is one of the best sites currently out there to find fully up-to-date ROMs for the Raspberry Pi.
Romsmania.cc
It works for any type of device like Android, iOS, Winux and Windows. Among the formats that it allows us to download are GBA, SNES, GB, N64, NES, PSP, NDS, GBC, PS2, XBOX and WII.
Romulation.net
This site allows us to relive our childhood thanks to the fact that it allows us to download classic games. When we enter the page we will be able to find the different gaming platforms with which we used to play. In addition, it also provides us with information and download of strong classic game system emulators.
freeroms.com
It is a page that stands out in the market, since it allows us to download GBA, ROMs, NDS, PSX, N64, SNES and many others for free. In addition to all this, you can also give us coupons up to 20% off, which is usually a mail order.
Coolrom.com.au
Now we are going to be able to play with the largest and cleanest emulators on the entire Internet, we will find a very large number of retro games for our Raspberry Pi.
Hardware