
Index:
UPDATED ✅ Need to enable or disable Hyper-V virtualization technology? ⭐ ENTER HERE ⭐ And discover how it is done step by step
Hyper-V is a virtualization technology released by Microsoft on its 64-bit operating systems. It can be found in systems such as Windows 8 or Windows 10, as a platform for managing virtual machines that allows users to experiment in a way that seems to have multiple computers crammed into one.
It is a program that has been active since 2008 and that has been improving over the years, also approaching areas that are not only professional. Because of this, can be used to have multiple operating systems on the same computer, open all at the same time, and even to open programs incompatible with the current computer. In app development environments it is quite important, since programmers can use this to test applications as if they had a mobile phone on their computer.
It has many possibilities, but first it requires the appropriate parameters to be adjusted and a prior authorization to be carried out. If you do not know how to enable and configure Hyper-V to virtualize in Windows 10, we take care of making it very easy for you with this guide. We are going to detail what you have to do step by step and, in addition, we will also teach you the requirements to meet.
Steps to install and configure Hyper-V on Windows 10
In this section we will explain the steps to install and configure Hyper-V in Windows 10. There are different methods to do it, but the one that we are going to explain is the simplest and most reliable that can be used in the operating system.
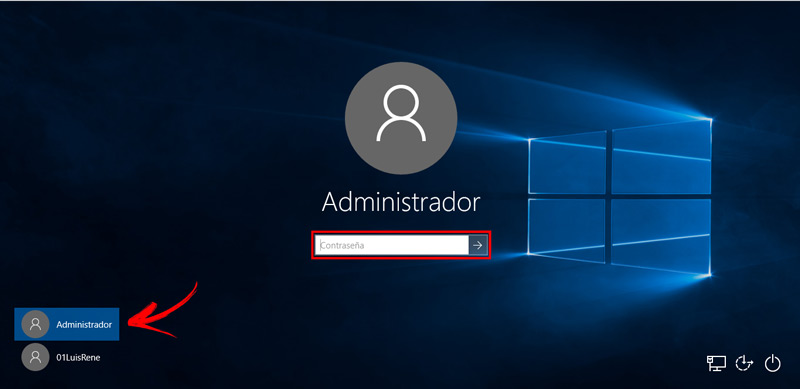
1 – Login as administrator
First of all, you need to connect to the operating system as usual. However, you need to do the login with a user profile that has administrator permissions, or at least enough to make adjustments and modifications to the system. If not, you will not be able to continue with the sections explained below.
2 – Go to the features configuration section
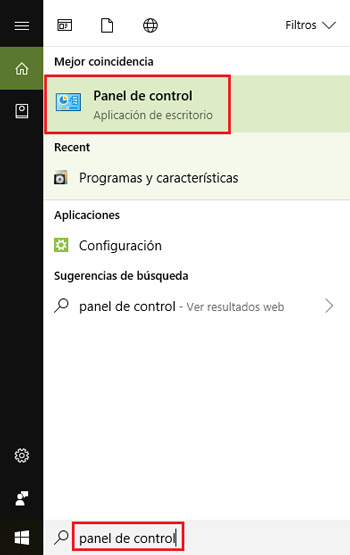
Once inside the system, the first thing you have to do when it has finished loading is to click on the button with the Windows icon. Doing so will open a toolbar corresponding to the menu “Start” .
Click on the search bar at the bottom and type in it “Control Panel”. Then, click on the option that appears on the screen, which will match what you just wrote.
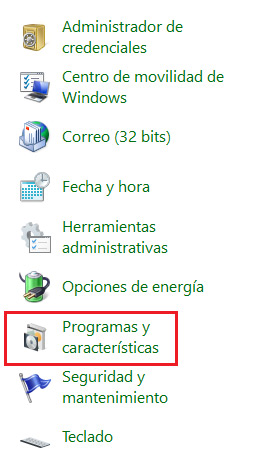
In this new window, of all the sections that there are, you should only keep one. Point the mouse to “Programs and characteristics” and click there to continue.
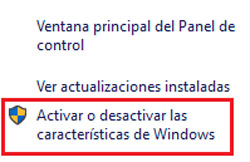
A new column will then open on the left and new options will appear. Don’t go there, just click on “Turn Windows features on or off.”
3 – Activate Hyper-V
Now, all you have to do is look through all the folders that appear until you find the “Hyper-V”. Click on the box next to it to unfold its entire interior and, now, check the boxes of both “Hyper-V Management Tools” like “Hyper-V platform”. Once you have done so, click on “To accept”.
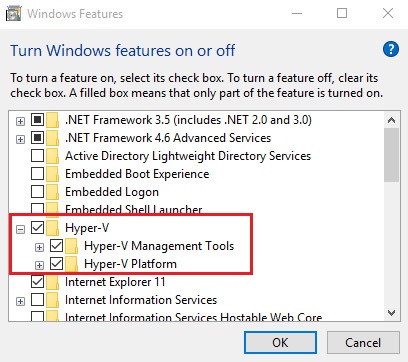
4 – Hyper-V enabled and installed
You have to wait a bit for Windows install the necessary files to activate this service. This process can take a few minutes or a few seconds depending on the capabilities of your computer. When finished, press the “Restart now” for all changes to be applied correctly.
As we have previously indicated, there is another method that, although it is faster, requires entering command lines on the computer.
We explain how you can do it below with this other alternative method:
1 – Open the special command console
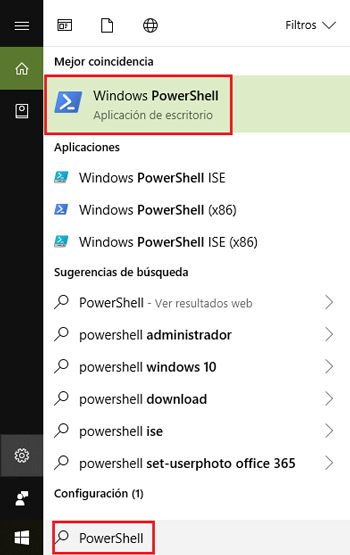
Start your computer with the administrator account in Windows and let it load. When it has been initialized and finished loading, click on the “Start” and type the following in the search bar: “PowerShell”. In the list of results that appears below, you have to click on “Windows PowerShell”.
2 – Enter the activation command
After the above, a window will open with a hole to enter text commands. Now, it is time to write what we are going to leave you next, without quotes:
“Enable-WindowsOptionalFeature -Online -FeatureName Microsoft-Hyper-v -All”

Wait for the upload to finish (it may take seconds or minutes) and a message will appear asking if you want to restart your computer to apply the changes. Press the “Y” key on your keyboard to accept and allow the computer to restart. Thus, when you re-enter this option will already be enabled.
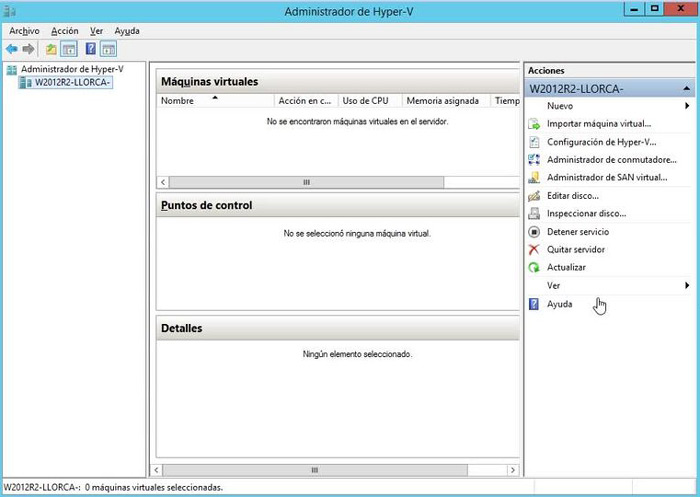
From now on, you just have to click on “Start”, go to the “Management tools” and click on “Hyper-V Manager”. In this way, you will enter its settings panel and you will be able to configure everything you want to use it with total freedom.
What requirements do I need to use this technology and what can we do with it?
Before even considering activating this technology on your computer, you need to know if you meet the necessary requirements to use it. must gather a series of hardware and software conditions to be able to use Hyper-V. Otherwise, this option will not even appear in the system and if you force it, it will cause problems that affect the computer.
These are the necessary requirements:
- Have a minimum of 4 GB of RAM.
- A 64-bit processor.
- Compatibility with VT technology in the processor (consult its corresponding manual, it can be AMD-V or with Intel virtualization technology).
- Have Windows 10 in any of the following versions:
- Windows 10 Education.
- Windows 10 Professional.
- Windows 10 Enterprise.
Operating systems like Windows 10 Home or other variants do not have this option. In case you have one of these installed, you can always update to a version that does offer support for this technology.
And what is Hyper-V technology for and what can I do with it?
As for what you can do with this technology, there are several possibilities that open up once it is activated and configured properly. We are going to explain below just some of the options that you can take advantage of taking advantage of the Windows 10 Hyper-V system.
- Open different operating systems at the same time on the same computer or simulate different machines without having to have different equipment.
- Use incompatible tools with the operating system you have, even the oldest and most obsolete ones.
- Try new apps or utilities in a safe environment and without putting the main equipment at risk. In networked structures, it also provides security to the rest of the connected computers.
- Leverage systems with higher performance no need to install them nor to make partitions on the hard drive.
- Reduce costs derived from additional licenses, the assembly of new equipment or the installation of more operating systems. It saves a lot if used correctly.
- Fully exploit the capabilities of a powerful computer performing multiple tasks in different environments simultaneously.
There are many more options to take advantage of using this proposal of the W10 operating system. However, these are the most outstanding and those that offer much more visible results at a professional, domestic or even academic level.
Computing