
UPDATED ✅ Do you want to Burn a DVD with your favorite videos or movies to watch them on a player and you don’t know how? ⭐ ENTER HERE ⭐ and discover how to do it ✅ EASY and FAST ✅
Today there are many people who continue to use the DVD to store documents, images, music or in this case videos or movies. The only disadvantage is that this device has a limited storage capacity of no more than 4.7 GB, what caused it to be forgotten with the rise of memories and data storage in USB.
Now, if DVD storage can be surpassed by any USB device, why is DVD still used? The reality is that this format is considered by hundreds of people as a more secure device, since pendrives run the risk of virus replacement or contagion. Another reason for continued use is the ease of sharing videos or movies for play on any device with a disc drivesuch as computers.
Next We will teach you how to burn a DVD with movies or videos on Windows and Mac step by stepso you can learn to save and share your audiovisuals using the software on your computer or alternative programs that can help you with this task.
Steps to Burn and Make a Movie DVD on Windows
In Windows, doing this is super simple because it is now compatible with many audio and video formats. Thousands of users continue to record their filmsthat’s why Windows has tools at your disposal to make your work easier, whether it’s software on the system or applications that you can easily download.
no programs
Our computer is the best ally to transfer images, files and videos using only the software provided by Windows. In a few steps you can do it as follows:
- Insert the blank DVD into the drive. Open File Explorer, then click on computer, there you will find the disk drives where we will see it represented as “DVD-RW”.
- After this a menu with 2 options is automatically reproduced: Like a USB flash drive: Here you can save, edit and delete the files on the disc multiple times, but the disc may not work on other computers and devices. Like a CD or DVD player: Files are saved to disk. These files cannot be edited or deleted from the disk, but the disk can be used on most computers.
- This time we will chooseLike a CD or DVD player“. Then we mark the option “Following” to continue the process.
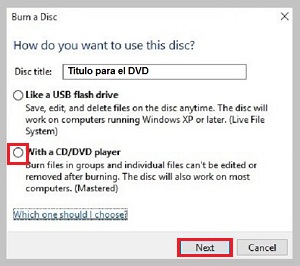
- Next disk formatting process starts. A blank window appears where we are told to drag files to this folder to add them to the disk.
- Select the desired video files and drop them into the window to begin the copying process to the drive.
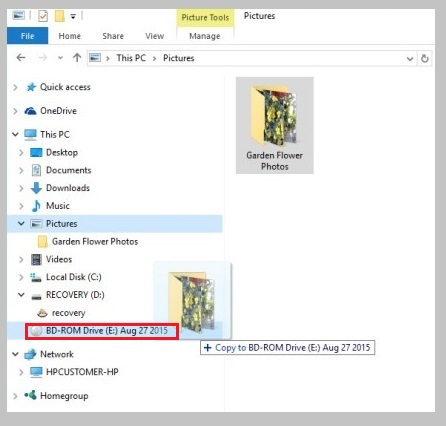
- At the end of the copying process, the files dragged to the window will be shown in gray letters, above them a title that indicates: files ready. Right-click in the empty area, and then select “Burn to disc”.
- A window will open “prepare this disc“. Enter the title of the disc, select the recording speed and click “Following“. The selected files are saved to disk.
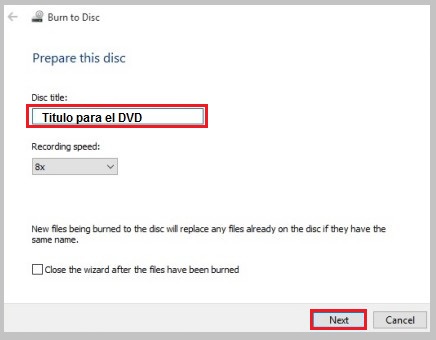
At the end of the process, a window will open indicating: “The files have been successfully written to the disc“. Click “To finalize” to close the window and you’re done.
With Nero Express
Nero Express it is a simpler application from the Nero suite, we could say that it is the daughter of traditional software Nero BurningROM. Its ease of use has gradually positioned it as one of the applications preferred by users to store images, data and videos.
Now we explain this method using this application:
- To use this program you must first convert the material to DVD-Video formatas this software only supports files with this codec.
- We insert the DVD into the drive and start the program, select “Videos” and then “DVD video files“.
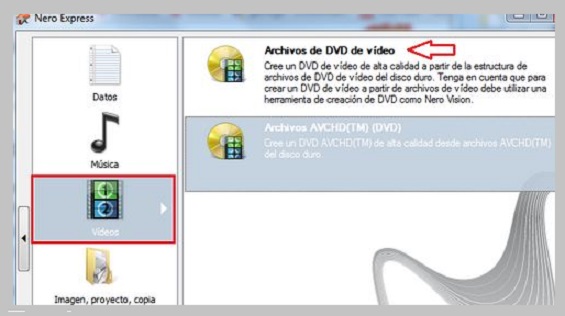
- Then we click on “Add“, is a tab on the right side of the window, this option allows us to select the folder where the material we are going to record is located, we mark the file and then the option “Add“.
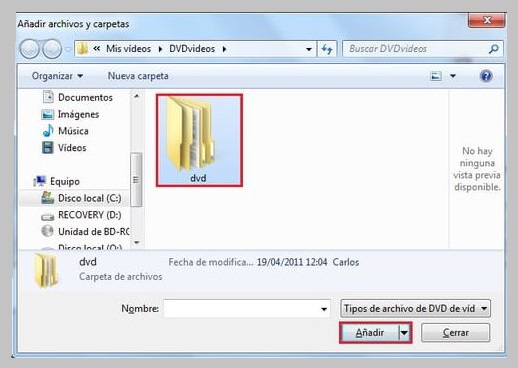
- The program interface opens a window where the selected files are loaded, at the end of the process we select “Following“.
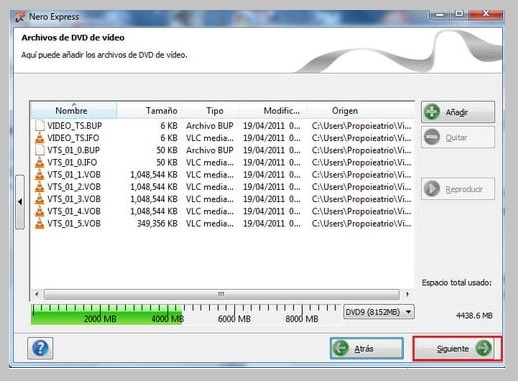
- Then the program opens an option to print labels, if we do not want to do it we click again on “Following“.
- To finish, we press the option “Engrave” and the copying process begins.
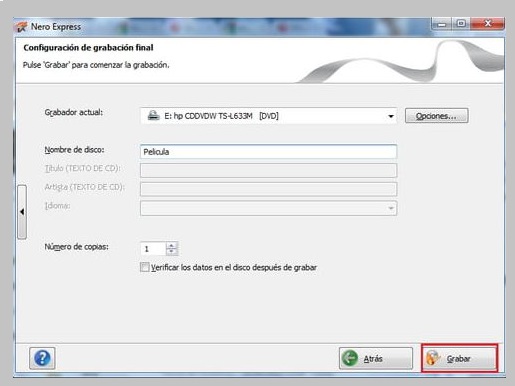
- At the end of the process, the program will eject the disk and that’s it.
How to record and burn a DVD with videos on a MacOS computer?
If you thought that you couldn’t record your files on your Apple computer, you’re wrong, because by identifying that your Mac has an integrated optical drive or if you connect an external drive to it, you can make your recording without much difficulty, either by using any of the integrated software in the system or any of the specialized downloadable programs for this type of task.
no programs
Mac has a variety of programs integrated to record the content you want without the need for programs external to the system. A very useful tool for this is Finder and here’s how to use it:
- We introduce the disk in the unit and immediately a drop-down menu will appear, we select the option “Use in Finder“.
- Then the disk will appear on the desktop, we position the pointer over the disk and double click it to open the blank window where we should drag the video files.
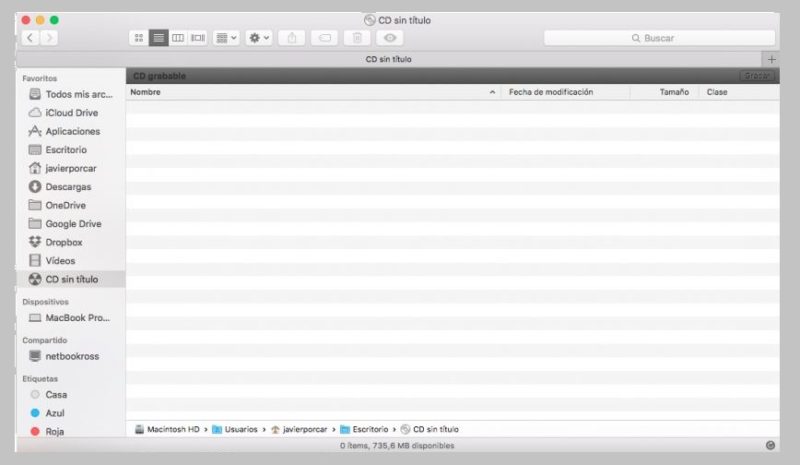
- After the copying process is completed in the window of “Finder”we select the option “File, Archive” and then “Engrave“, naming our album.
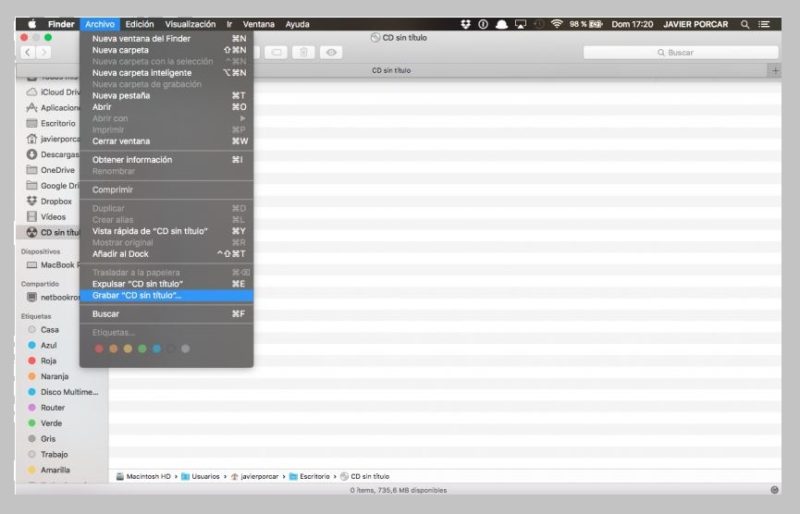
- Finally we choose the recording speed and we give “To accept”it remains to wait for the information to be saved on our disk and that’s it.
with Burn
It is a simple and fast application to use. A pop-up window provides you with all the help you need by following very simple steps to complete your objective. This is what we should do:
- We have the application downloaded in our unit, clicking on it automatically opens a window where we have several options: Data, Audio and Video.
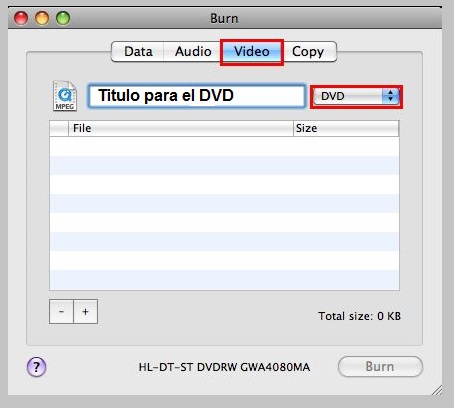
- Depending on the option we choose, we can drag the files to the window to add them to the recording and thus proceed to the next step.
- The program will ask if you want to convert the file to a DVD (MPG) format, you must accept it by clicking “Convert”.
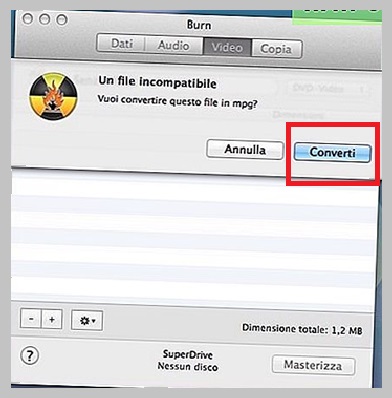
- Then select the folder where you want to save the movie.
- The conversion process will have an estimated time according to the duration of the files and the power of your computer.
- At the end of the conversion process, we insert the disk into the drive and click “Engrave“.
- When the time is complete the program will eject the disk.
List of the best software to Burn DVD on Windows or Mac
It is true that the software installed on our computers, either Mac or Windows they are very helpful and easy to use, but there are a variety of downloadable programs with simple interfaces and with which we can work comfortably.
We present you a top 5 recording programs available on Windows and Mac:
Wondershare Video Converter Ultimate
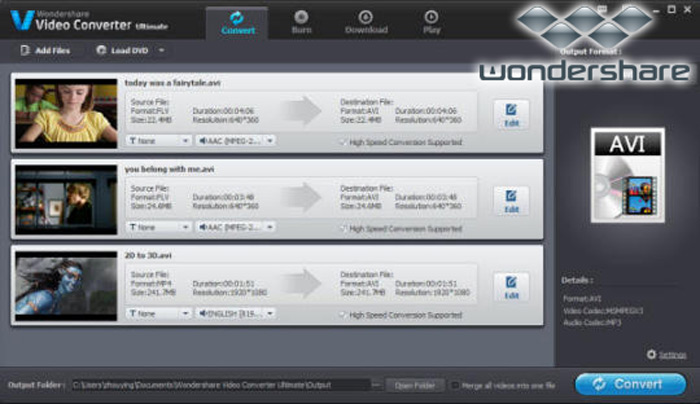
It is one of the number one software as it not only allows you to create DVD from your computer but also you can download movies from You Tube and 1000 other video sharing websites.
You can convert audiovisuals directly from MP4 to VOB (DVD-Video), AVI, MKV, MOV other 1000 formats. Another great advantage of this software is the ability to edit your videos, trimming, adding watermarks and subtitles. This software is compatible with Windows and Mac operating systems.
ExpressBurn
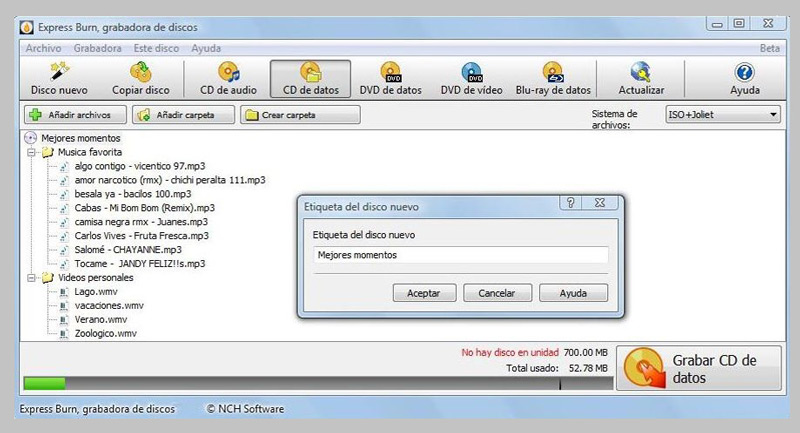
It is a very simple software to burn discs to a CD and DVDs. It allows you to normalize the volume of the audio and customize the pauses between tracks, it is compatible with various formats such as wav, mp3, wma, ogg, flac and more.
You have the possibility to create a Blur-ray. This software is compatible with formats such as avi, mpg, vob, wmv, mp4 and ogm, another possibility is the recording of video files in PAL or NTSC. It was created mainly for Mac but it also has its version for Windows.
iDVD
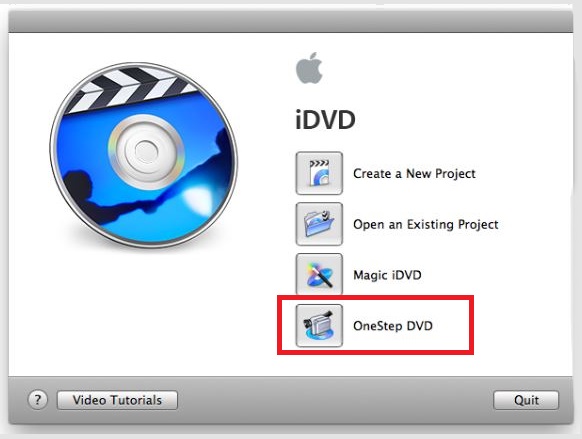
It is an application created by Apple exclusively for Mac. It supports AVI, QuickTime, mp4 files, among others. The program integrates other system applications such as iMovie and iPhotos projects to later export directly.
It is extremely easy thanks to its interfacejust select a template, include the movie or videos you need, convert the file to one that is compatible with the software and after starting the burning process we wait for the DVD to be created and that’s it.
ImgBurn
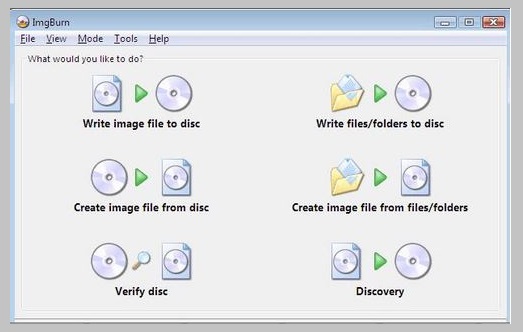
This program creates DVD, CD and Blu-Ray. It is designed for Windows and works with all its versions. It supports various types of files including: Mp4, Mp3, WAV, WMA, WV, FLAC.
Do you have other tools?, with it we can burn ISO images or files and folders to the DVD disc. Other advantages of this software is its availability as it can be easily downloaded on the internet.
windows dvd maker
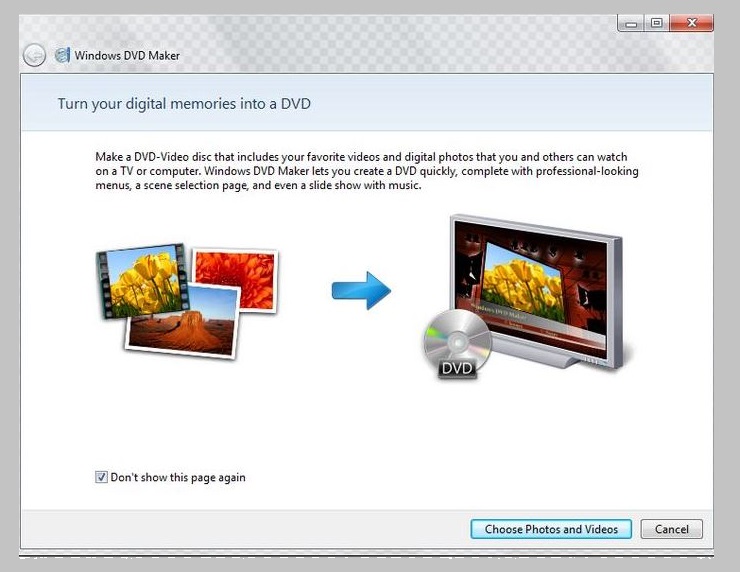
It is a software designed for Windows (10, 8, Vista or XP) that allows you to create your files and then play them easily on any device with a reader. It has support for more than 60 video codecs and can convert files to other formats. One of its very useful tools is the creation of subtitles and menus. Now you have all the tools to burn your favorite videos and movies to a DVD without any problem.
Multimedia