
Index:
UPDATED ✅ Do you want to develop an LCD display with moving text on your Arduino? ⭐ ENTER HERE ⭐ and Learn Everything FROM ZERO!
Currently most of the Arduino projects make use of an LCD screen to convey that way certain data or statisticsthis is how computers have sensors and actuators who are responsible for establishing contact between the physical world and the virtual world. This works the same as computers where you have a keyboard, mouse, horns, speakersamong others.
Therefore, in the case of the Arduino boards They have hardware that fulfills this same function, one of them is LCD screens. It is a component whose function is to convert the electrical signals of the plate in a visual information for the human beingthis allows you to know certain data or statistics that they are taking with relative to another variable.
In order to use these screens, it is important that the user has a good command of both the connections as well as the programming of said screen, since it requires configuration, but it is very useful in most projects. According to all this, here we are going to teach you how to create an lcd display with moving text on arduinofor this follow everything that we will teach you next in the post.
What types of LCD screens are there to work with Arduino?
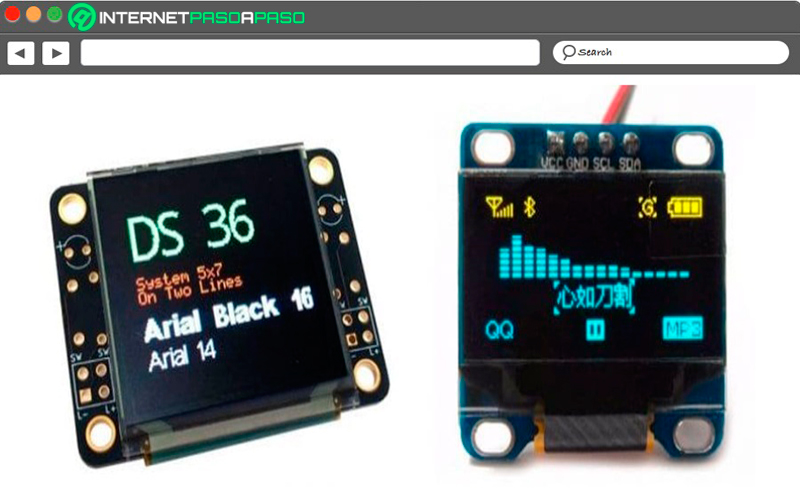
We must bear in mind that the digital market is getting bigger and bigger, this is how today users have the opportunity to find different types of LCD screens to work with the Arduino projectswhere each of them offers different characteristics.
Currently, we can talk about five fundamental screens for what it is to work with this platform and which we are going to show you next:
Line LCD
This type of screen is responsible for display information across linesthis is how all the data present there will be placed in lines and you can’t get out of that frame. It is currently one of the most used screens for projects Arduino, This is due to its ease of use and above all because it is very cheap.
It is also important to keep in mind that it is very easy to read, since it only shows one certain informationmostly the one that the user wants to know and it is only text what it reflects there. All these aspects have made the line LCD one of the most widely used today.
Dot LCD
In terms of its operation, it is very similar to the previous one, but this time it is not about lines, but rather there is a dot matrix available. In this type of screen you can place both text and images anywhere on itwhich offers more options for use.
Another advantage offered by this lcd is that it has various font sizes within the same screen, which will allow you to give a greater variety to your project. It must be taken into account that some lcd do not allow several this aspect, instead they maintain a fixed font size.
The OLED Display
For many these are considered as a type of display own, while for others these are within the LCD types. In this case the OLED display It is a screen that is responsible for displaying information, but its construction is different from what we normally know of LCD screens, this is because it uses LED diodes with organic components for its creation.
Difference from above mentioned screens, the OLED displays They feature higher resolution, lower power consumption, and better color. Its function is the same as computers or lcd by pointsthat is Arduino OLED displays They use an array of points or pixelsthis being what allows them to be use multiple colors when displaying the content.
LED or LCD LED display
The LED display is very similar to OLED mentioned above, but in this case led diodes do not contain organic elements. However, keep in mind that the performance of this screen is not as high as that of the OLED display, but if it has much higher resolution than the LCD screen per point and above all it offers color in your images.
TFT display
Finally found the TFT display, which is a latest lcd type that exists on the market. Being one of the most recent to be launched, it has more modern features, in this way the TFT-display uses pixels like TV or computer monitors which will allow any type of information to be issued through these screens. It is used for advanced projects where it is necessary to show quality images, although it has a high cost.
As it is a screen very similar to the one in televisions or computers its energy consumption is quite high Compared to any of the screens mentioned above, this has also been one of the reasons why most the Arduino projects They are built with small screens. the size of the display is measured across inchesWhile others display are measured by characters or by the width of the screen.
Learn step by step how to create an LCD screen with moving text on Arduino
LCD screens They usually use the properties of the polarized light to show the information that is reflected in them, all this is generated through a filter series that are responsible for displaying all the data thanks to the lighting generated in the background. Today you can find a high range of LCD screens that can be used in Arduinosuch as those mentioned in the previous section.
Each of them is responsible for offering certain functionalities according to their type. However, in the process of creating the LCD display with moving text on Arduino It is very similar for all of them. This is how this procedure will be carried out with a Typical 16 x 2 LCD, indicating that 16 characters will be displayed in the first and second rows.
To create this, you simply have to follow the steps that we will indicate below:
LCD connections with Arduino
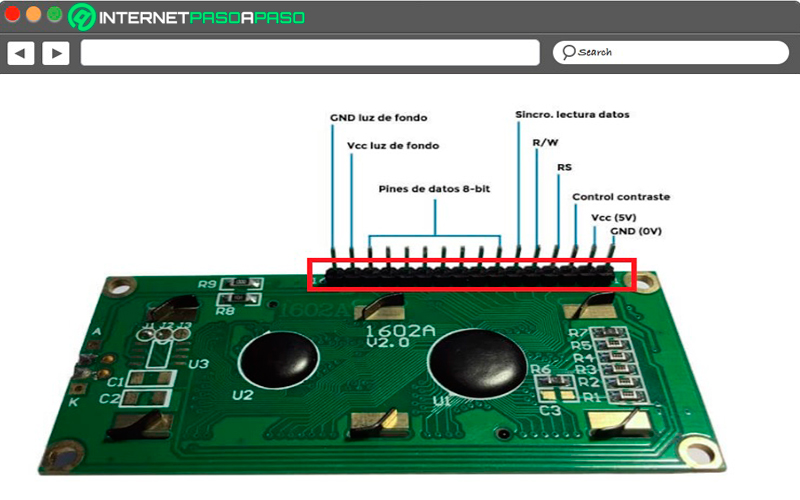
Currently LCD screens have been being modified so that they now have a row of sixteen Pins, where the first fourteen pins are used for control displaywhile the remaining two are used for the background lighting and thus be able to reflect the text of said screen.
According to this, here we show you the function that each of these pins performs:
| PINS | FUNCTION |
| 1 | GND (Ground) |
| two | 5 volts |
| 3 | Screen contrast control |
| 4 | RS – Selector between commands and data |
| 5 | RW – Writing and reading of commands and data. |
| 6 | reading synchronization data |
| 7-14 | 8.bit data pins. |
| fifteen | Backlight power supply (5V) |
| 16 | GND (Ground) Background Lux (0V) |
In the following image that will be shown you can see the positions of each of the the physical pins of the LCD. Please note that this image has been taken from the back of below the LCD, This means that at the time of connect it to breadboard the pins will remain horizontally inverted.
LCD assembly
When everyone knows each other connectors and identifythe next thing will be to start with the LCD assembly.
For this it will be necessary to assemble the basic circuit, in this case the following material must be used:
- Breadboard.
- Cables.
- Arduino UNO.
- 16×2 LCD screen.
- Resistance 200 Ω.
- 10kΩ potentiometer.
In the image that will be shown below you can see how the wiring is done:
As you can see it is a fairly simple circuit to make. The 200Ω resistor It is the one that allows to regulate the voltage at the input of the lcd power, while the potentiometer is in charge of regulating screen contrast. For this to work correctly it is important that the potentiometer is 10kΩ. Note that potentiometers are variable resistorswhich means that you are change the resistance value by turning a regulator.
Algorithms used
Before starting with the LCD display programming it is important that you can raise the algorithmas this will allow save time when coding with the native Arduino language. So that all this can be easily understood, everything will be explained step by step, it is important to keep in mind that it will not go into depth in terms of variables or constantsbut the most important thing is to be clear about the sequence of steps.
Which are the following:
- The first thing is to get the size of the text.
- Now the entrance of text from the right of the first row.
- Here the loop will iterate through the characters of highest to lowest index.
- get a piece of the substring from the index to the end.
- next thing will be clean LCD screen.
- Here you should place the cursor on column 0 row 0.
- Now you should display the part of the text in the LCD screen.
- At this point you must wait a while.
- here you must scroll the text to the right of the first row.
- The loop will iterate through all the columns from second to last plus one.
- You should clean the LCD.
- You must place the cursor in the corresponding column row 0.
- The full text should be displayed the LCD screen.
- Again it must wait a while.
- Text scrolls to the left of the second row.
- The loop will iterate through the columns from the last plus one until the column 1.
- I know again clean the LCD.
- The cursor is placed in the column corresponding row 0.
- The full text will be displayed on the LCD screen.
- Wait a while.
- Now the text output will be by the left of the second row.
- The loop will iterate through the characters of lowest to highest index.
- Here you should get a piece of the substring from the index to the end.
- I know clean the LCD.
- You should place the cursor on column 0 row 0.
- The text will be displayed in the LCD screen.
- We wait time.
As you can see it is a algorithm that can be considered a bit complex, it is divided into four blockswhere the first two are used to scroll the text to the right and the last two for the text to be scrolled toward the left.
List of the best Arduino projects with LCD screen that you can do on your own
LCD screens are not mandatory for the Arduino projectsbut if they are more than necessary for many of them, this is how they are currently used by many electronic developers to carry out some of their creations, since they will allow to obtain some data depending on the purpose of the project created.
That is why here we are going to show you the best Arduino projects with LCD screen that you can do on your own:
a weather station
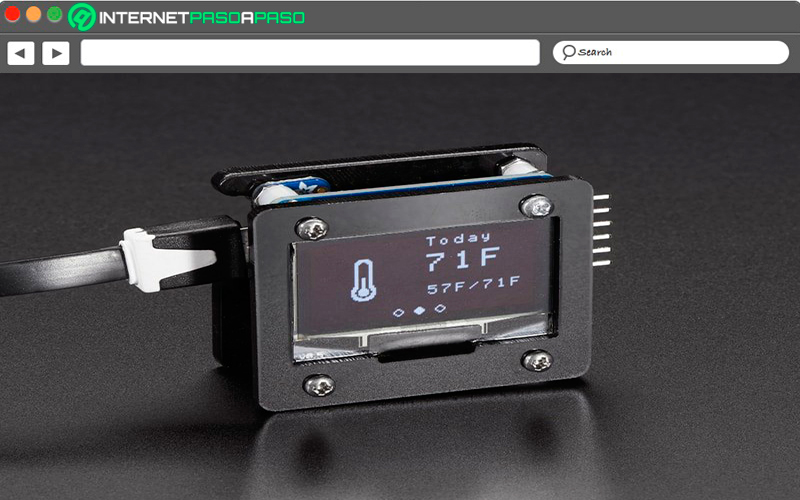
It is currently considered one of the easiest Arduino projectsmaking it ideal for those who are just starting out with programming from this platform. To do this you must build a small screen so that they can show the dataand through programming you can even include the forecasts of the previous days in order to make several comparisons.
To carry out this project you will need a Adafruit HUZZAH board, this being the most recommended by experts and a small OLED screen where all will be displayed the collected data and a casing. With these materials you can start having your own weather station at home.
Arduino Smoke Detector System
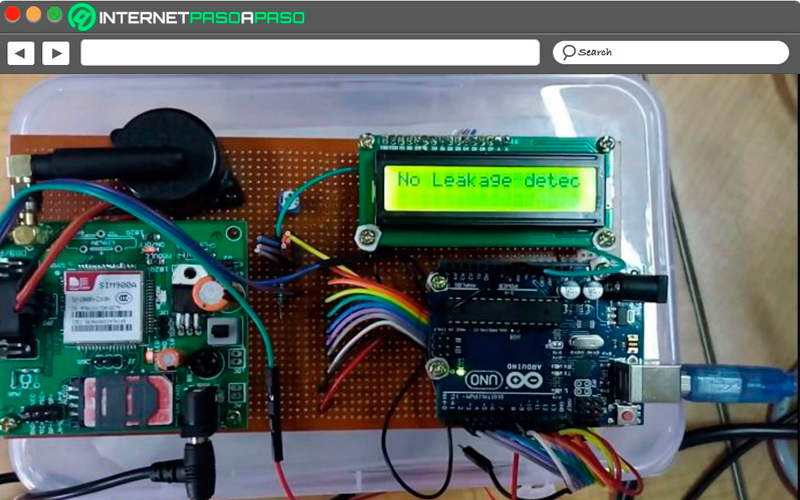
This is a project that can be very useful in real life, it is a smoke detector which can be installed ins homes, offices, supermarkets, businesses, among others. To create it, you will need to use a Arduino board with a MQ-2 sensor, the sensor will be in charge of emitting an alarm when there is the presence of smoke in the place.
You should also add a speaker or buzzer who will be in charge of sounding said alarm when it is activated and so that you can obtain more information about what is happening you can add a small led screen to the project.
Pool Status Controller
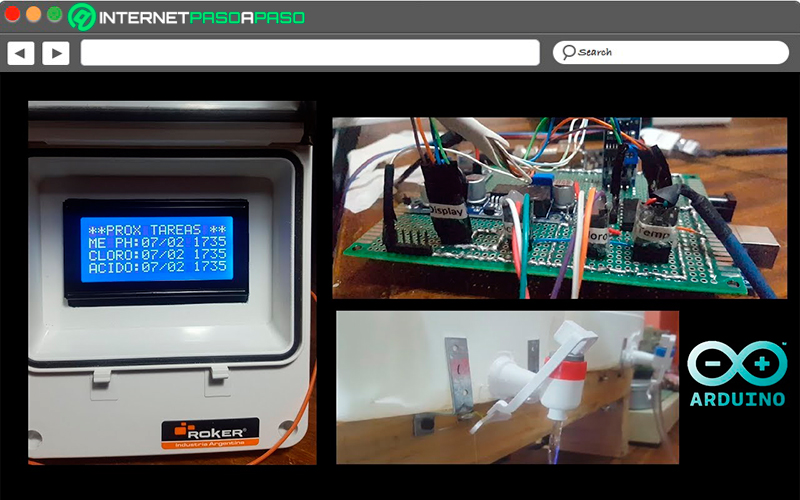
This project is ideal for all those people who have a swimming pool, it will allow them to know the PH and temperature of the waterthis will help them keep in optimal pool water conditions, thus allowing your enjoyment at all times. To create it, you will need a screen to display the data in real time, in this case it will be a small led screen.
The best Arduino Kits to work with LCD screens that you should know
If you are starting in the world of Arduino, then you can make use of the arduino kitsconsidered today as one of the best tools to start taking the first steps on this platform, both for encryption like electronics. They are about packages that have all the essential components that are necessary to carry out certain projects.
In this way with a arduino kits people will be able to get everything open source hardware and softwareso they can make use of it without having any experience in terms of programming or electronics.
Today you can find many kits available on the market, so here we are going to show you which are the best for working with LCD screens:
Elegoo ONE
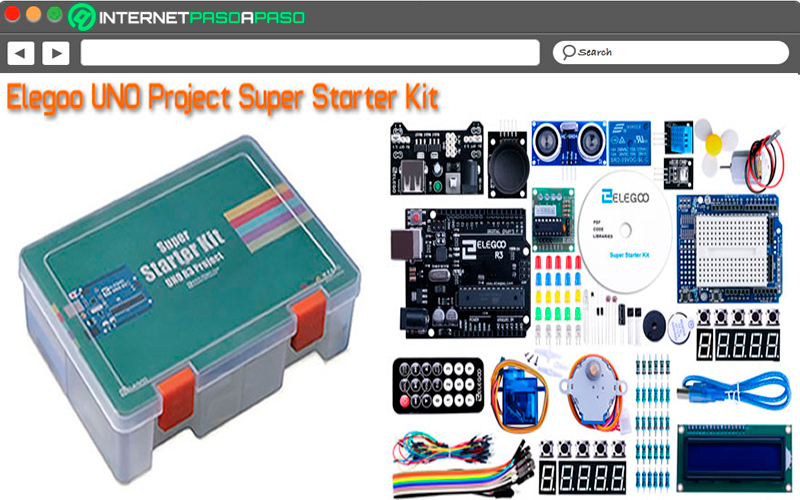
Elegoo UNO Project Super Starter Kit It is currently considered one of the best on the market and also stands out for being one of the cheapest you can find. It is a fairly complete kit that includes a CD with a manual PDF where you can find more than 22 tutorials.
There are slightly advanced components like IR Receiver, Joystick and remote control that can be a bit complex for those who are just starting out in this world. But the advantage of all this is that at the end of each of basic projects of elegoo you will have the ability to start implement components more advanced.
Some of the components included in this package include the following:
- Tutorial in PDF format with 22 lessons and projects.
- 16x2LCD module with pin header.
- Elegoo UNO R3 (Compatible with Arduino uno).
- Module Joystick.
- Module of power supply.
- Receiver TO GO.
- Servomotor (SG90)
- Sensor ultrasonic.
- Module of temperature and humidity sensor DHT11
- Engine Step by Step.
- Cable USB.
- Potentiometer.
- Endurance.
- Circuit integrated.
These are just some of the components that you will find in the list of elegoo, as you can see it has highly advanced modules and sensors which are ideal for taking advanced projects with robotics, controls engines and weather stations. All this has made this package one of the favorites for the vast majority when starting out on Arduino.
Furthermore, it should be mentioned that elegoo It has a very affordable price compared to other packages of this type. It is also characterized by offering quality parts and software can be updated online directly from elegoo official site.
DFRobot Starter kit
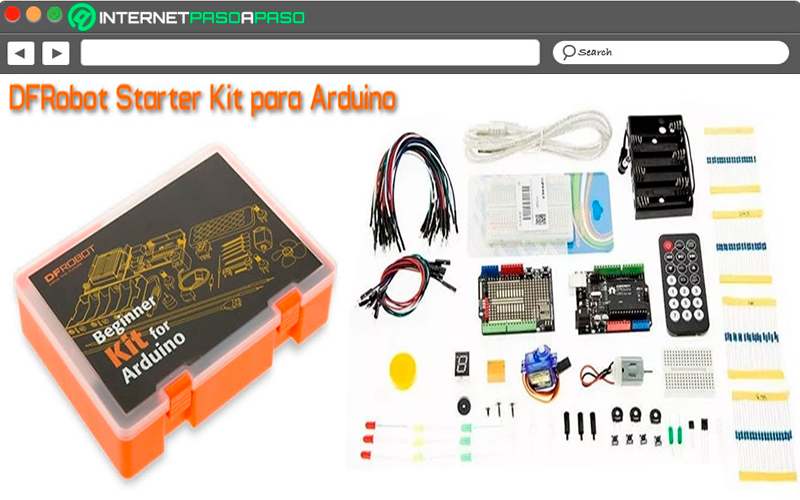
This package has fewer tutorials than elegoo, that is how DFRobot offers a total of 15 initialization tutorials For the users, Despite offering fewer boot options, this product is currently one of the most purchased. It is an initial package for beginners in the world of electronics and Arduino.
One of its main advantages is its large number of components, as well as applications that offer basic control over LED, monitoring and motor controls. All the components offered here are of very good quality that will allow you to carry out 15 projects.
Some of the most outstanding components are the following:
- DFRduino ONE R3.
- Cables male to male
- bread board
- 5mm LEDs.
- Endurance.
- Diode IR receiver.
- Sensor of ambient light.
- Sensor Of temperature.
- 8-Segments LEDs.
- Sensor of inclination.
- Microcontroller.
These are some of all the components that this package offers, with each of them you will be able to make up to a total of 15 projects without difficultywhich are going to increase your level. For ease of use, each project has a single reference where contains the wiring diagram for each of them.
Official Arduino Starter Kit
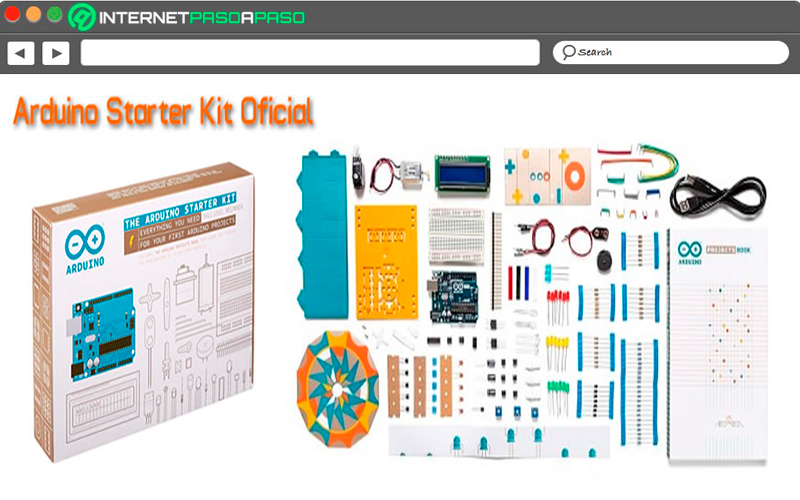
Finally, we present you the official Arduino kitthis package is characterized by including several components with which a total of 15 arduino projects. In addition, it offers a project book with a total of 170 pages where you can get the step by step of each of the projects available there. It has a version in English and one in Spanish.
Notably Official Arduino Starter Kit It is one of the best valued by users, who have made this product more reliable and many other users want to purchase it. In this way the arduino kit has been developed for platform beginnerswho can start taking their first steps easily thanks to these packages.
In addition, it offers a large number of components which we show you below:
- Manual of the Arduino project.
- Cable of USB.
- Wood base easy to assemble
- Cables.
- Cable braided bridge.
- Drums of 9V.
- Potentiometer.
- Sensor temperature TMP36.
- LCD alphanumeric (16 x 2 character display).
- Sensor of inclination.
- capacitors
- Servomotor little.
- Endurance.
These are some of all the components that this package offers you, keep in mind that it is a fairly large list and you will have all of them available to carry out any of all 15 projects that this allows you. Furthermore, both the kit and the components are of excellent quality and offers a very complete manual. However, it should be mentioned that this package has a slightly higher price than the two mentioned above.
Computing