
Index:
UPDATED ✅ Do you want to install your first web server on a Raspberry Pi? ⭐ ENTER HERE ⭐ Learn Everything FROM ZERO! ⭐
Despite being a mini PC and being quite small we can say that they are very powerful insidehence the main reason for all the uses that can be given to this plate.
This is how it can become a media center or to have a home web server where you can store your website or any page you want as a personal blog.
In this way you are Raspberry Pi boards have endless uses that you can take advantage of at any time. This is how we will explain here how to create your own web server from scratch like an expert.
What is the purpose of using a Raspberry Pi as a home web server?
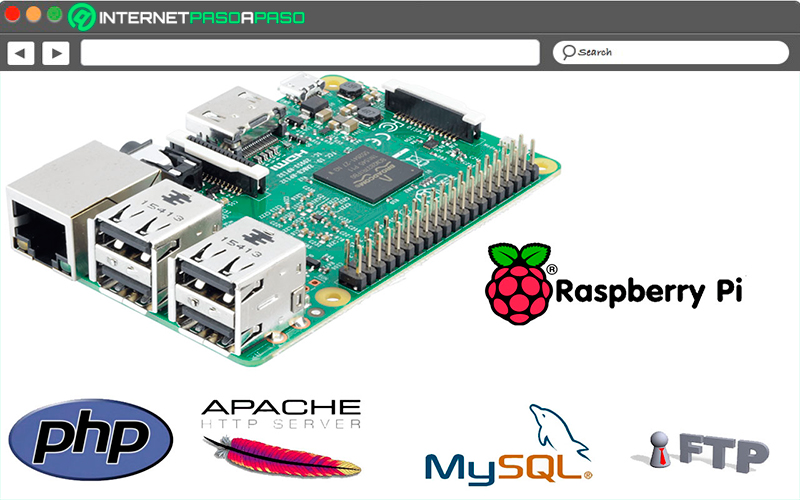
Today it is practically impossible to find options for free web hostingsince none is going to offer you everything you really need to ride your website. That is why a very good alternative is that of create your own homemade web server using a Raspberry Pi. However, you must be clear that the hardware of this board has certain limitations.
That is how the Raspberry Pi shows certain limitations for accommodations of complex web pages such as online stores or dynamic content pages, as well as for those pages that have many visitors. In addition, it should be mentioned that this microcomputer has a low bandwidth of the Internet connection, which can become an obstacle to perform properly as a server.
But the truth of all this is that this microcomputer is suitable for some fields of application, so it will offer you very good results. In this way it can begin to be used as local server with internet connection either to be used within a corporate network. Among some of its functions, it will allow you to test web pages that are online or complete web pages of reduced size and don’t have a high number of visitors.
It should also be mentioned that can be managed for configure programs for home automation such as turning lights on and off, door control, heating, among others, or to manage a own cloud. One of the main benefits that you will get when using your raspberry pi What webserver is that it will reduce the current expenses that all this entails, since for this an electrical current connection is mandatory as a Internet connectionbut this does not usually exceed the 5 watts
This means that the electrical current jacks for continuous operation of the webserver will be practically nil. In addition, the acquisition costs of components required are minimal. In this way, if the board is used for this type of applications with low resources and size, then it can offer you a very good service for hosting the site.
Advantages of using your Raspberry Pi as a web server Why should you prefer instead of a free server?
As already mentioned in the previous section, today it is very difficult to get a quality free server, since basically none of them is going to offer you everything you really need, Therefore, they can be considered as an unviable option..
While it is true, the possibilities that can be achieved with a raspberry pi in this sense they are also limited, since in order to guarantee their operation it is necessary to work with small websites with few visits. This means that it can be a very good alternative for those users who are just starting out. In addition, all this becomes something very positive for the majority, especially because create a web server it is currently very complicated and expensive.
Therefore, here we are going to show you the main advantages of using this board as your home web server without much investment:
Offers you versatility as a home server
Not only will you have the opportunity to use the Raspberry Pi as a local web server, but you will also be able to use this microcomputer for many other things, such as create your own VPN to be able to access from your network anywhere in the world.
Build your own NASmake it a center multimedia to play audio and video in 1080 x without problems and you will even be able to use it as console video gamegosh or as a home video surveillance system.
As a quiet and energy-efficient home server
As already mentioned in the post, web servers They usually generate a high electrical current consumption since they always need to be connected to it. That is why when using the raspberry Pi this will become an advantage thanks to its low power consumption. And it is that it usually spends the electricity that a smartphone or tablet spends while charging, which can be considered almost nil.
This means that none of this is going to affect your electricity bill so you will prevent this expense from increasing and secondly you will be able to save by not having to hire a Hosting. But this is not all, not only does it allow you to save money in these senses, but also by not having moving parts. it will not generate an annoying noise, so it can work properly silently.
By not generating any type of noise you will be able to install it in your own room and thus have control of it at all times. So, if you’re not looking to create a page as big as Facebook, Google or any otherand you just want to create a page in WordPress or Blogthen starting to use this board as a web server can be a very good alternative for you.
What are the best Raspberry Pi to use as a web server? The most profitable models
Today you can find different versions and models of the plates raspberry pi available in the market, this is how here we are going to show you which of them are the best that you can use as home web server.
To do this, follow in detail the list that we will show you below:
Raspberry Pi 2
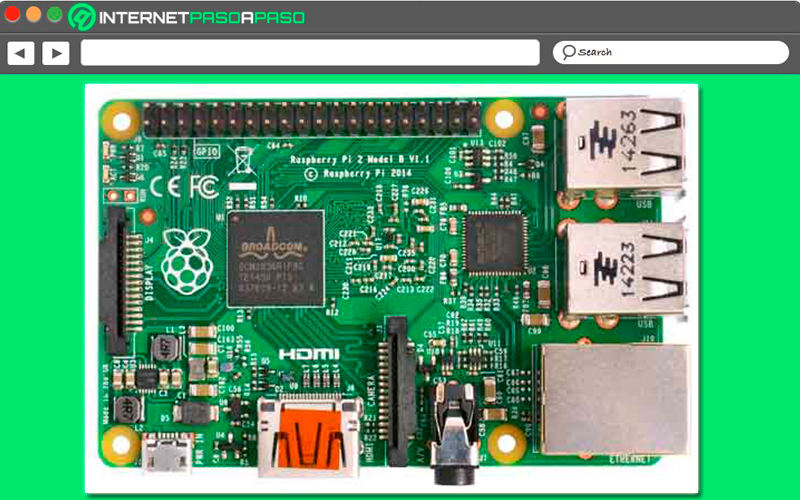
This model of microcomputer It is a good option to carry out these types of projects, this means that if you have one of these you will not have to acquire a new model to be able to create your own web server at home. It’s like this Pi2B model As it was updated, it has enough computing power superior to previous versions.
It mounts a Broadcom BCM2836 SOC, a ARM Cortex A7 processor of four cores at 900 MHz, and 1 GB of SDRAM. In the same way it maintains what is the VideoCore IV graphics chip and it has 4 USB ports, Ethernet portthe micro SD card, and the number of GPIO pins is 17.
Raspberry Pi 3 Model B / B+ /A+
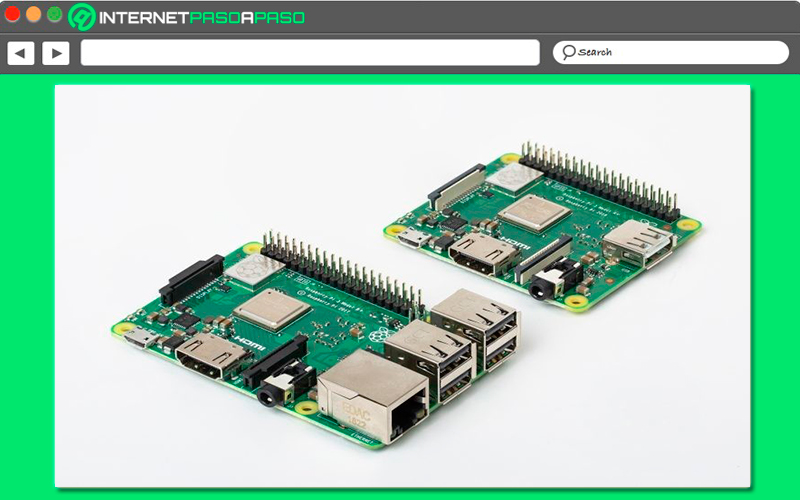
Without a doubt, this plate model has become one of the most interesting of all, and it is that it has a large number of accessories that will allow you to save money and energy consumption, which becomes a good factor if you want to use it as a local or home web server.
It should also be mentioned that it generates very little heat so it does not have heating problems. It has a port HDMI and they can be powered with a standard charger or from the USB with a computer, the most recommended is that it be from 5V and 2.5A.
Among the three available models of this version it must be said that the Pi 3 Model B+ It is the most complete of all. The difference between the three models of this version are very few and are mostly marked in the CPUs, the jump to WiFI AC and an Ethernet connection with greater data transfer and that offers the possibility of feeding it from the USB port. In the case of Pi3 Model A+, it usually has a smaller size, as well as fewer specifications and for obvious reasons a lower price.
Despite having less RAMthe absence of RJ45 connector for network connections and a vast reduction in USB ports where you only have 1, it’s still a board that can help you accomplish endless projects. Thus, of these three models it can be said that Pi B / B+ models are the most suitable for create your Web Server at homesince they will offer you everything you need so that you can achieve it and thus be able to manage your own small websites.
Raspberry Pi Model 4B
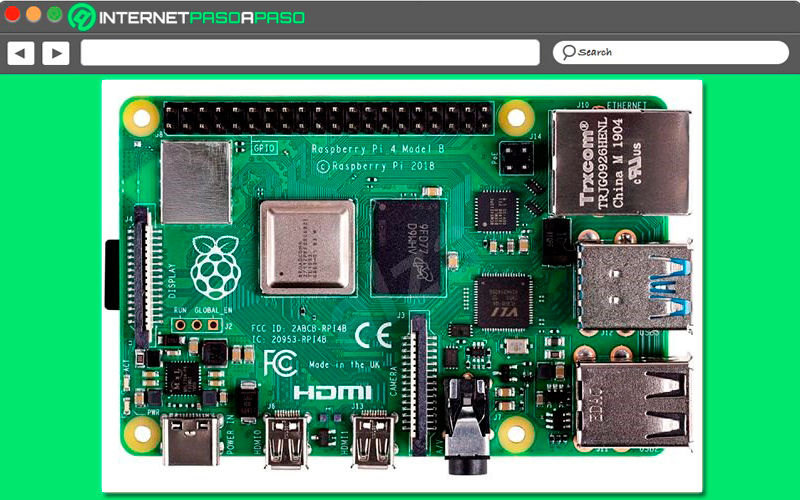
To finish, we present this board model which has been the last to be launched, so it is clearly the most powerful and complete of all. This means that it would be the best option at the time of create your web server at home. However, it should be mentioned that it has a price that is around the 55 euros in the market. It should be mentioned that one of its aspects to highlight is its high performance, all this is thanks to the specifications of its processor and its random access memory that reaches the 8GB.
All this has made it possible to use applications that are more demanding in RAM, such as the server or desktop format. It should also be mentioned that it has a large number of port options, this is how this board includes what they are USB 3.0 ports and 2.0 ports, now counting on a standard that offers greater data transfer.
In the same way, he has included two hdmi, which allows it to be used as multi monitorhas a new graphics processor that offers a 4k video output and 60 HZ refresh rate. Finally, it should be mentioned that this latest version of raspberry will allow you to take better advantage of Wi-Fi AC networks and has support for Bluetooth 5.0. This means that Internet access will not be a problem when creating your own Web server.
Materials and requirements to use Raspberry Pi as a server What do I need to do all the work?
In order to use your raspberry pi as a server it will be necessary that you meet certain requirements and materials for it.
Which we are going to show you below:
- A plate RaspberryPi.
- A micro SD card with the Raspbian operating system.
- A Internet connection either through a ethernet network cable or through Wi-Fi.
- A electricity supply via a micro USB cable.
Taking into account that web servers work in “headless” that is, without screens or devices and represents the variant with greater energy savings, the most appropriate in this case is to configure a remote access to the server power inserted from SSH-protocol with the help of a SSH client.
Therefore, if you make the decision of the administration via SSHthen you must enter the IPv4 address of the Raspberry Pi in your SSH client to be able to connect them to each other, in the event that you do not know what the IP address of your board is, then you can access it entering the command hostname –i In the terminal. If you are using raspberry pi no display and no input device, then you can get the IP address by searching for the router in your web browser.
In order to use the web server to create a private cloud or for any other type of application, a larger storage space will be needed, so these capacities need to be expanded. In the case of the Raspberry Pi This is very easy to achieve by means of a external hard drive or USB stick.
Learn step by step how to create your home web server with Raspberry Pi using LAMP
In order to create a Raspberry Pi Web Server with LAMP you will need to follow each of the steps that we are going to indicate here, keep in mind that this process is going to be carried out with Raspbian, and this is because LAMP is the acronym for a software package that is made up of a Linux operating system, an Apache web server, a MySQL database, and the PHP scripting language.
Here not only the LAMP pack must be installed, but it will also be installed phpMyAdmin. In this case you will have to log in to the console of your Raspberry Pi. It is important that before configuring the LAMP software pack, the first thing you should do is “Update all the packs that are already installed”.
To do this you must use the following commands:
sudo apt-get updatesudo apt-get upgrade
After this you will be able to start with the installation of each of the LAMP elements. Keep in mind that this is a procedure that is separated by phases, which is why you must follow each of the steps that we will indicate below in detail.
Apache Configuration
The installation of this Apache Servers HTTP server it is done in a simple and fast way, it will be carried out with a single command and the same will be applied to the other elements Raspberry Pi Web Server LAMP.
Therefore, here you are going to have to enter the following command:
sudo apt-get install apache2
After this it will be necessary for you to check if the installation has been carried out successfully, for this you will write the IP address of the Raspberry Pi in the address bar of your browser. Yes Apche2 has been installed correctly, then a default page will appear in the browser with the message “It Works”. This web page in HTML format is located at Raspbian Jessie In the address book /var/www/html/index.html/ and the old version of Raspbian called Wheezy under the directory /var/www/index.html.
This page can be checked in the directory and other types of web pages can be included there:
sudo nano /var/www/index.htmlsudo nano /var/www/html/index.html
Here you are going to enter any of those two commands. If you have introduced changes you will be able to see them after reloading the web page of the browser.
Configure PHP
It is important to carry out PHP5 installation, since with this not only the web server will be able to process files HTML, JavaScript, or CSSbut you can also process the PHPs.
Therefore, it will be necessary to take your installation through the following way:
sudo apt-get install php5 libapache2-mod-php5
After this you will be able to generate a PHP file under /var/www as a test you will have to install the phpinfo.php file:
sudo nano phpinfo.php
Later you will have to make the following corrections in the editor:
<?php

Phpinfo();

¿>
In this way if you have entered /infophp.pho in order to obtain the address Raspberry IP in the browser being as follows: http://192.168.x.x/phpinfo.php, then the corresponding website should appear. This will take place when PHP has been installed on your board correctly.
Configure MySQL
MySQL is mostly used to create the databases of web servers, therefore, you will have to create your own, to do so, write the following command:
sudo apt-get install php5-mysql mysql-server mysql-client
Here you will have the opportunity to install everything necessary for it, you will also be asked to create the root password for MySQL. When you have done this and the database configuration is complete, then the mysql installation, so this will all reset.
Configure phpMyAdmin
Finally you can use phpMyAdmin to manage the database (MySQL) and it is that with the help of this free software you will have the opportunity to easily manage the database through a graphical interface in the browser.
For this it will be necessary to install phpMyAdmin through the following command:
sudo apt-get install phpMyAdmin
Now on the screen that is shown below you will have to select Apache 2 as a web server. You will then be asked if you want to install the phpMyAdmin administrative database, which you will accept. After this it will be necessary for you to choose a password, if you want you can put the same one as for the database and thus we complete the installation. When you have done all this it will be necessary to perform the link phpMyAdmin with the Apache web server.
In order to execute this, you will need to do it with the following command, on which you can edit the apache2.conf configuration file with the nano editor:
sudo nano /etc/apache2/apache2.conf
Here you will have to place the cursor on the end of the configuration file or if you prefer you can press the “Ctrl + V” keys several times simultaneously and enter the new command line in the file:
Include /etc/phpMyAdmin/apache.conf
You will need to save all changes made via the key combination “Ctrl + O” and then close the configuration file by pressing the keys “Ctrl + X”.
When you have done this, you will need to update the Apache web server by including a new command in the console:
/etc/init.d/apache2 restart
Finally, after having carried out the previous steps, not only has the web server been configured in its entirety, but your database is now ready to be managed using phpMyAdmin on the server.
For this it is necessary to enter the IP address of the Raspberry Pi in the address bar followed by /phpMyAdmin, it should look like this:
("http://192.168.X.X/phpmyadmin")
Once there you will register on the page of phpMyAdmin with the username of root and with the password that has been set in mysql previously established. When you log in you will be able to add sets of data in phpMyAdmin, as well as remove databases, tables or create them and in turn to be able to use other types of functions.
We teach you step by step how to turn your Raspberry Pi into a private server with PHP and MariaDB easily and quickly
At this point we are going to teach you how to convert your raspberry pi on a private server with PHP Y MariaDB in a very easy and fast way.
In this case, each of them refers to the following:
-
MariaDB:Like MySQL Open Source Fork. It is quite similar in terms of performance, but it is free software that is currently maintained by its own community. -
PHP:As a scripting language, it will try to install version 7.2 on the Raspberry, which is not available in the official repositories. Considering that this latest version is the most stable.
Turn your Raspberry into a private server with PHP
As already mentioned on this occasion, it will be about installing what is the latest available version of PHP. Taking into account that Debian Due to its update policies and its robust distributions, it does not always have the latest versions in its repository, as is the case with PHP in this case. This means that by default the version 7.0since it was previously tried install 7.2 but distro breaksso it will be done with PHP 7.0.
Therefore, to start doing this, you will need to enter the following commands:
sudo apt-get updatesudo apt install php7.0-fpm php7.0-common php7.0-mbstring php7.0-xmlrpc php7.0-soap php7.0-gd php7.0-xml php7.0-intl php7.0-mysql php7.0-cli php7.0-mcrypt php7.0-zip php7.0-curl
When all the repertoire has been installed, the next thing will be to edit the PHP configuration in order to optimize it and nginx to tell it to take care of serving the php files.
In order to optimize php you will have to edit the php.inc file, for this the following command is used:
sudo nano /etc/php/7.0/fpm/php.ini
Here it is important to make sure that all the values are correct. To do this, press the “Ctrl + W” keys and search inside the nano editor:
file_uploads = On

allow_url_fopen = On

memory_limit = 256M

upload_max_filesize = 100M

fix_pathinfo=0

max_execution_time = 360
After this it will be necessary to edit the nginx configuration to tell it to handle processing php files:
sudo nano /etc/nginx/sistes-available/default
The following will be to disconnect what is necessary so that nginx can take care of serving php files (they are marked in bold):
# pass PHP scripts to FastCGI server

#

location ~ .php$ {

include snippets/fastcgi-php.conf;

#

# # With php-fpm (or other unix sockets):

fastcgi_pass unix:/var/run/php/php7.0-fpm.sock;

# # With php-cgi (or other tcp sockets):

# fastcgi_pass 127.0.0.1:9000;

}

# Add index.php to the list if you are using PHP

index php index.html index.htm index.nginx-debian.html;
Subsequently, php and nginx will be restarted using these commands:
sudo service php7.0-fpm restartsudo service nginx restart
In order to know if all this has worked correctly, it will have to be checked, for this a php file must be created using the following command:
sudo nano /var/www/html/pruebaphp.php
And then the following content is added:
<?php

phpinfo();

?>
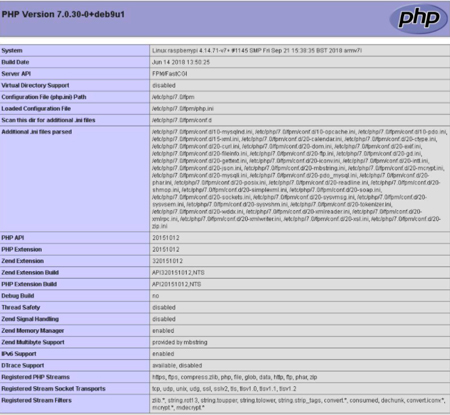
If everything has been done correctly and it has gone well, then you should see the following on the screen:
Create a private server with MariaDB
Now it’s time to install a database engine inside the homemade web server. In this case it should be mentioned that MariaDB It is one of the best options. especially for its high efficiency and because it is free software.
Therefore, to carry out its installation on the Raspberry Pi you must enter the following command:
sudo apt-get updatesudo apt-get install mariadb-server mariadb-client
After this the installation of the database will be completed, but this must be made much more secure, for this add this command:
sudo mysql_secure_installation.
The most recommended in this case is to leave all the options as they appear by default. Only if you want in the test environment and locally, the root user is not given a password for convenience. But in production it is important to establish password and disable login root user remote.
Done all this you can install phpMyAdmin, but if the use you are going to give it does not go beyond the creation of the database, then you can do it from the command line itself. There is also another alternative that is highly recommended and it is Install webminwhich has the function of creating a database, allows you to change the privileges for the root user Through the program or the command line.
In this case the following command would be added:
grant all privileges on wpbasico.* to root@localhost identified by 'tupassword';
Computing