Index:
UPDATED ✅ Do you want to know how to set the text of a text box in Microsoft Word documents? ⭐ ENTER HERE ⭐ and learn everything FROM ZERO!
Microsoft Word is one of the most widely used word processors in the world.. One of the reasons for its success is due to the great variety of tools that it offers the user. Just as the compatibility with other programs, both inside and outside the family Office.
One of these utilities may be more related to power point what with Word. This is the text box. This tool allows create separate boxes of the body of document. Allowing to vary the sizeorientation and other characteristics.
If you want to learn more about this, so you can make great presentations without leaving Microsoft Wordwe recommend this post.
What should we take into consideration when changing the direction of the text in a text box?
A text box can be very functional in a document. Word. Among its applications we can mention diagrams, summary tables, written presentations, family treesamong many others.
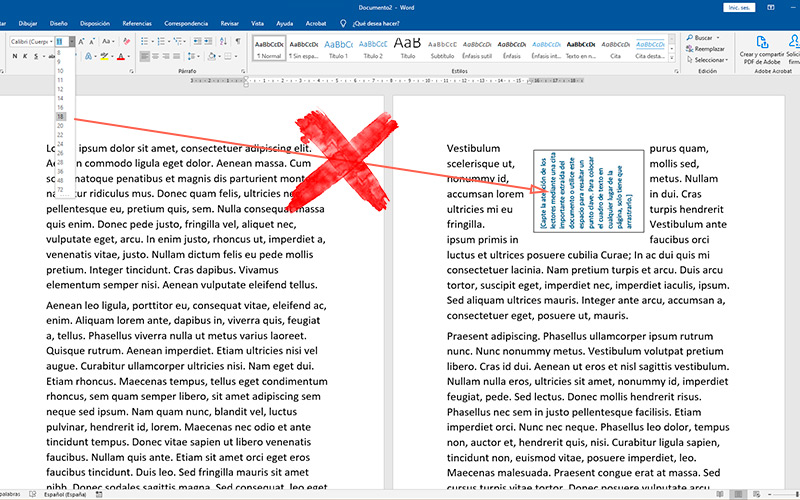
Due to the variety of positions and dimensions of text, which these constructions require, many times a more dynamic element is necessary. It is because of that text boxes have the option to rotate their content.
But before carrying out this process, it is necessary to know some features and issues. To begin with, we can mention that you have to consider that this element will behave as an object. That is will not share the general properties of the rest of the text.

In this sense, you will also have to take into account that the global modifications you make typography, color, size, alignment, etc. Will not apply to box content of text. In order to change the features mentioned to the words inside the box, you must select it separately.
Likewise, at rotate textual directionparagraph properties, such as “Align to the left”, “Center”, “Vignettes” and the others within this section, will also change their angle. In this way it will correspond to the turn you made in the frame.
Regarding the tool spelling and grammar check, you should not worry. The same will contain the contents of the box.
As we mentioned at the beginning, this element behaves like an objectwhich entails some features. Among which we can find, place in front of and behind the text, transparencies, rotation, scale and all those related to this category.
Steps to set the text direction in a Word text box
Since the recommended uses for this tool are found intended for synoptic tables and other diagramsit is necessary to have the possibility of rotate text direction.
To achieve this, you need to follow these steps:
Set text direction
Before starting, it is important that you know that this method is different from rotate the text box. What we will actually do is change the orientation of the content within it.
For it:
- Start microsoft Word.
- on the button “New” create a blank document. You can also open some other that you have already worked on.
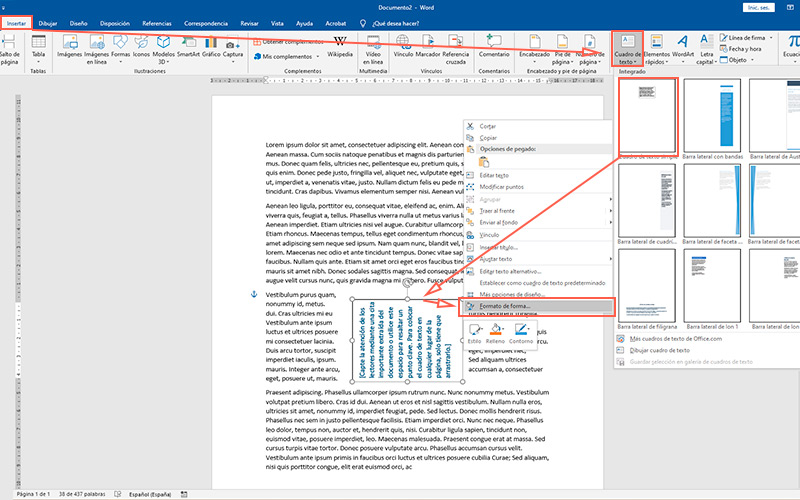
- Go to the menu “Insert”.
- Within it, choose “text box” which is in the section “Text”.
- press on “simple text box”this will make it easier for you to understand the method.

- write inside of the box that was just created. It can be any content and It does not matter if you exceed limits.
- Then press with the secondary button mouse over the border of the box.
- Within this menu, click on “Shape Format”.
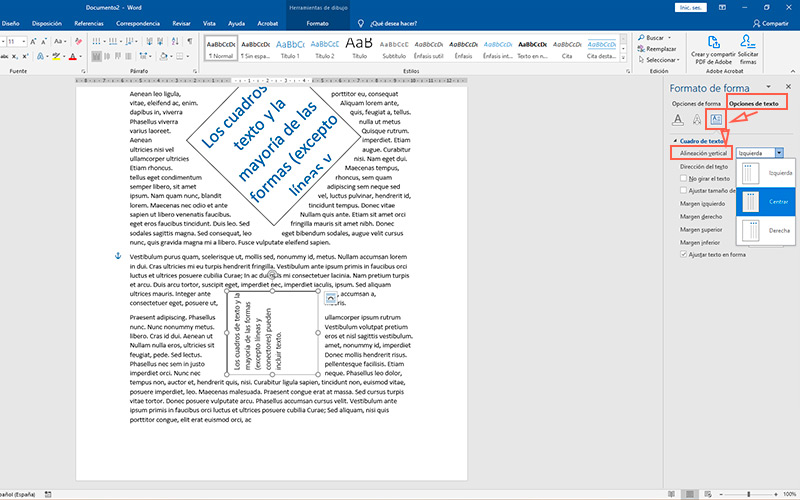
- will appear a side options bar.
- By default, the “shape options”change it to “Text Options”.
- Below this you will find three icons, choose the third one, “Design and properties”.
- Inside the drop down “text direction” changes from horizontal to “Rotate text” at 90 or 270 degrees, as appropriate.
Choose text position
Before closing the options sidebarIt is possible that change the position of the text regarding the painting. Similar to what can happen in a Excel table or of Word.
To do this, follow these steps:

- Within the same section, find the option “vertical alignment”.
- Change the alignment within the dropdown menu of it. Can be “Left”, “Center” either “Right”.
- If you want to change the alignment of the content with respect to its own vertical axis, you must go to the tab “Start” and do it with the buttons of the section “Paragraph”.
Automatically adjust shape based on text volume
Do you remember that in one of the previous paragraphs we mentioned that it did not matter if you exceeded the limits of the box? It was because within the side panel there is an option that allows you to reset the dimensions of the box depending on the size of the content.
To perform this action you just have to deactivate the option “Wrap text into shape”. This will make change its extension based on the length and width of the text it contains. But you must bear in mind that if it is one or more long sentencesthe shape of the box could not be the desired.
However, there is a simple solution to this. Insert line breaks between sentences using the button “Enter” of the keyboard.
Software