UPDATED ✅ Your external hard drive doesn’t turn on the LED, it won’t start and it makes noise and you don’t know how to fix it? ⭐ ENTER HERE ⭐ and discover how to do it ✅ EASY and FAST ✅
Use a external hard drive or portable drives to save information, either files, documents, photos, videos, among others, has become very common today. This in order to be able to transport them from one place to another in a much simpler way. However, this type of device can cause you some kind of problem until you delete or lose all the information you store on it.
In general, one of the most common problems of these external equipment is that are not recognized by the computer, they don’t start or start to make a lot of noise, keep in mind that this last symptom is a sign that it may be close to damage.
Despite this type of failure, it is important to mention that if your hard drive won’t boot can have solution, In addition, it can be solved by yourself through some very simple methods to perform. Therefore, fixing and recovering information from these computers is possible. For this, just follow the methods that we will explain below.
Steps and Methods to Fix External Hard Drive Won’t Boot, Noise or Click and Recover Data

Can fix or repair these devices is something possible today, for this it will be necessary that you perform some methods that will help you solve problems such as the noise they emit when they work, when they don’t start or when they don’t recover the data stored in it.
In such a way, that here we are going to teach you some methods so that you can solve these drawbacks To do this, follow each of the steps that we will teach you.
Fix internal errors using CMD
The first step that we are going to explain to you in order to solve these types of problems is to fix internal errors using cmd. For this it will be necessary run the fixer discs to correct any external device internal error type.
In addition, this type of solution has two ways to carry it out, to do so follow the instructions below:
manually
- The first thing is to write the “Symbol of the system” in the search box and then select it.
- The next thing is to write “chkdsk [letra de unidad:] /R” you must replace where it is indicated “drive letter” with the letter that corresponds to your drive external hard drive.
- Once this is written, press the key “Enter” to start the verification process.
- When the verification is finished you must write “Exit” and then press the key “Enter” for this process to finish.
Automatically with free disk management software

Download EaseUS Partition Master Home Edition
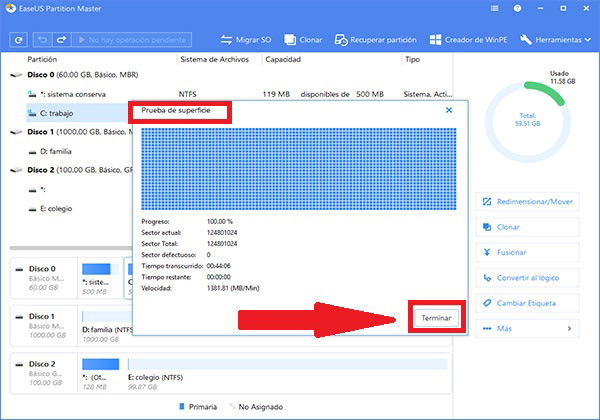
- The first thing will be to execute “EaseUS Partition Master Free” and then right click on the partition you want to check, there a menu will be displayed where we select “Check partition”.
-
Now you will have to choose a form of verification, the following options will be shown on the screen:
- “Check partition properties”
- “Surface Test”
- “Require Windows Chkdsk.exe to fix errors”
- Once you have selected one of them, click on “OKAY”.
- Finally, it only remains to wait for the program to start doing its job and automatically corrects errors that are causing damage to the external hard drive. Once the analysis has been carried out, select “End up” for the process to finish.
Uninstall drivers or controllers
Another way to solve this type of problem in external hard drives is by uninstalling the drivers or driver.
To do this, you will need to perform these steps:
- Start by clicking on the menu “Start” from your computer and then type the following: “devmgmt.msc” and press the key “Enter”.
- Now we start the “Device administrator”.
- The next thing is to select “Extend Universal Serial Bus Controller”.
- We must check if any of the devices appear as unrecognized.
- In the event that a device is shown as “Unrecognized” you must go to the tab “Controllers” there you must remove or uninstall the driver.
- The next thing will be to check again if the external hard drive appears on the computer.
- In the event that it is not detected, you must Restart the system.
- If the equipment has turned on again and it already appears, but after a few minutes it is erased again, you will need to repeat the steps explained above and go to the “Disk Management”.
- Once you are inside this section, you must change external drive letter. To do this, start a letter where it last appeared.
This method not only serves to correct the problems of external hard drives, but you can also use it to correct similar problems with SD cards, USB or partitions on the hard drive.
Replace control board
In some of the occasions the problems generated in the external hard drive as the noise that they begin to generate when they start to work may be due to the fact that there is something that is causing a problem. short or malfunction in the control board of the equipment.
In such a way that many of the experts in this area recommend their users to change this control boardwhich will make the disk start working again and in a correct way.
However, it is important to mention that when you want to change this plate, it must be done by another one exactly like her. Especially since there are disc models that even being the same model have different micros.
Keep in mind that if you change it for another controller board otherwise this change would not have no successful operation. Therefore, the problem in disk it would continue to be maintained, even some new ones appear.
put it in the freezer

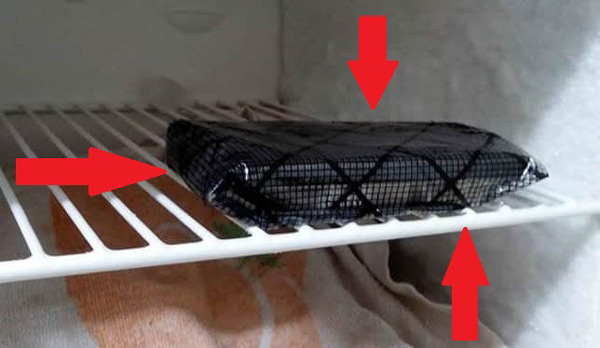
Another way that we can use to try to solve this type of problem with these external devices is putting them in the freezer. It is not a method that is certified and that guarantees that it is 100% true.
However, there are a large number of users who mention that this method is very effective. And it is that put the hard drive in freezer it can be repaired especially if its fault is to make noise.
Please note that these external equipment usually cause a noise due to a excess heat, which indicates that cooling will allow the computer to read again and it can recover the data stored in it.
In order to do this, you will need to follow these instructions:
- the first thing will be unplug the hard drive of the computer.
- Next, it must wrap in paper or fabric and put it in the freezer for at least a period of time of at least 12 hours.
- Once the 12 hours have passed and removed from the freezer, previously dried with a dry cloth, must be reconnect to the computer.
- In this step, the hard disk should already work for you, but, otherwise, it will be necessary to repeat the process again. This time you should leave the disc for 24 hours to 48 hours in the freezer.
Is your external hard drive still not working? How to recover data from your external memory?
If you have already tried each of the methods explained above and your hard drive is still not workingyou can try another way to power extract the data from your external memory.
It is worth mentioning that before trying this type of solution that we will explain below, you must make sure that your computer already not under warranty, If it is still in that period of time, it is best to take it to the store and they will take care of solving the problem. However, if it has already been lost, then you can try this method yourself.
For this it will be necessary to be able to find the real problem of all this, in this way we must begin to rule out possible problems that they may be generating external memory failure. Please note that it may be a connectivity problemin this case it must check the connection between USB/Thunderbolt as it may not be working properly.
You can do this check using another USB cable, In the event that it works, you simply have to change the cable and the problem will be solved.
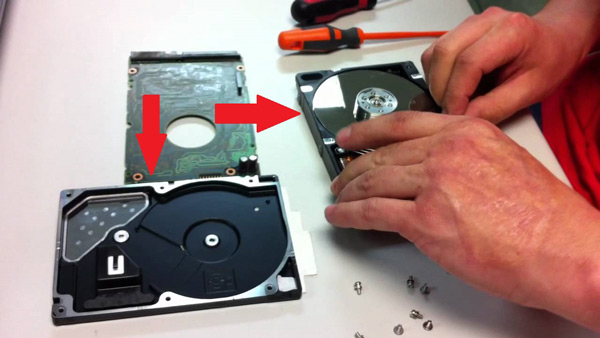
Now if the problem it is not the cable connection We must try another step to be able to find a way to solve the problem. In this case it is open the hard drivefor this it will be necessary Remove your memory casing.
For this you have to be very careful not to break it, in the event that this happens nothing serious will happen, the important thing is that the hard drive is always kept intact and none of its pieces are affected.

Once the device has been disassembled, it will be necessary to check that the connector located inside the computer is properly connected to the hard drive. In the event that this connector is not correct, you must accommodate it and try to use it again. the hard drive. In case you are connected correctly it is recommended try with another new connector, Usually, these connectors are usually fairly low priced.
In the case that external memory continue to damageit may be that the disk is really damaged and irreparable, for this it will be necessary that you try to find a solution with an expert in the area. In this way you can try to recover all the data stored in it.
Hardware