Index:
UPDATED ✅ Want to build an entire VPN server on a single Raspberry Pi board? ⭐ ENTER HERE ⭐ Learn Everything FROM ZERO! ⭐
Currently these microcomputers are used for different types of usesand it is that they allow carrying out different home automation projects, multimedia center, security and professionals.
This is how these small plates can be used to create file servers, web servers and above all it can work for you as a VPN server. So your Internet searches can be much more private.
Today you can get a lot of paid and free VPN, but being able to create one yourself will be truly amazing. This is how we are going to teach you how to how to set up a VPN server with your Raspberry Pi right from the start.
Advantages of using your Raspberry Pi as a VPN server Why should you do this project instead of using a free one?

Undoubtedly VPNs They are one of the best services when it comes to wanting browse the Internet and access websites from other countries and above all for violate local government restrictions. This is how all this constitutes a virtual communication network where the requests and responses of the VPN servers and VPN clients are transferred directly over the Internet.
All this allows users to connect to a LAN network from any Internet access and thus be able to access its data. As well as establish communication with devices by remote controlsuch as fax machines or printers, or use it for Internet connection on the local or home network. You must bear in mind that these are encrypted connections, so surfing the Internet will be much safer.
According to all this, being able to use your Raspberry Pi as a VPN server It will certainly offer you certain advantages, especially since these boards are cheap and for each of their accessories, which allows these microcomputers to be a pretty good candidate to function as a VPN server.
Another advantage that can be mentioned is the energy consumption of these mini PCs, despite the fact that they have permanent operation on power consumption will be relatively low, so it will not generate high consumption and your bills will not increase. All this undoubtedly becomes a perfect combination to turn this tiny board into a powerful VPN server.
What are the best Raspberry Pi to use as a VPN server? The most profitable models you can buy
Since the launch of this microcomputer, different versions and models, each of them with its own characteristics and functions, although basically each version has become a improvement of its predecessor. This is how here we are going to show you what they are the best models of Raspberry Pi 2 which you can start using as VPN server in your local network.
To do this, follow the list that we will show you below:
Raspberry Pi 2

We start with this board model which was one of the first to be released. It is considered a very good alternative to carry out different types of projects, one of them is to be used as VPN server. Clearly when compared to the models above the Pi 2 wouldn’t be so good for it, but if you have this Raspberry and you want to carry out this type of project you can do it easily.
when working with the Pi 2 to be used as a VPN Server It is best to use a 1024 bit encryption, since a higher one does not work as well as it would cause a loss of performance. Keep in mind that this model has the BCM2836 chip with more MHZ and retains the same architecture as its predecessors. This is how the Pi 2 has a lot of new features and improvements.
Some of the most important features of the Pi 2 is 1 GB RAM at 450 MHZ, a new ARM Cortex-A7 CPU of four cores at 900 MHZbecoming much more powerful than its predecessors, making it a very good alternative for a large number of projects.
Raspberry Pi 3

Without a doubt, this version will offer you better functions and components at the time of create your VPN server. And this version of the mini pc’s It has come with a large number of new features that have made it one of the best Raspberry Pi, so its use can be used in many different types of projects.
If this board is used to create a VPN server, it is best recommended that it be used with a 2048 bit encryption, since clearly this board has better performance and better capabilities so it will not be affected by this encryption. The Pi 3 has a ARM Cortex A53 processor of quad core a 1.2GHz 64-Bitthis indicates that up to 10 times more performance can be obtained than previous versions and up to 50% more than the Pi 2 model.
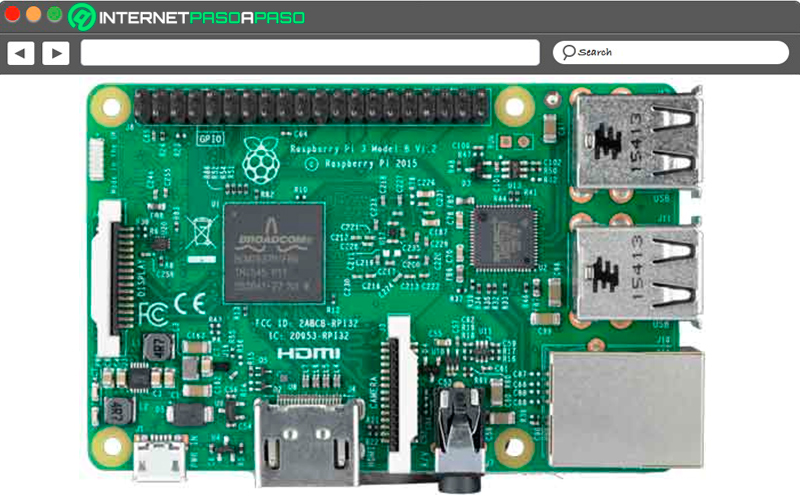
One of the most important aspects of the Pi 3 is that it offers Bluetooth and Wi-Fi connectivity without the need to use adapters for it, which allows you to have better connectivity at all times. However, it should be mentioned that it still retains other characteristics such as USB ports, HDMI port, microSD slot, Ethernet inputamong others.
Raspberry Pi 4

Finally we present you the Pi 4 modelwhich has been the last to be launched and therefore is the most powerful and advanced model of all RaspberryPi. This is how this plate has become one of the best alternatives when wanting to carry out any type of project, either for to create media, game consoles, web servers or VPNs, since it has all the necessary characteristics for it.
If there is something to highlight, it is its performance, which is much higher than that of any other raspberry piall this thanks to its specifications and its processor, it also has a 8 GB random access memory. This is how, thanks to all this, you can now use applications much moremore demanding in terms of RAM such as apps in desktop or server format.
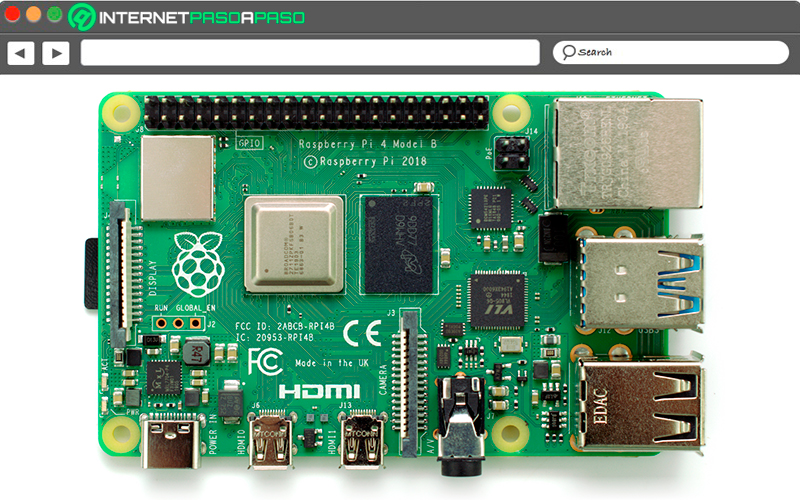
It should also be mentioned that it has new components such as its ports, now it has USB 3.0 and 2.0 portsthus achieving a standard that offers a higher transfer of data. Finally, it should be mentioned that this model includes two HDMI ports which will allow you to connect two monitors simultaneously, as well as connections to WiFi AC networks and support for Bluetooth 5.0.
Materials and requirements to use Raspberry Pi as a VPN server. What do I need to carry out the entire project process?

if you’re thinking about turn your microcomputer into a VPN serverthen you need to know that materials and requirements you must have for it. Keep in mind that, like any process, it has its guidelines and conditions.
This is how below we show you everything you will need to be able to carry out this procedure easily and quickly:
- A plate Raspberry Pi model 2 or higherpreferably it is advised to use the latest version, in this case the Raspberry Pi 4.
- The micro SD card with the Raspbian-Jessie operating system
- Have a Internet connection preferably this should be by Ethernet cable since in this way the network suffers fewer drops.
- A stable power supply, this can be provided by the micro USB cables of smartphone and tablet chargers.
After having everything mentioned at hand, you need to make a fundamental decision, in this case you can install the VPN server directly on the Raspberry Pi, to which you would have to connect a mouse and keyboard via USB and a monitor via HDMI cable or do it through the ssh-clienta software that uses a secure shell protocol to connect remotely with another computer.
This is how the remote maintenance of the server with SSH It is one of the most recommended variants, since this way it will be much easier to access the VPN server from a different computer. Therefore, if you decide to go for the second option, then you can use different very common ways to access and operate a Raspberry Pi remotely, such as WinSCP or Putty for Windows or OPenSSH for operating systems UNIX.
In order to connect this software with the board, you need to enter the Raspberry Pi IPv4 address on the client, in this case the client is going to be the device from where you want to access the board and in this way they connect to each other. For this you must enter the address 192.168.0.1 in the address bar of your preferred browser to open the router menu of your Raspberry Pi, from there you will be able to obtain the IP address.
Set the IP address if you use the SSH client
When you decide to use the method of sshclient, The best thing to do in this case is to assign a static private IP address to the Raspberry Pi on the home network. If this is not the case, then every time the microcomputer is accessed via SSH, a new temporary dynamic address would have to be found and connected to the client, which will clearly end up becoming tedious for everyone.
However, the most important thing in this regard is to be able to link the plate with a IP adress permanent to use OPenVPN with which we will be working. All this is because the VPN server must always be available and under the same home network address so that it can be accessed continuously, as well as be constantly available on the Internet.
But keep in mind that an Internet connection only has a public dynamic IP address that is constantly changing. after 24 hoursall this will hinder the availability of the server under the same IP adress. Therefore, if your Internet connection does not have a public static IP address you’re going to have to resort to configuring a Dynamic DNS (DDNS) as the only alternative. Finally, so that your microcomputer is always online as a server, updates and security are essential.
Learn step by step how to create your VPN server with a Raspberry Pi from scratch

considering everything requirements and materials that you need to carry out this installation, and the different methods that exist for it, here we are going to explain how the procedure is so that you can create your own VPN server from home in an easy and fast way.
To do this, follow in detail everything that we will teach you below:
Preparation of the Raspberry Pi
As already mentioned in the post, for this example we are going to work with OpenVPNthis being the best option to work with a Raspberry Pi board. Therefore, before starting with the OpenVPN installationthe first step is going to be to open the terminal of your Raspberry Pi to check if there are pending updates for already installed packages.
In order to do this, you need to enter the following commands:
sudo apt-get update.sudo apt-get upgrade.
If you have never changed the standard password of the microcomputer, then this is the time to do it, keep in mind that by default they usually have as user: Pi and password: Raspberry. In this way you will avoid any unauthorized access to the system, both locally and via SSH from the network.
Now with the application of this command the configuration of the microcomputer will be opened where you will be able to create a password that is sufficiently secure:
sudo raspi-config
Installing OpenVPN and creating the easy-rsa file
Now you have to start with installation of OpnVPN and Open SSLbeing this u software that is responsible for encrypting the Internet connection.
To do this you must enter the following command:
sudo apt-get install openvpn openssl
After having installed OpenVPN, predefined scripts will need to be copied easy-rsa in the directory of OpenVPN settings. This is going to be where the certificates and keys are saved with a command that only works with Rabian Jessieit should be mentioned that in the previous operating system the files are located at this address: /usr/share/doc/openvpn/examples/easy-rsa/2.0).
To do this you must enter the following command line:
sudo cp –r /usr/share/easy-rsa /etc/openvpn/easy-rsa
Next, the /etc/openvpn/easy-rsa/vars file will be opened in the console. This command must be added to configure it:
sudo nano /etc/openvpn/easy-rsa/vars
In order to change the settings it is necessary to replace the line export EASY_RSA= “’pwd’” with the following line:
Export EASY_RSA= “/etc/openvpn/easy-rsa”
Keep in mind that in this file you will also be able to modify the length of the key, with this you will be able to determine the security level of the encryption. In the case of The Raspberry Pi 3 you can enjoy enough performance to be able to process without difficulty the key length of 2048 bits. While in the Pi2this encryption can cause performance losses, so it is only convenient use 1024-bit encryption.
The ciphers of 4096 bit They’re only going to be useful in a few cases, so they’re not that important in the end. In order to change the length of the key, adjust the number of bits in the line export KEY_SIZE=2048. When you have done all this you will only have to back up the configuration file easy-rsa where you will need to have the rights of Super user to be able to integrate all the adjustments made in the environment variables. For this you need to run the script vars with the command source.
Finally, you will have to make the configuration file that has been generated accessible through a symbolic link under the name of openssl.cnf, to do this enter the following command lines:
Cd /etc/openvpn/easy-rsa

Sudo su

Source vars

Ln –s openssl-1.0.0.cnf openssl.cnf
Run the creation of certificates and keys for OpenVPN
It is important that before starting with creating new keys for OpenVPN, make sure there are no old keys already created.
In order to verify this, you need to enter the following command:
./clean-all

./build-ca, OpenVPN
At this point you will need to add different data to identify the server certificate before the clients, but here you will be able to confirm the default information due to its little importance in the operation by pressing the key “Enter”.
Finally, you will have to generate the certificate for the server using this command line:
./build-key-server server
Now you will have to enter the new national code and ignore all other fields present there. To finish you must confirm the creation of the certificate by entering “Y” twice. When this create the CA and the server certificate, then they will install VPN clients.
Here you will have to create a certificate and key for each of the devices where you want to access the VPN. It is a process quite similar to the one that has just been carried out, so you must enter the your country code and confirm twice. If you want to each of the devices you can assign its own name.
Here you will have to write the following commands:
./build-key laptop

./buil-key tablet

./buil-key smartphone
Once the names of the devices have been defined, the next thing is to protect each one of them by means of a security code, so now the following commands must be used:
./build-key-pass laptop

./buil-key-pass tablet

./buil-key-pass smartphone
In order to finish creating the certificates and keys, you will have to apply the command to create the DH key that will be used on the server for the key exchange:
./build-dh
Keep in mind that this process may take a few minutes, but when it is finished, the session will be closed as a user with root permissions with the following command:
Exit
Generating the configuration file for OpenVPN
After the keys have been created for the server and clients to recognize each other, confirmed by CA. The next thing to do is run the VPN server settings.
To start with all this you will have to open the OpenVPN configuration file, you will do this with the following command line:
sudo nano /etc/openvpn/openvpn.conf
Keep in mind that it is an empty file, so it has to be completed with the following commands:
Dey tun

Proto udp

Port 1194
For what is the next step is going to create a SSL/TLS root certificate (ca), a digital key (KEY) in the easy-rsa directory and a digital certificate (cert).
It is very important that the correct bit cipher is entered (1024, 2048, etc.):
ca /etc/openvpn/easy-rsa/keys/ca.crt

cert /etc/openvpn/easy-rsa/keys/server.crt

key /etc/openvpn/easy-rsa/keys/server.key

dh /etc/openvpn/easy-rsa/keys/dh2048.pem
Now you will have to specify that the Raspberry Pi is used as a VPN server, for this it is necessary to name its IP address, as well as the network mask that is assigned to the VPN:
Server 10.8.0.0 255.255.255.0
In this way with the command redirect-gateway def1 bypass-dhcp clients will be indicated that all traffic is redirected through the VPN tunnel. In case you want you can try this setting and verify that everything is correct if security is very important to you. In the event that they occur difficulties or navigation slows down or canceledthen the instructions that we are going to indicate below should be used in some of those cases.
With them you will be able to name the public DNS servers with which the VPN server. In this way, in the following command lines, we will use as an example a IONOS server (217.237.150.188) and one of Google (8.8.8.8), but if you want you can replace it with the DNS server you want indicating the IPv4 address.
This is how with log-append /var/log/openvpn you will get the server events to write to the /var/log/openvpn file:
push "redirect-gateway def1 bypass-dhcp"

push "dhcp-option DNS 217.237.150.188"

push "dhcp-option DNS 8.8.8.8"

log-append /var/log/openvpn
After configuring the server, you can continue with the configuration of VPN clients.
For this it is necessary to create a configuration file where the following information will have to be entered:
persist-key

persist-tun

user nobody

group nogroup

status /var/log/openvpn-status.log

verb 3

client-to-client

comp-lzo
To finish this step with the help of the command client-to-client it can be determined that VPN clients not only will they recognize the server, but they can also recognize other VPN clients and with comp-izo LZO compression will be enabled, which will also be indicated in the client configuration file. After this you must save the changes by pressing “ctrl + 0” and to close “Ctrl+X”.
Make the creation of a script to be able to access the Internet with a client
In order to access the Internet connection on your local network through the VPN tunnel it will be necessary to create a redirect.
For these cases, the file /etc/init.d/rpivpn must be created, this will be done with the following command:
sudo nano /etc/init.d/rpivpn
Now the following comments are copied into the file and a header for a Linux-Init file is created:
#! /bin/sh

### BEGIN INIT INFO

# Provides: rpivpn

# Required-Start: $remote_fs $syslog

# Required-Stop: $remote_fs $syslog

# Default-Start: 2 3 4 5

# Default-Stop: 0 1 6

# Short-Description: VPN initialization script

### END INIT INFO
Next you will have to activate the IP_forward redirection by writing a 1 in the file as follows:
echo 'echo "1" > /proc/sys/net/ipv4/ip_forward' | sudo –s
After you’ve done all this, the next thing you’ll need to do is create a redirect for VPN packets with the iptables packet filter:
Iptables –A INPUT –i tun+ -j ACCEPT
Iptables –A FORWARD –i tun+ -j ACCEPT
When you have done this, all that remains is to create the necessary orders that allow the clients can access the LAN and the Internet.
In order to achieve this, you will need to add the following command lines:
iptables -A FORWARD -m state --state ESTABLISHED,RELATED -j ACCEPT

iptables -t nat -F POSTROUTING

iptables -t nat -A POSTROUTING -s 10.8.0.0/24 -o eth0 -j MASQUERADE
Once this is done, the following will be save and close the file. But for the redirection to be effective, it will be necessary to assign the corresponding rights to the script and install it as init file.
To do this, write the following:
sudo chmod +x /etc/init.d/rpivpn
sudo update-rc.d rpivpn defaults
Now you will have to run the script and restart the OpenVPN server using the following lines:
sudo /etc/init.d/rpivpn
sudo /etc/init.d/openvpn restart
Finally, close the configuration of the clients
This will be the last step to finish this whole procedure. Here it will be necessary collect certificates and keys of each client in their own package. To be able to do this, it is necessary to once again have the user rights. Super user. When these are assigned, then the folder should be accessed /etc/openvpn/easy-rsa/keys/ and then you are going to deposit the client configuration file in it. With the commands that we will teach you, the client file will be opened.
Keep in mind that all clients are configured in the same way, the only thing that has to be changed is the name of the device:
sudo su

cd /etc/openvpn/easy-rsa/keys

nano laptop.ovpn
In the client’s .ovpn file it will be necessary to add all these lines:
dev tun

client

proto udp

remote x.x.x.x 1194

resolv-retry infinite

nobind

persist-key

persist-tun

ca ca.crt

cert laptop.crt

key laptop.key

comp-lzo

verb 3
Once all this is done, the next thing is to adjust this content. This is how in the fourth line you will have to replace xxxx with the IP address of the DDNS provider. If you want, you also have the possibility to include a static IP address if you have one. Next you will find the port where the VPN server will be available.
In the row 10 and 11 The name of the client must be written. Once this is done, the changes must be saved and it is closed with the aforementioned commands. The next thing will be to compress the configuration file, along with its certificates and keys, in a zip file.
If for some reason you have not yet installed a compression package on the Raspberry Pi, then you can do so with the following command:
apt-get install zip
It is necessary to create the compressed file, for this the command that comes next (Note that you should always use the name of the correct client you are working with, in this case it is laptop):
zip /home/pi/raspberry_laptop.zip ca.crt laptop.crt laptop.key laptop.ovpn
Once this is done, it will only be necessary to configure the rights of the files and we finish with “Exit”:
Chown pi:pi /home/pi/Raspberry _laptp.zip

Exit
In this way this compressed file will be transferred from raspberry pi to the customer with a SFTP or SCP program and then the client is configured on the device. This is how it would be ready to access the local network connected to the client and its Internet connection from any external access point.
Computing