
Index:
UPDATED ✅ Do you want to connect and program an Arduino joystick for your project? ⭐ ENTER HERE ⭐ and Learn Everything FROM ZERO!
If you like electronics and you are a programmerthen with the help of Arduino you will be able to carry out a large number of projects that will allow you to carry out different types of activities in the real world. This is how you can also use a joystick on this platform in order to improve its use and achieve a better experience.
In this case a joystick is an input element for digital programswhich is constructed using a set of variable resistors. It is also considered as a very useful tool in the Arduino platform, which will help you give directions to what you want. In this way the joysticks are used to carry out remote control car projects and for video game controls.
In this way, it has become a very interesting tool for movement in two dimensionsin addition to offering ease of use and not requiring as much money for use. This is how here we are going to teach you what a joystick and how you can use it with Arduinoto do this, follow in detail everything that we will teach you next in the post.
What is a Joystick and what is it for in an Arduino project?
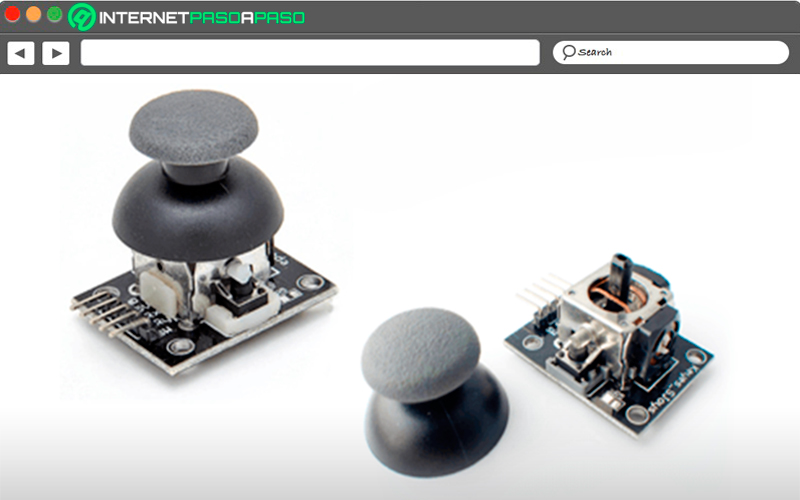
a joystick is a controller that can be add to electronics and Arduino projectsit provides the advantage of being able to add a greater amount of information than can be obtained simply with pushbuttons. In this way, those input elements are very similar to what they are analog sticks who have the most the controls of the Xbox or PlayStation game consoles and computers.
They are used when you need to have a much more control precise and smooth. All this has led it to become an excellent alternative for all those electronics who want to execute a project that requires certain movements.
These input components are made up of a rocker system with two orthogonal axes coupled to two potentiometers. These potentiometers are responsible for measuring the position of the lever in both axes. It should be mentioned that one of the axes is supported by a microswitch, this is what allows you to detect lever presses.
Therefore, these elements aim to facilitate what is the analog signal for the position of each axis, plus one digital signal that detects the keystrokes. Having an entry the X and Y axes in analog formyou can get to program the controls in a more advanced and precise way than you can get with a digital on/off control.
An example of this could be the following:
- It can increase movement speed of a robotic arm the older you are the measurement value, this means that as long as said value is higher, the speed will increase. The same thing happens when you want to make a car go faster or turn much faster. If these actions are executed only with pushbuttons it would be almost impossible to achieve smooth movements, but the robot would move with jumps, creating a sudden movement.
Lastly, it should be mentioned that the joysticks They are comfortable devices to use and very simple, they allow you to add a control to each of the electronic projects created with Arduino. This is how this component can be used to robotics projects, real vehicles, remote control cars, for a robotic arm, among many others.
Analog or Digital Which is the best joystick to use with Arduino?
Many of the users are constantly wondering which is the best joystick for use with ArduinoYes analog or digitalthe truth of all this is that the analog variation is continuous and gradualwhile the digital features discrete jumps so they end up being more abrupt. In the case of physics in real life it is composed of analog variations as it can be wave as for example the sound of light, the variation of speed, a stone in the wateramong others.
All of this is known as a continuous variation affecting the senses digital variations they only exist artificially. When you want to represent real life in a game the I/O interface between the user and the system You should try to hide digital variations in order to offer more realism to the simulation, trying to make them look analog.
analog joysticks They are made up of small potentiometers and pushbuttons Y the output signal is clearly analogbut later it must be demodulated to convert it to digital, since this is what allows it to be interpreted as data and input values for the system that is digital. Inside the computers there is a card that was usually found in the sound cards since it was demodulated and it is the one that is in charge of doing this converter basic system analog to digital.
The goal of all this is to use the variable voltage of each potentiometer to charge a capacitor, which is simply a charging device. electrical storage. Therefore, if the potentiometer is adjusted to be able to offer a greater resistancewill cause the condenser take longer to loadand if less is offered, then the capacitor will charge faster.
When discharging the capacitor for later time how long it takes to recharge, the convert can determine the position of the potentiometer and therefore, the joystick. In this case, the resulting measure of recharge ends up being a numerical value that the computer can recognize. That is why the PC will execute this operation every time it needs to perform a joystick reading.
It must be borne in mind that analog joysticks are those that connect to the port for analog joystick and not USB What are they digital ones. So everything that goes in and out of usb is digital. In this case the joystick port is designed as a two-way interface. analog joystick where each joystick has two buttons. In this way, the joystick port is not usually integrated into the motherboard components.
They can be integrated into type cards multiple I/O or in sound cards. This is how the port connector can allow the connection of two joysticks at the same time. In order to know if there is a joystick port on the computer, it must have a 15 pin connector which is located on the back of your CPU.
Finally I know you can tell that the Analog joysticks provide a better experience than digital ones, since they are much smoother and simpler, so they will offer a more real experience, while the digital ones are more abrupt and offer jumps, so they are not as smooth as the analog ones, this being the main difference between the two.
Learn step by step how to use a joystick with Arduino from scratch
Before starting to carry out this procedure, it is important to keep in mind that this joystick module has five pins which are numbered from left to right and are known as:
- GND: Pin connected to ground.
- +5V: power pin (5v).
- VRx: potentiometer readout pin for x-axis.
- VRy: potentiometer reading pin for the Y axis.
- SW: is an additional pin used for a push button at the bottom.
Bearing this in mind, here is the list of materials you must have to use an Arduino joystick from scratch:
- Arduino UNO/MEGA/LEONARDO/ELDER BROTHER among other models.
- Cables of connection.
- 4 LEDs.
- 4 resistors of 220 Ω.
Arduino code generation
From now on it will take place Using the joystick with an Arduino. As mentioned earlier in the post, this input component is a lever with a given motion in two dimensions. So this is nothing more than the regulation of the two potentiometers with respect to the movement that is printed to the joystick. This means that if the potentiometer is moved from left to right it would be like moving the potentiometer of a end to end.
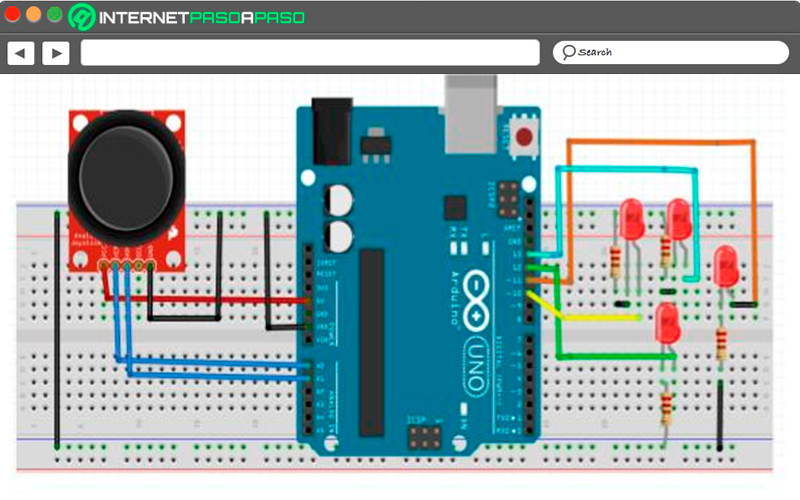
This is how it can be used very easily in the Arduino board. To do this, four Positioned LEDs in four directions relative to each other, either to the right, left, up, or down. The program will turn on the LED according to the direction of joystick movement. This means that if the joystick is moved up, then the led top and so on respectively with each of the others positioned leds.
connections
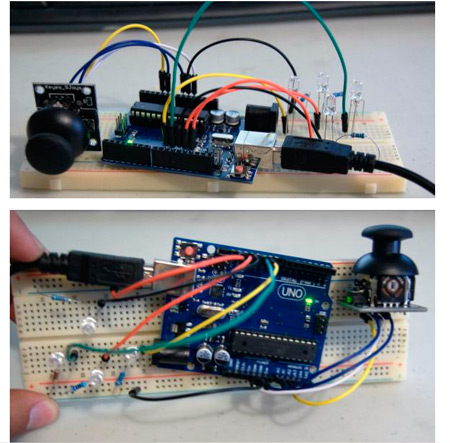
In the following images you can see how the connection of the two-axis analog joystick with button is made:
Code
In this case, it is about obtaining a reading with a given variable for each of the axes, in the value of the Xs will be read for the LEDs that are located at left and right, In these cases, values ranging from the 700 and 400this is because Arduino takes an analog reading with values ranging from 0 to 1023, that is to say, that the resistive value of the potentiometer, whatever it is, the Arduino board will understand it as a value that is within those parameters.
The same will happen for any of the directions that move the joystick. Taking into account everything mentioned above, it will be possible to carry out the use of the joystick with Arduino. It is important to keep in mind that each user will use it as they want to give it.
The Best Arduino Joystick Projects You Can Do Yourself
today in Arduino It has become very common to see different types of joystick projectsthis is because this input element has been converted to one of the best alternatives to carry out this type of electronic Activities, since it will allow to provide a analog movement to the different Arduino projects made in real life.
This is how we are going to show you which are the best Arduino projects with a joystick that you can do yourself from home:
Control 2 servo motors with joystick
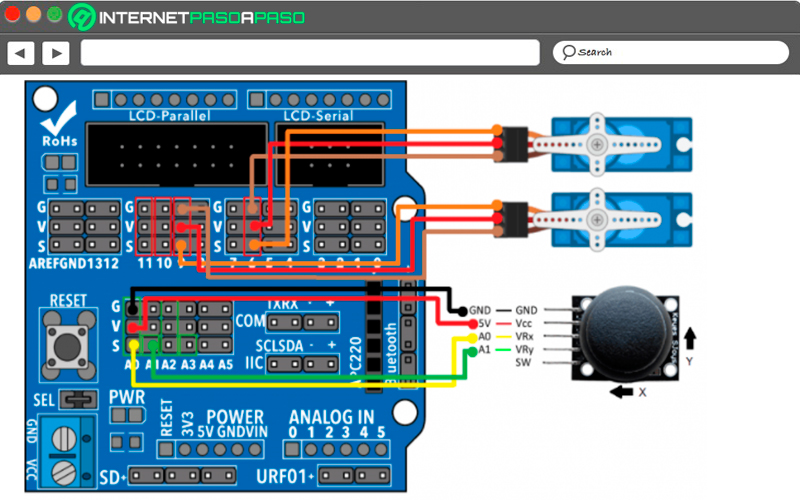
Thanks to the tool Arduino longer joystick elements electronic users will have the opportunity to learn to program a circuit that allow them control the position of 2 servomotors based on the position of a single joystick. Keep in mind that these input components are made up of two potentiometers, so each of the potentiometers must be associated with each servomotor.
In this way, the position of the servomotor will vary from the 0° to 180° depending on the joystick movement from left to right. Regarding the difficulty of the project, it can be said that it is made for intermediate users and which can take approximately 30 minutes to create.
Control the ARM Robot with 2 joysticks
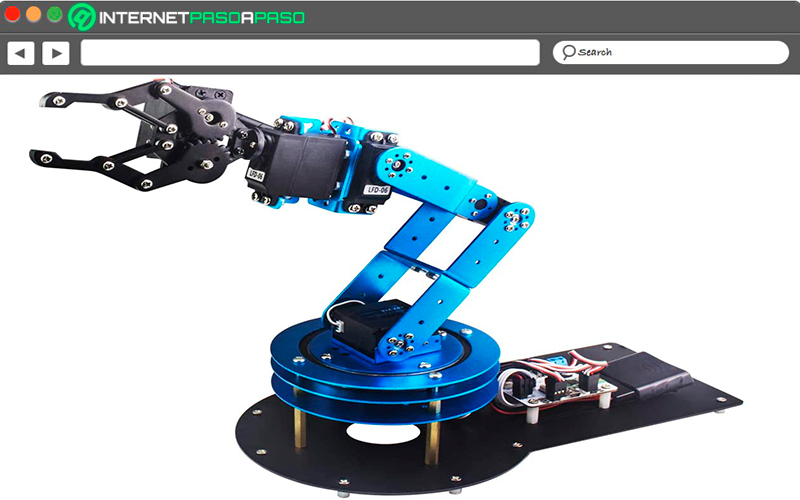
East robotics project in Arduino has become one of the most interesting and popular of recent times, which is how many electronics programmers have decided to focus on this type of project known as ARM Robotwhere it consists of giving it different movements in different directions to take certain objects that are light.
These movements can be controlled through 2 sticksit will allow move the forearm, pliers and arm in the direction you want. This is a project designed to intermediate users and which can take at least 60 minutes.
homemade robotic arm
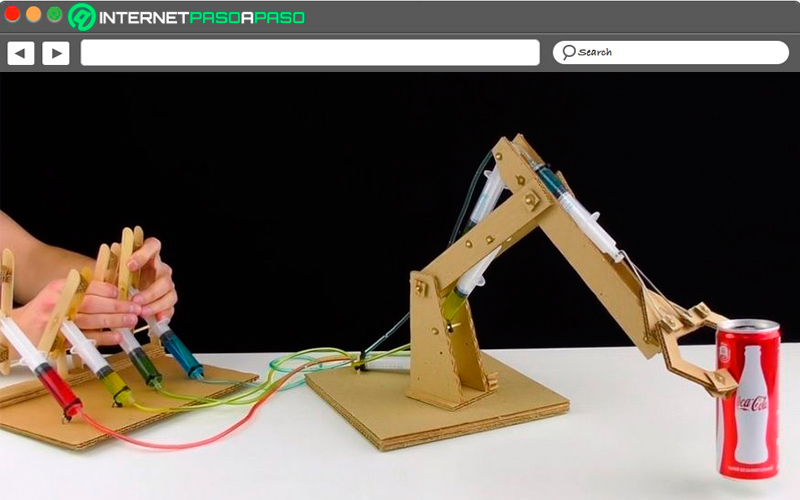
If you like the Arduino projectsthen you will have come across different robotic arm projects, these being one of the most used today. It consists of designing an arm in order to carry out different types of movements, it will have a stick, being this the component that will allow to give the different movements of the robot arm.
This is an ideal project for users who are just starting out with robotics projects so they can create it from home without the need for much knowledge. The same must be created with cardboard material to make it lightweight and easy to move.
Hardware