
Index:
UPDATED ✅ Do you want to know about ultrasonic sensors in Arduino and how to use them well? ⭐ ENTER HERE ⭐ and Learn Everything From Scratch!
If you like electronics and programming surely you have already worked with the Arduino platformcurrently used to carry out a lots of interesting and real electronic projects. This is how many of these projects need what is a ultrasonic sensorwhich is used to determine sensor distance with an object placed in front and which is currently very used in car GPS.
This type of sensor will let users know if they have any type of obstacle in front of them even though these can’t see around. Therefore, this component helps the Arduino board to measure distances and ensure that the different mechanisms created have the capacity to dodge all kinds of obstacles. It is also important to mention that this device has a measurement range between 3cm and 3m with a precision of 3mm.
As you can see, it has become one of the most useful and most important plugins for this platform at the time of create projects that are related to stopping moving objects. That is why here we are going to explain a little more about what this sensor is about and how you can start using it, To do this, follow in detail everything that we will teach you below.
What is an ultrasonic sensor and what is it for when working with Arduino?
Ultrasonic sensors with Arduino will allow you to measure distance through ultrasounds, so it has now become very common to find them in the new carssince many of them have them integrated into the GPS, allowing users to be able to know what obstacles are in front of them in case they cannot see around them.
In the same way it can be said that a sensor ultrasound It is a device that allows you to measure distances. The operation is based mainly on the sending of a high frequency pulse, not audible to humans. This pulse bounces with nearby objects and ends up being reflected on the sensorwho available a suitable microphone for that frequency.
To the power measure the time between pulses and knowing the speed of soundyou can estimate the distance of the object against whose surface hit the ultrasound pulse. In this way, the sensor will have the ability to indicate the proximity of impact against any object, allowing the user to avoid it.
It must be borne in mind that these sensors are cheap for the most part and above all that they are very easy to use. As for the measurement range of these sensors, it ranges from 3 cm to 3 m in practicebut the actual measurement range is considered to be much more limited, ranging from 20 cm to 2 meters.
These components are low precision sensors where the orientation of the surface to be measured can cause the wave to be reflected, falsifying said measurement. Due to this and other factors, they are considered not very suitable in environments with many objects, since it can cause the sound that bounces off the surfaces generate echoes and false measurements. Therefore, it can be said that they are not very suitable for outdoor operation.
Despite not offering a exact distance accuracy of objectsultrasonic sensors are currently widely used for many types of robotics projectswhere it is usual mount one or more sensors. In the event that a higher pressure is required in the measurement of the distance, then it is most recommended that they be accompanied by distance meters for optical and infrared sensors.
How does an ultrasound sensor work?
As has been mentioned, said sensor is mainly based on measure the time between sending and receiving a sound pulse. Therefore, it send ultrasonic waves through the trigger or trigger, it bounces off the object and the receiver or echo detects the wave. Depending on the time that the wave has taken to travel, it will be possible to determine the distance that exists against the object.
The speed of sound under conditions of temperature of 20 °C and 50% humidity and atmospheric pressure at sea level is 343 m/s. Transforming these units gives the following:

This means that the sound will it takes 29.2 microseconds to travel one centimeterthis allows to obtain the distance from the time between the emission and reception of the pulse.
For this it is necessary to use the following equation:

Here we must divide the time in two because when we measure the time that it takes the pulse to come and gothe distance traveled by the pulse is twice the distance to be measured.
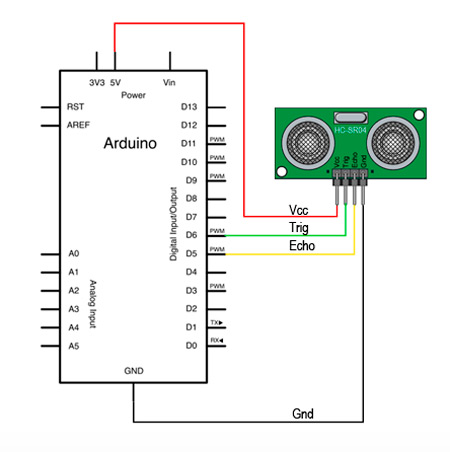
For all this it is necessary to apply the following electrical diagram:
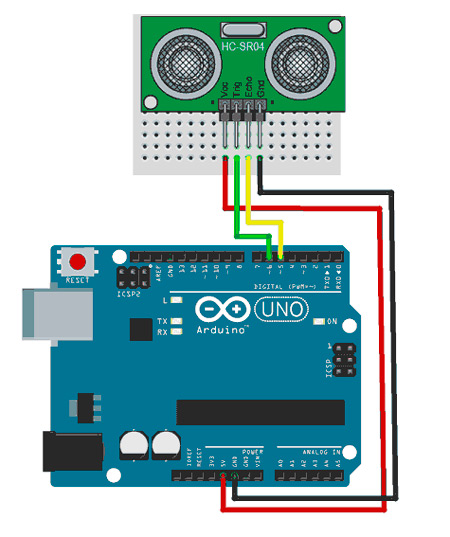
On the other hand, the assembly is a protoboard that would be like the following:
Learn step by step how to connect an ultrasonic sensor to your Arduino board from scratch
If you want to start using the ultrasonic sensor on your Arduino board, then here we are going to explain how to carry out this procedure in an easy and fast way. Keep in mind that for this you only need to have a arduino Board, this can be any plate model since the procedure will be the same for all of them. In this case, we will work with a Arduino UNO R3 board.
To do this, simply follow each of the steps that we will indicate below:
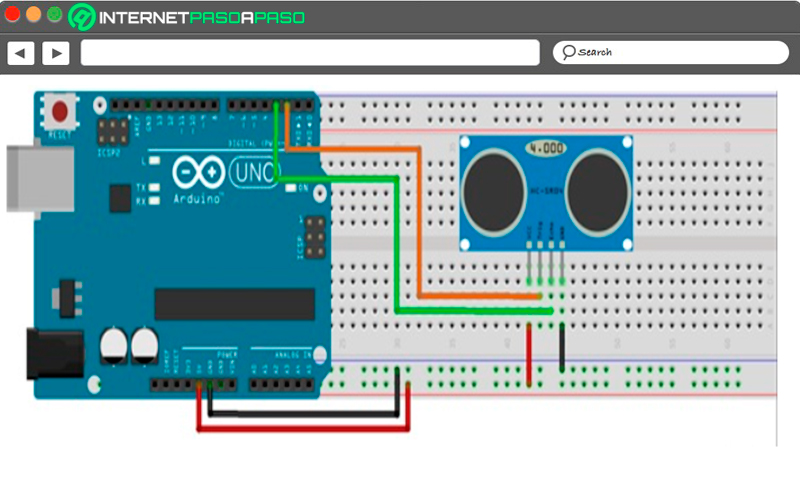
- The first thing will be to insert the ultrasonic sensor in a breadboard and with cables you must make the following connections: “Sensor trigger to pin 2 of the Arduino” Y “Echo from the sensor to pin 3 of the Arduino”.
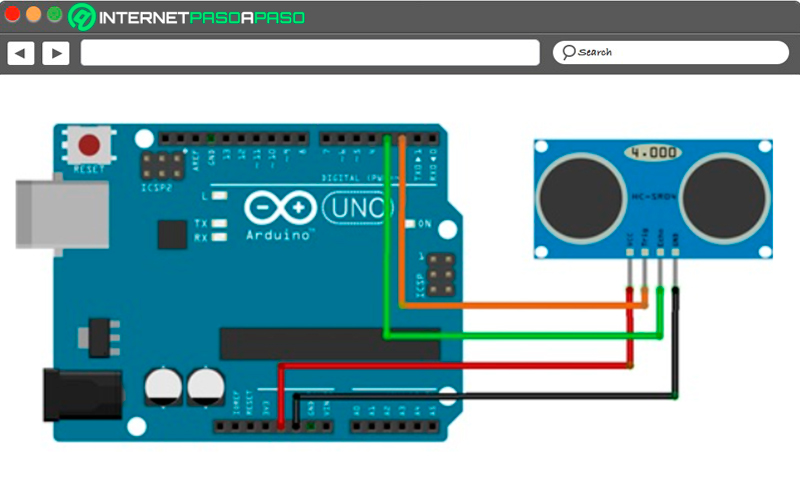
- In case you want you can also connect the module directly to the Arduino without using the breadboard
- Keep in mind that all These connections must always be made with the Arduino turned off.so it is recommended to have it disconnected from the PC or any other external source.
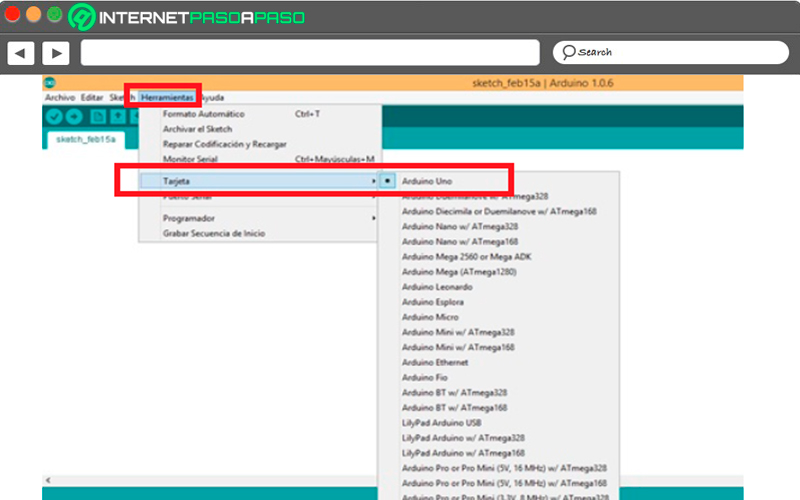
- Afterwards you must open the Arduino programming environmentfor them you must go to the options of “Tool” and then to “Card”, once there you must select the model of the Arduino board that is being used. In this case, the option of “Arduino One”.
- When the IDE is already configured, then you must start to schedule our skitso that you can understand all this better here we are going to explain step by step all the code.
The first thing will be to configure the pins and the serial communication to 9800 bauds:
const int Trigger = 2;   //Pin digital 2 para el Trigger del sensor

const int Echo = 3;   //Pin digital 3 para el echo del sensor

void setup() {

Serial.begin(9600);//iniciailzamos la comunicación

pinMode(Trigger, OUTPUT); //pin como salida

pinMode(Echo, INPUT);  //pin como entrada

digitalWrite(Trigger, LOW);//Inicializamos el pin con 0
Now from the void loop you must start by sending a 10us pulse to the sensor trigger:
digitalWrite(Trigger, HIGH);

delayMicroseconds(10);   //Enviamos un pulso de 10us

digitalWrite(Trigger, LOW);
- Subsequently, the response pulse of the sensor will be received through the Echo pin to measure the pulse we use the pulseln function:
t = pulseIn(Echo, HIGH); //obtenemos el ancho del pulso
In the case of variable t, going to have the time it takes get the ultrasound echonow the next step is to calculate the distance between the ultrasonic sensor and the object.
To do this, the following formula must be used:

- variable “Speed” is the speed of sound 340 m/s, but in this case the units used must be cm/us since we will be working both in centimeters and microseconds. The “Weather” is the time it will take for the ultrasound to reach the object and return to the sensor. And finally the variable “Distance traveled” is twice the distance to the object, replacing all this data in the formula will obtain the following:
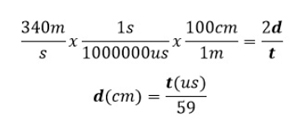
- Finally, it must be sent serially the distance value and we finish by placing a pause of 100mswhich is higher than the 60ms recommended by the technical data of the sensor.
Here you can see the complete code of the program:
Const int trigger = 2;  //pin digital 2 para el trigger del sensor

Const int Echo = 3; //pin digital 3 para el Echo del sensor


Void setup() {

Seria.begin(9600); //Inicializamos la comunicación

pinMode(trigger, OUTPUT); //pin como salida

pinMode(Echo, IMPUT); //pin como entrada

digitalwrite(Trigger, LOW); //Inicializamos el pin con 0

}


Void loop()

{


Long t; //tiempo que demora el llegar el eco

Long d; //distancia en centímetros


Digitalwrite(Trigger, HIGH);

delayMicroseconds(10);        //enviamos un pulso de 10us

digitalwrite(Trigger, LOW);


t = pulseIn(Echo, HIGH); //obtenemos el ancho del pulso

d = T/59:                 //escalamos el tiempo a una distancia en cm


Serial.print 'distancia: ');

Serial.print(d);         //enviamos serialmente el valor de la distancia

Serial.print('cm');

Serial.print();

Delay(100);   //hacemos una pausa de 100ms

}
Discover how to program an ultrasonic sensor connected to an Arduino board easily and quickly
Knowing how to connect a ultrasonic sensor to your Arduino board, the following will be how to program it.
To do this, you simply have to follow the steps that we are going to indicate below:
- The first thing you should do is connect the Arduino UNO and then load the program.
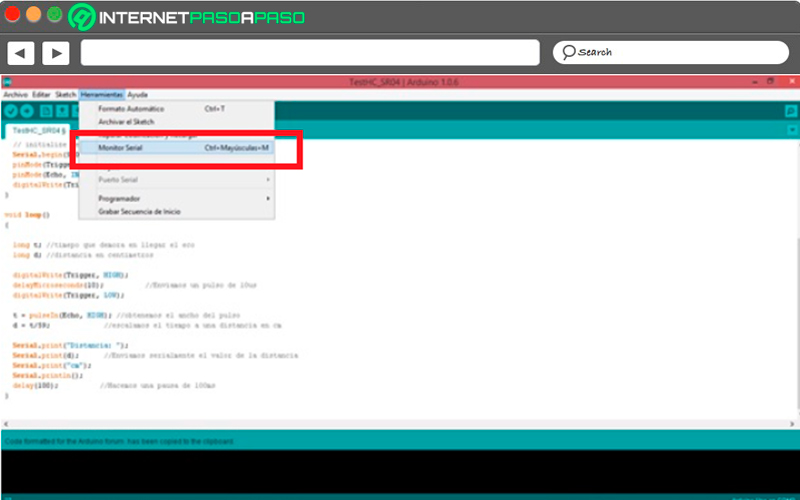
- After that the Arduino and the sensor they must already be working, to be able to visualize the data You must go to tool and there open the serial monitor.
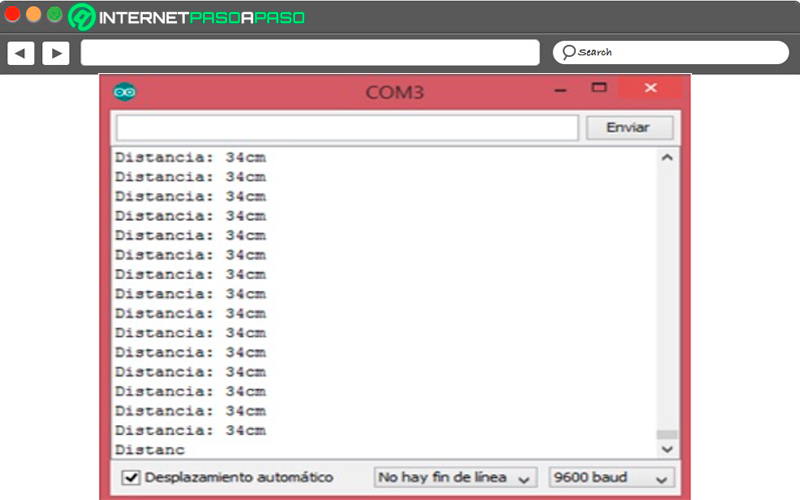
- Inside the serial monitor you will find all the values of the distance that get the HC-SR04 or ultrasonic sensor. Now you must place an object in front and it varies its distance from the sensor and check the distance which will be displayed on the monitor to see if it is correct or not.
The best Arduino projects with ultrasonic sensors that you can do yourself to practice
Without a doubt the ultrasonic sensors they will allow you to create truly amazing projects. In addition, this component allows you to create a wide variety of projects that are very useful for the benefit of the human being in different senses. This is how here we are going to explain what they are the best Arduino projects with ultrasonic sensors that you can create yourself from home.
To do this, follow everything that we will explain below:
Walking stick for the blind
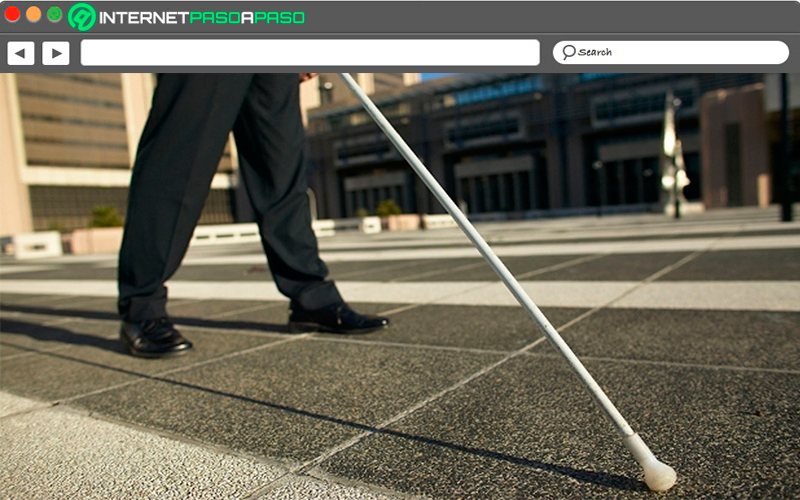
This project has been designed for all those people who want to help other people who present a visual disability. It is very simple to do so you will not need to be an expert in the area for it. Thanks to this ultrasonic sensor it was possible to design a cane for the blind that allows to identify the objects that are close and that can obstruct in the way of visually impaired person. Ideal for the blind to be able to walk in the street without so much danger.
smart trash can
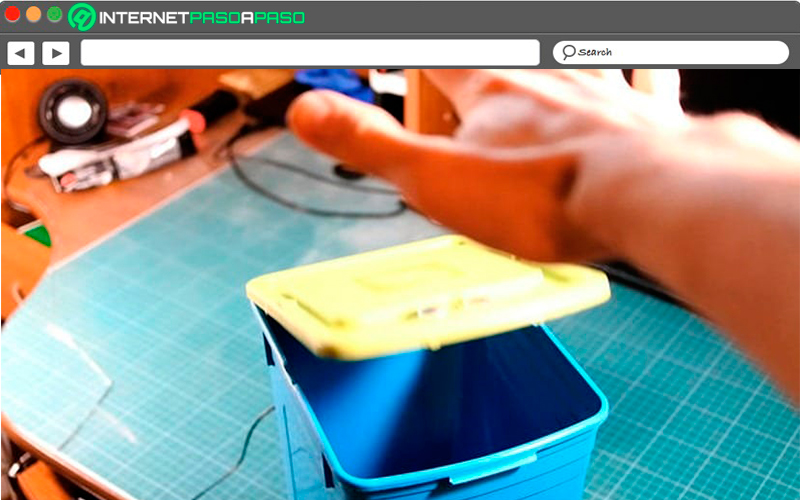
has become one of the most practical and used projectsthe same can be create either for fun or to gain more experience since it does not require much financial investment, which makes all this easy. Therefore, this smart trash can consists of activating a sensor so that it opens by itself when you are close, so you will not have to make any effort to lift the lid.
Also, this will prevent you from having to touch the trash can something that is unpleasant for many. This type of project works with both small or large trash cansjust keep in mind that the larger the container, the more complex the electronic project will be.
car that parks itself
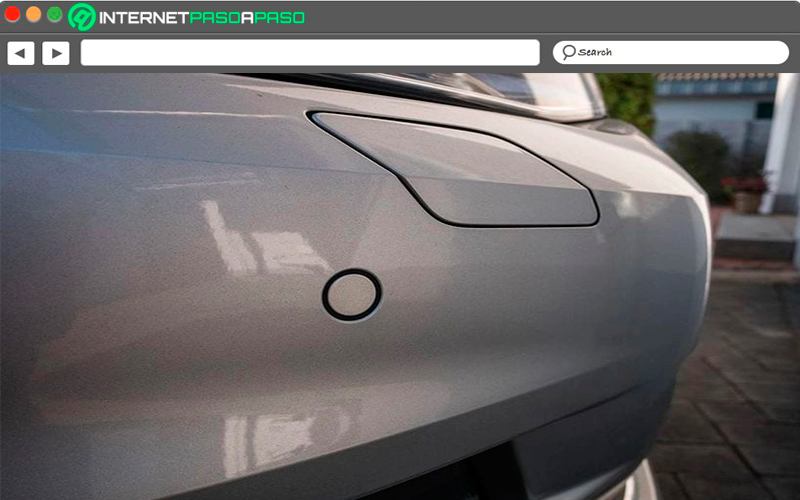
Just as we named it earlier in the post, these ultrasonic sensors They are used mostly in cars, since they fit perfectly there to carry out various functions. In this case it is a car project that allows himself to be park alone, indicating that the carriage will be controlled by the board Arduino.
This is a project that at first glance may seem very complicated, but what you really need is a lot of logic. If you get a space big enough to be able to park your carjust start measuring the distance that space has, if it’s big enough then Arduino he will take care of parking the car there by himself. Note that this does not yet work for very small spaces. reduced.
Radar
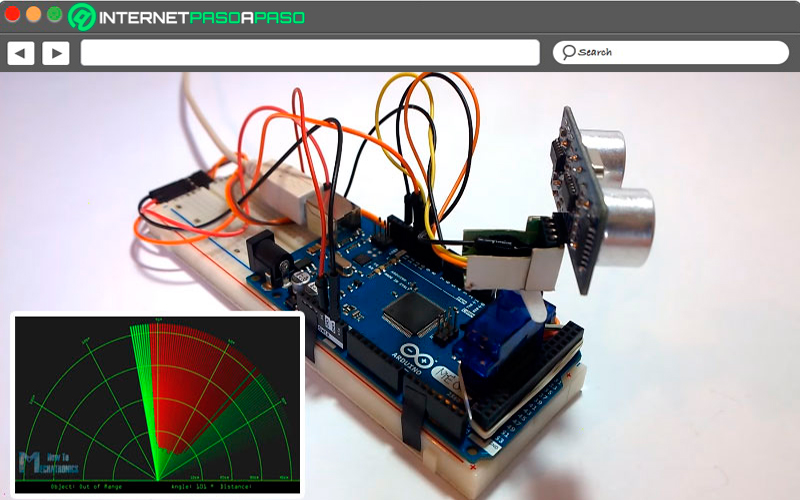
It can be said that this is one of the projects that has most impressed the public, it consists of a Radar which will have a graphic part that will be the most complex part of it, since the assembly of the circuit and the Arduino code are quite simple. The most complex part of all this is the creation of the code for the graphics, since it will be necessary to use processing, a language with an IDE quite similar to the Arduino IDE, but that is used mostly by the visual arts.
Fortunately, in Arduino you can get all the source code, so you can replicate this project in just a few hoursalthough the complexity of this will depend on what how good or not is your experience on this platform.
Smart vehicle barrier
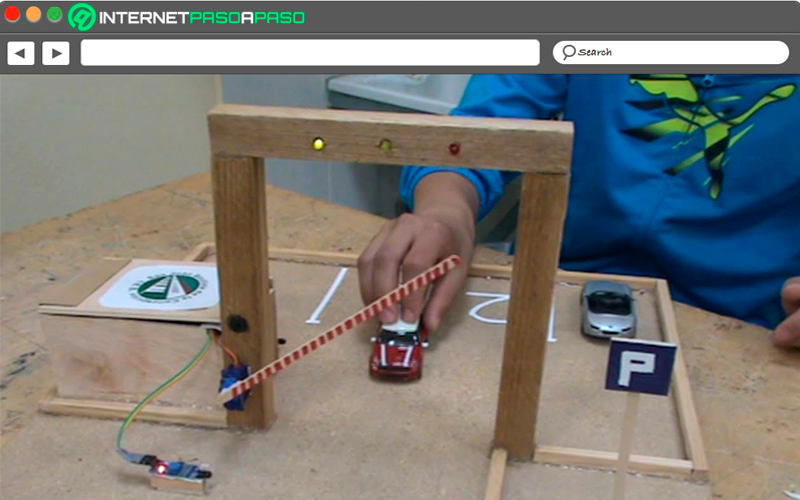
Although perhaps you did not imagine the parking bars to enter or exit them, you can also schedule smart. This mechanism consists in that the bar cannot be lower while the vehicle is below it or while it is in a certain perimeter. All of this is created through a sensor HC-SR04. In addition, when a car is detected nearby, the bar will rise automatically, this will cancel the manual work to raise or lower it.
object levitator
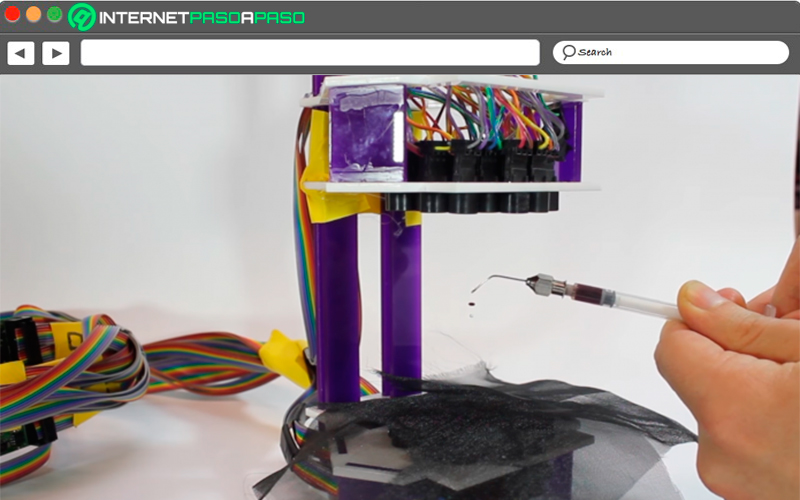
This is one of the favorite projects for the vast majority. This time it is a project where it is going to separate sensor transmitter and receiverthis in order that they can be used for levitate small objects. It is a completely visual mechanism that will surprise everyone who sees it. Keep in mind that it only works with small and light objects.
distance alarm
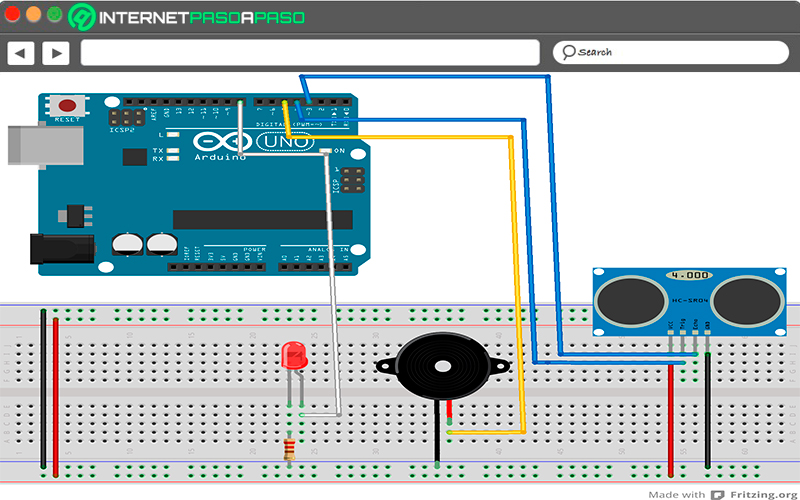
It can be said that this is one of the most common uses that is given to this sensor, in this case it is about obtaining an auditory notification thanks to a horn to be used in it. This will let you know when you are very close to the sensor.
This project may seem very simple, but the truth of all this is that it offers a large number of uses that can be carried out with it. How can it be to install a series of sensors in your car to alert you when someone approaches him or at the main door of your home or perimeter.
simple distance meter
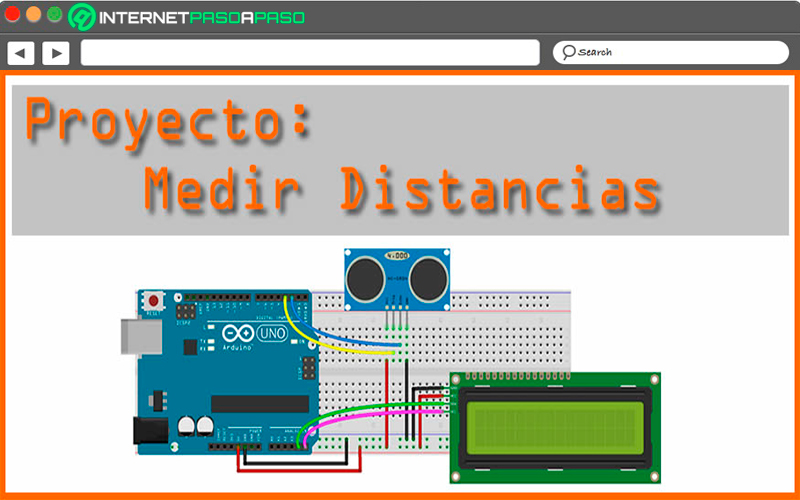
It is very similar to the one mentioned above and is carried out through the sensor HC-SR04, if you don’t have much experience using this component, then it’s a very good option to start testing it. All this consists of being able to create a distance sensor that is quite simple, this project is used through a LCD screen where all the information regarding the measurement of the sensor will be displayed, all this with the purpose of obtaining a visual feedback without depending on the serial monitor.
The main advantage of the distance meter is that it allows you to obtain the information in the unit of measure that best suits youeither in meters, centimeters, millimeters, among others.
Water level monitoring
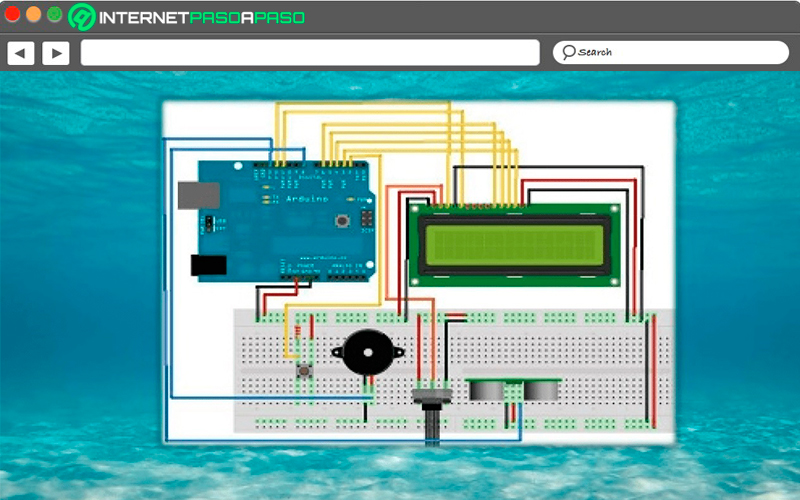
This is another of the advantages that you will get when using this sensor, and it is that thanks to him you will have the opportunity to measure distance with objects that are not 100% solid as are liquids. For this it is necessary that you put into practice all your skills so that you can be able to monitor the level of the water container as an example, all this will be displayed visually through a led screen or a set of leds.
Thanks to this you will be able to know the status of your current filling, this type of project is widely used for check water tanks or the tank of a cistern, since it will prevent the water monitoring process from having to be done manually.
object counter
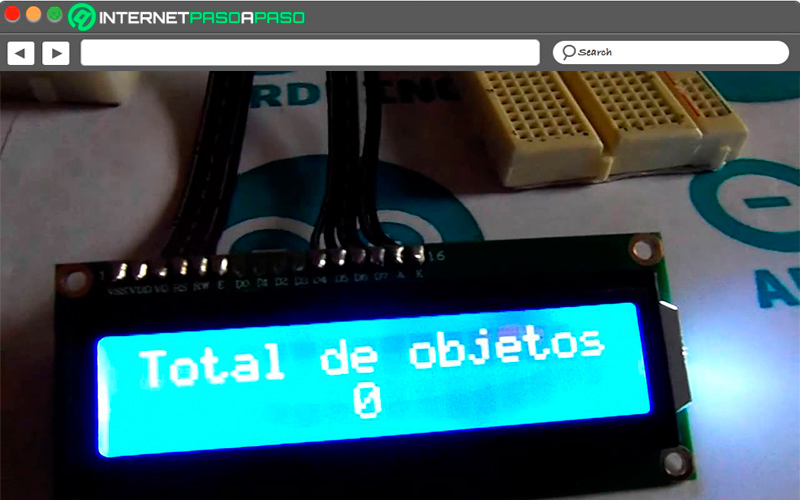
Finally we find what is a smart object counter, it is based on what is the sensor HC-SR04 and it is a project that deals with the creation of an object counter, this means that every time an object passes through the front of the machine it will increase a variable, this will allow you to keep track of the number of objects that exist in a place.
Best of all, this project not only allows you to count objects, but also provides the ability to Count animals, people, cars, or anything else that passes by. So that you can have a little more idea, these sensors are applied to the bars placed in some public transport who are in charge of control the number of people passing by during the day. It is used mostly for statistical purposes, so it is ideal for stores or public places.
Hardware