Index:
UPDATED ✅ Want to learn more about formatting shapes in Microsoft Word documents? ⭐ ENTER HERE ⭐ and learn everything FROM ZERO!
Forms are tools that you must know perfectly if you want to become an expert in Microsoft Word. We make this statement because they are very useful elements when you want to draw in the middle of the document.
There are different types of objects that you can use without limits. But the problem that arises when using these functions is their editing. You will be able to make a large number of combinations that will leave your writing perfect.
If you know how it is done, we ask you to continue reading this post. We will show you the operation of all the tools that you can use in detail. Check out!
What is the format of a form in Word and what is it for?
The shape format in Word is a drawing or figure that is found natively in the program. They are autoshapes that are used to graph different styles of illustrations.. They have the advantage that they can be perfectly adapted to the text.
In this way, an efficient and agile tool is obtained, since few steps are needed to incorporate it into the document. These shapes are widely used in flowcharts, organization charts, and custom form design.
What is the difference between the format of forms and images and texts?
Shape formats are shapes that you can use by default in Word. They are characterized by allowing texts within their fills. Instead, An image is a file or photo found on the Internet or on the processor. You will be able to change several aspects, but not as many as the shapes. Nor will you be able to write on the images, unless their design allows it.
Instead, the text format is the most used in a Microsoft Word document. It is represented by writing and its size, appearance and shape can be modified.
What are all the types of shapes that can be inserted in Microsoft Word?

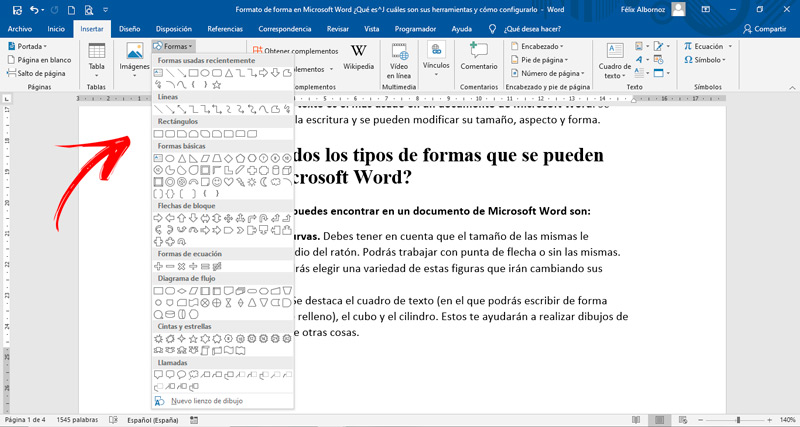
The types of shapes you can find in a Microsoft Word document are:
- Straight and curved lines. You must take into account that the size of the same will be granted by means of the mouse. You can work with or without an arrowhead.
- Rectangles. You can choose a variety of these figures that will change their angles.
- Basic shapes. The text box (in which you can write directly and has no padding), the cube and the cylinder are highlighted. These will help you draw flowcharts, among other things.
- Block arrows. When you need to work with arrows to expose a sequence of ideas, you can choose different layouts. In some models you will be able to write inside the forms.
- Equation forms. It is ideal for giving students work with algebraic signs.
- Flowchart. If you are one of the people who work with this type of administrative tools, you need to have all these forms. You will have all the basic shapes used in this type of chart.
- Ribbons and stars. These types of tools can be used when you need to highlight a main idea in the middle of a graph.
- You will be able to choose a good amount of objects that you can use to represent conversations or thoughts of characters. They are also useful to highlight some data or make clarifications.
Steps to set shape formatting and style your objects in Word
We will show you below the steps that you will have to do to work with objects that you insert in a Word document. You must bear in mind that, in order for them to be activated, you will have to have the form selected.
Let’s look at each function in detail:
Style

The tools you will find in this group of functions are:
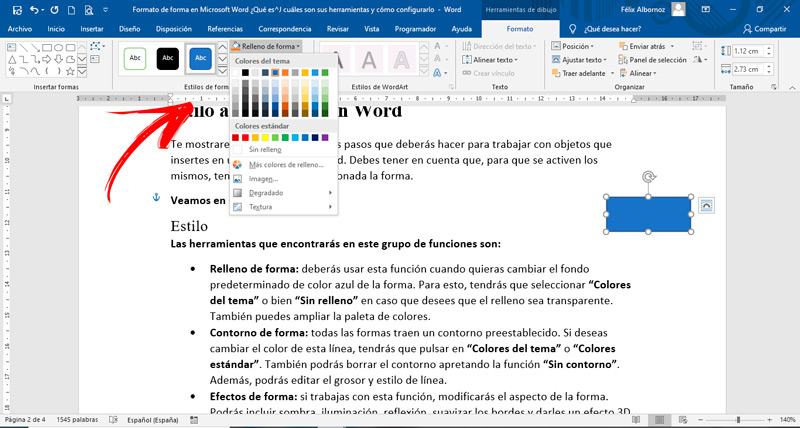
- Shape Fill: You’ll need to use this function when you want to change the shape’s default blue background color. For this, you will have to select “Theme Colors” O well “Unfilled” in case you want the filling to be transparent. You can also expand the color palette.
- Shape outline: all shapes come with a preset outline. If you want to change the color of this line, you will have to click on “Theme Colors” either “Standard colors”. You can also delete the outline by pressing the function “no outline”. In addition, you can edit the line thickness and style.
- Shape Effects: if you work with this function, you will modify the appearance of the form. You can include shadow, lighting, reflection, soften the edges and give them a 3D effect. So that you can choose the one you like the most, we recommend that you press one by one until you find the one you need.
WordArt
With WordArt you can use different functions. Let’s see what they are:
- Text padding: you will have the possibility to change the color of the fill of the letters. To perform this task, you will have to choose from the menu that will be displayed when you click on this tool. “Theme Colors” Y “Standard colors” are the options available to you. You can also remove the padding.
- Text outline: As with the shape, the words also have a line that delimits their area. If you prefer, you can modify the color and thickness or change the line style. For this, you will have to click on the different options that you have available. In addition, you can also remove the outline.
- Text Effects: If you want to give the letters of the text a different look, you can use this tool that will allow you to add shadows, reflections, 3D effects and lighting. You will also be able to modify its alignment so that it has waves. You can do this if you press the function “Transform”.
Text
The functions you will have to choose from in this group are:
- Text address: this function will help you generate another orientation to your words. You can choose if you want a 90°, 270° rotation or leave them horizontally. In case you press the tool “Text Direction Options…” you will be able to choose the degree of inclination and to which sector of the document you want to apply this modification.
- Align text: With this tool you will be able to accommodate the text inside the shape at the top, bottom or if you wish in the center.
- Create link: is a very useful function when working with text boxes. If you have 2 or more boxes, you will be able to start typing in one box and then continue the text in the next one automatically. That is, the surplus you have in the first box, you can place in the other. For this, you will have to click on the first illustration, then select the function and then choose the second box.
Organize

In this group you will have the following options to use:
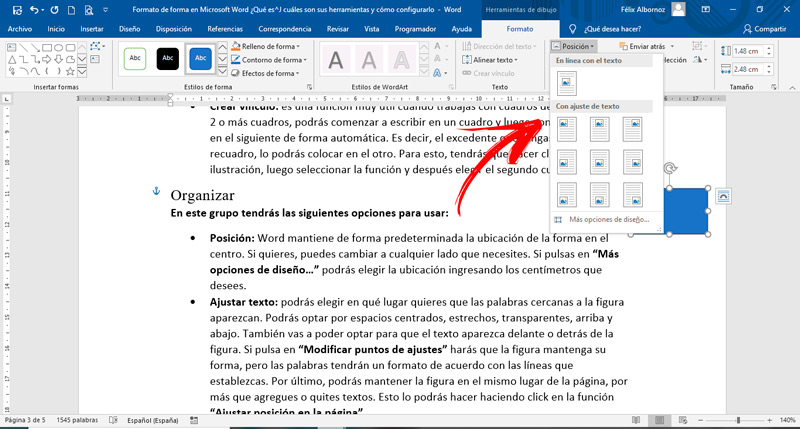
- Position: By default, Word keeps the location of the shape in the center. If you want, you can switch to any side you need. If you click on “More design options…” you can choose the location by entering the centimeters you want.
- Adjust text: you can choose where you want the words near the figure to appear. You can choose centered, narrow, transparent, top and bottom spaces. You will also be able to choose for the text to appear in front of or behind the figure. If you click on “Modify setpoints” you will make the figure keep its shape, but the words will have a format according to the lines you set. Finally, you will be able to keep the figure in the same place on the page, even if you add or remove text. You can do this by clicking on the function “Adjust position on page”.
- Bring forward: if you click on this option you will make the object move up in position. That is, it will be placed in front of other forms, so it cannot be covered. If you want the figure you have selected to hit first and never be covered, you will have to click on “Bring to the front”. Instead, if you click on “In front of the text” you will cause the text to be covered with the illustration.
- Send Backward: This function is the inverse of the previous one. It will allow you to place the figure behind others or at the end of all. For this last option you will have to click on “Go to the bottom”.
- Selection pane: this tool is a bar that will appear on the side of the page. It serves to have a frame of reference of all the forms that you have in the document. Just by selecting the list, the system will take you to the location of each form.
- To line up: If you want to align objects relative to each other or by reference to margins, this is the tool to use. You can align them to the right, left, up, down, etc. You can also distribute the shapes vertically and horizontally. Lastly, you can use grid lines and alignment guides.
- Group objects: when working with 2 or more objects, you can group them to form a single set, so you can move them in blocks. You can also ungroup them. To do this task you will have to select all the elements you want to join.
- Rotate objects: His name says it all. This function will allow you to rotate the shapes at different angles so that they are as you like.
Size

With this tool you can enlarge or reduce the size of the object. To do this, you will have to write the centimeters you want both in height and thickness. If you click on the arrows, you will see how the shape you inserted gradually changes size.
Computing