Index:
UPDATED ✅ Do you want to know more about forms and how to create your own in Microsoft Excel? ⭐ ENTER HERE ⭐ and learn everything FROM ZERO!
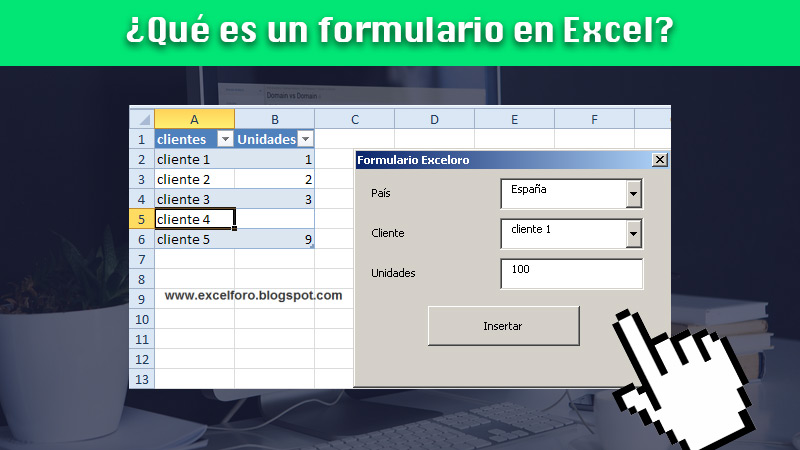
For all those who need get into data within a spreadsheetan excellent idea is to take advantage of the forms in Microsoft Excel. The interesting thing about them is that they can be organize in multiple fields and each of them meets a certain function.
In this sense, this type of files can be effectively modified and customized depending on what the user needs. In this way, in Excel buttons, content controls, check boxes can be added ready Y many more functions to a form.
So that you know in depth about them, we will indicate what they are, what they are for and how you can easily create them within a spreadsheet.
What is a form and what is it for in Microsoft Excel?

Theoretically, a form is a file in which data is stored or any other type of variable information. Its use is very varied, because it is adjusts to the needs of each person. For example, some companies make use of forms as a working tool on which information is reflected for simplify and classify them according to various criteria.
Specifically in Excelusers are given the possibility of create your own forms through the use of templates or with the Scheduler function. If you are inexperienced in the area, it is best that you take advantage the templates available in Excel or that you download a previously designed model on the Internet.
However, in case require a much more professional and specialized form with buttons, combo boxes and many more functionalities, we recommend you to choose crafting with the help of the function excel programmer.
What are all the types of forms that exist and can be created in Excel?
As we explained, the main purpose of a form is to allow a person to enter all the data you need, to be able to store and organize them according to a series of categories.
It should be noted that the The use of forms has changed over the years. In the first instance, they were carried out physically in sheets and actually, can be designed on computers and add interesting features to them.
Regarding the types, they vary according to the objectives of the user. The main types of forms They are: medical services, for job application, contact, for surveys, among others.
Next, we will talk about the main ones:
For medical services
As the name implies, are those forms that are implemented in the health sector. In these cases, items are already preset by medical institutions and should filled with personal information of the patientclinical data and any other important details.
It should be noted that each document of this type must also include specify the symptoms presented by each patient, medical history, family pathologies, among other information that are useful to the medical institution in which you have entered.
for surveys
It is one of the most used and some people classify them within the type of “eventual” forms. They take advantage of research where is needed know the opinion of a certain group of people regarding a specific topic.
For job application
This documents can be found in the human resources department of a company and are already previously designed. They usually include sections to fill in contact informationas well as a section that includes a series of questions that will be used to get to know the candidates better.
In this way, they have to answer questions related to their abilities, skills, virtues, aspirations, previous work experience and other details regarding the vacancy for which they are opting.
Contact
This is probably the most used type of form today. It can be achieved both physically and digitally. Specifically the web versions, found within web pages to collect information from visitors such as their email, phone number and much more.
Their objective is keep in touch with users for later share news or information that may be of interest to you. Even many companies They work with this type of forms to keep track of their payroll.
Steps to create a custom form for any task in Excel
Create a form in Excel It is a simpler task than it seems. However, it can get a little more complicated when you want add specific features or functions a bit more advanced like buttons, content controls and much more.
But we will explain the two most common ways to create a custom form in Excel:
With Templates

Templates are a great help when you are not familiar with the use of Excelapart from that it can help you save a lot of time.
If you want to enjoy one of them, you just have to:
- Anger Excel.
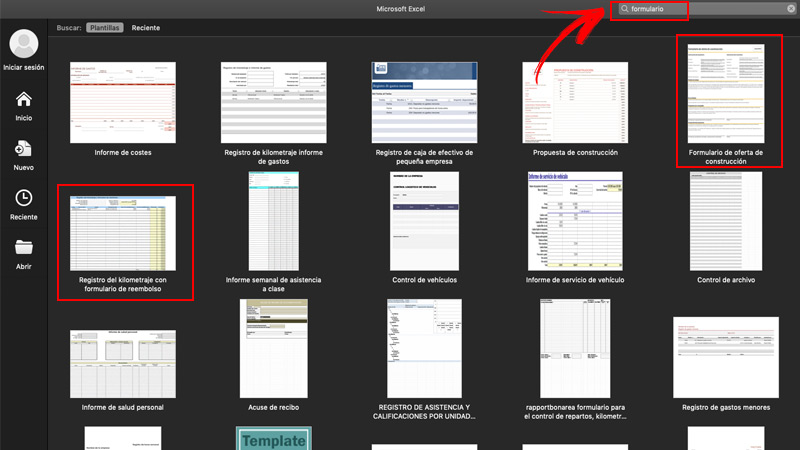
- in the tab New, choose the template you need. You can put in the search engine “form” to display the Available options.
- Select the template what you want
- Write the texts you need and customize the fields: change color, letter, etc.
- press on Save.
If the default template included in the program does not convince you, you can look for options on the internet and download them.
With the Developer tab

This is the most professional and advanced method with which you can design your own form in a spreadsheet, but don’t panic! Is easier than it looks like.
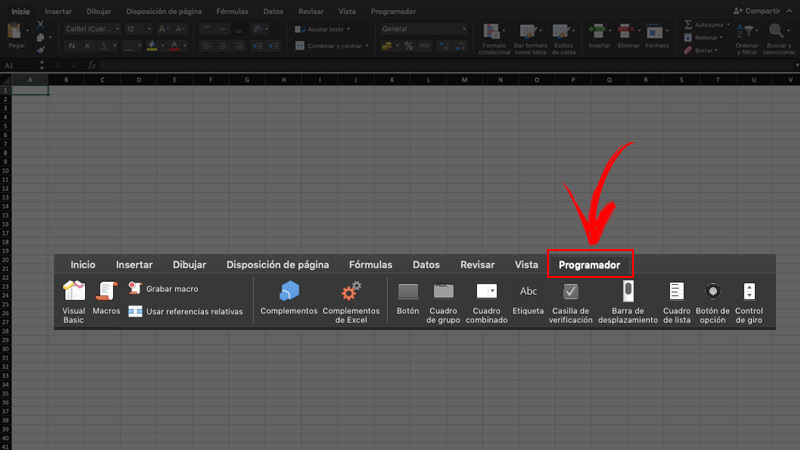
First of all, you must activate the Developer tab in you Excelbecause this function comes deactivated by default.
To do so, follow these steps:
- Go to the excel menu and click on preferences.
- Within CreationChoose Watch.
- right below Options, To showclick on the tab Programmer.
The second main step is add and format the different content controls of your form.
The steps to follow are:
- inside tab Programmerclick on the control you want to add.
- In the spreadsheet, select the location where you will insert the control.
- If you want to set specific propertieshold down the key CONTROL (on Windows) either COMMAND (on mac) and click on the control. Then click Control Format.
- Once inside the box Control Formatset the properties you need such as: font, color, alignment, etc.
- Repeat steps 1 to 4 on each control you add.
Once that’s done, you have to protect the sheet containing the form.
To do this, you must:
- Enter the menu Toolsgo to Protection and click protect sheet.
- Choose the options of protection you want.
- Guard and close the book.
Notably Excel recommended if you want to continue with the edition after protecting the form, enter in the menu Toolsgonna protect sheet and click on unprotect sheet.
Finally, as an optional step you can test your form to make sure everything goes well.
If you want to do it, you will have to apply the following procedure:
- test your form entering it and filling it as a normal user would.
- save a copy and check that everything is correct.
Computing