
UPDATED ✅ Do you need to CONNECT and Create a virtual private network in your Windows operating system and you don’t know how to do it? ⭐ ENTER HERE ⭐
There is a lot of VPN software available for you to connect to secure servers around the world. It is a simple option and that you can achieve yourself using any version of Windows to establish a secured connection. What these servers do is ensure that all transmitted data is encrypted using encryption protocols and techniques known as “Tunneling”, which makes it almost impossible for any third party to know the origin of the connected device.
The utility of virtual private networks is well established for businesses. With them they can create secure connections between multiple terminals, sometimes hundreds, even thousands of kilometers apart. There is no doubt that for you, who are an active user, this is the most viable option to protect your IP address, in addition to having the added bonus of browsing safely without running the risk of your data being intercepted by onlookers who wish to obtain your information with malicious intent.
Therefore, this time We bring you a step-by-step guide so you can learn how to configure, create and connect to a VPN on Windows 10, 8 and 7, in addition to providing you with practical solutions that will prevent you from having problems with this type of connection. At the end of the reading you will be almost an expert on the subject and you will considerably improve the security of your navigation.
What is a VPN or Virtual Private Network and what is it for?
As the name implies, a VPN (Virtual Private Network) it is simply a virtual version of a local network of computers, which are physically interconnected with cables to share resources such as printers, files, mail, among others.
With it, the computer can connect to the local network from anywhere in the world. For this, the Virtual Private Network integrates two essential functions: encryption and tunnelingwhose purpose is to deliver your data securely over the Internet.
Creating a private network can offer you a number of benefits. One of them is that it allows you to share documents in a very simple way, and the second is that due to the increase in cybercrime, the VPN becomes an essential service to protect your computer system and all your devices.
Steps to create and configure a Virtual Private Network on your Windows computer
The microsoft operating system It currently has three versions that are widely used. We refer to those that respond to the nomenclature 7, 8 and 10, although the first currently no longer has support. Next we will show you how create and configure a private network in each of these deliveriesso you know how to do it regardless of the version you use.
Windows 10
On Windows 10 you can do it in a few clicks as long as you have the address of a server and also the ids to connect to it to pass your traffic.
W10 supports 4 protocols:
- PPTP
- L2TP / IPsec
- SSTP
- IKEv2
Before any configuration, you will have to find the address of a VPN server. There are several sites that offer them to you for free and that are reliable. To find one, go to the list of best free vpn servers and choose the one that suits you best. Once you have this resource, the steps to follow are:
- What you should do is look for a server, I recommend the site
VPNbook.com. It offers a small list of free servers. In the tab “PPTP” on the site page, choose an address and remember the username and password (they are changed regularly).
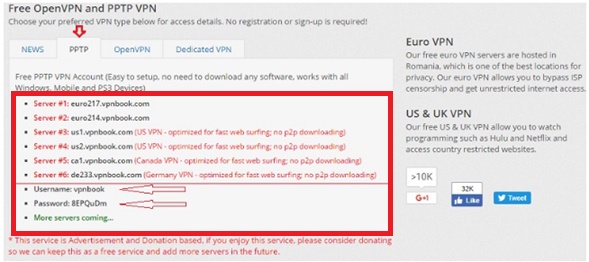
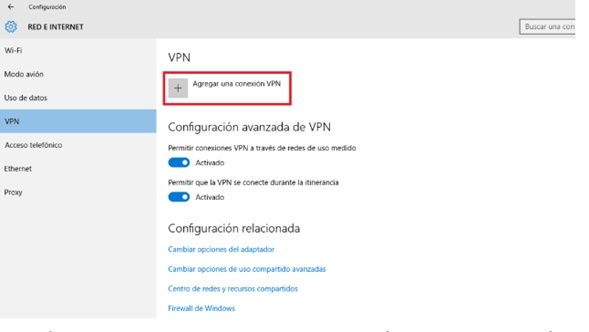
- Then, to set up a connection on your S,O Windows, go to Settings > Network and Internet > Virtual Private Network. Click on “Add VPN connection“.
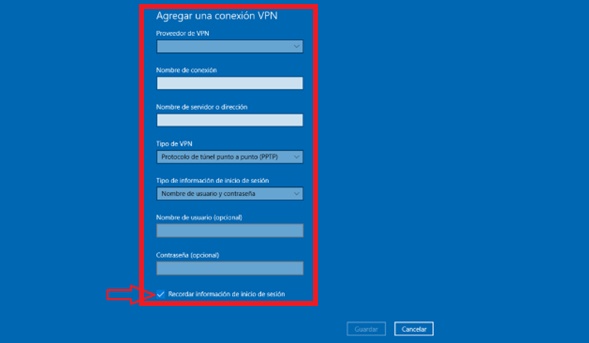
- Immediately, a blue window will appear in which you will have to enter the information indicated above. Remember that in the field “Name” It may be required to enter a specific name for your private connection service.
- Go to settings and click on “Connect“, to add the VPN (Virtual Private Network). This will make your Internet connection made through said service.
Windows 7
Despite the fact that VPNs were not as popular by the time Windows 7 came out, Microsoft decided to equip this version of its flagship operating system with such a function.. Activating it requires searching among the most remote services, but once you learn how to do it, it becomes extremely easy, being a matter of minutes to activate it. If you want to know how, simply follow the steps that we explain below:
- Go to control panel, “Management tools” and click “Services“.
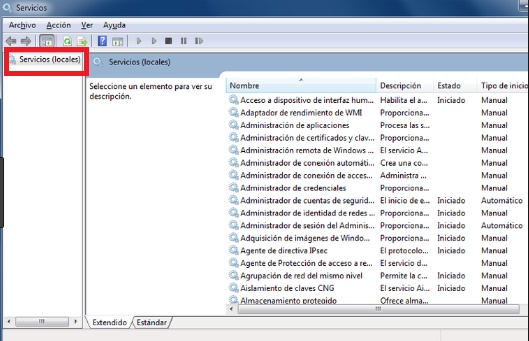
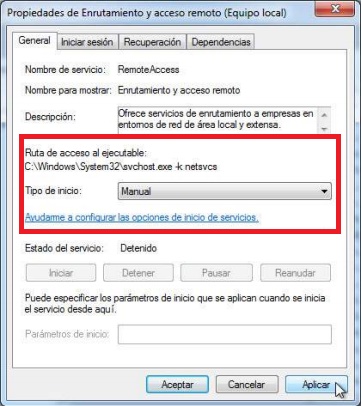
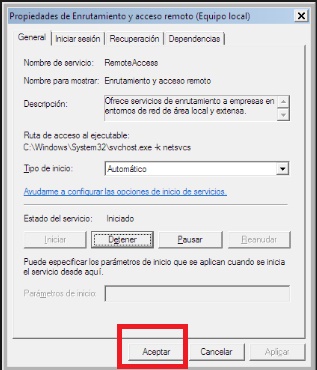
- Activate the Routing and Remote Access service. To do this, right click on it and go to Properties. Choose the “start type”change it from “Manual” to the option “Automatic”then touch “Start” Y “Apply”.
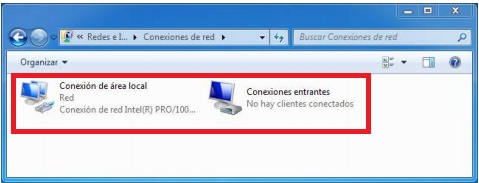
- Then go to Networks > Network Center and change the map settings and update network connections with F5. Incoming connections should appear on the screen.
- Right click on this new connection and select “Properties“. Then check the box that allows the connection to the virtual private network to your computer in the tab “General” and click “Start“, later “To accept“.
- In the tab “Users“, select the user accounts that can connect to the network. A new account can be created by clicking “New” and entering an ID and then a password.
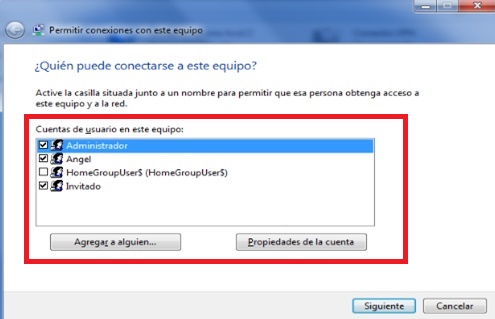
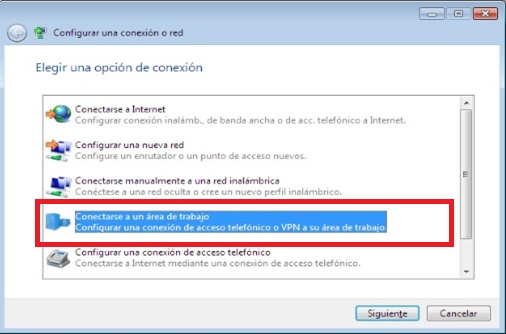
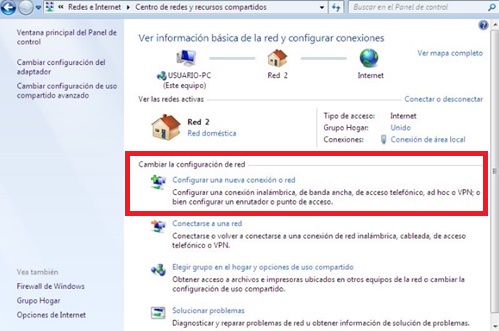
- Then go to “Control Panel” and select Center network and sharing. On the menu “Change your network settings“, select “Set up a new connection or network“.
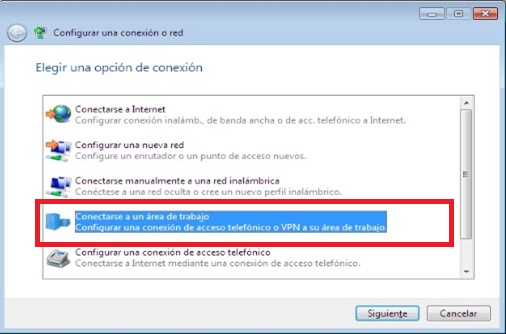
- Choose the option “Connect to your work area” to set up a dial-up connection.
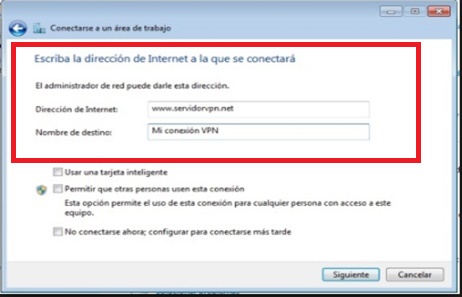
- Click “Use my internet connection“. For Internet address, enter the address of the server you want to connect to and enter a destination name. Do not check the boxes below and click “Following“.
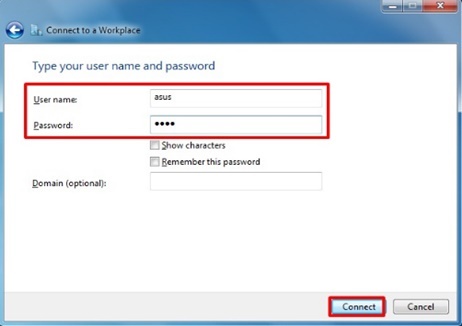
- Enter your username and password and click “Connect“. That is all.
Windows 8
At this level you already know how to configure your VPN for Windows 10 or 7; now you are going to learn to do it with Windows 8, remember, you must follow the instructions, to the letter.
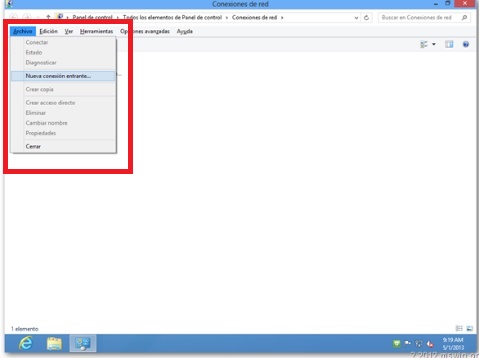
- The first thing is to create a new incoming connection. To do this you must go to “Control Panel” and then select “Network connections“. Once the window is open, display the menu bar and select “new incoming connection“.
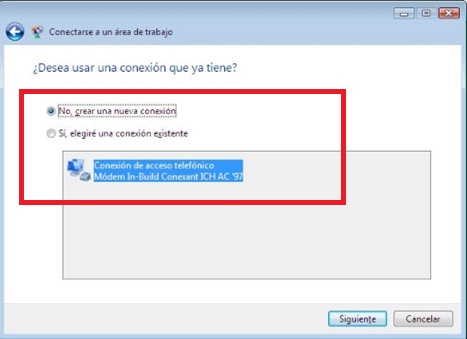
- The window that appears next allows you to define what type of connection users will connect to your VPN with. Check the box for “Internet” and click “Following“.
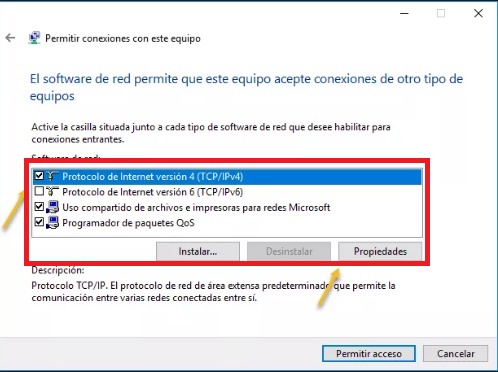
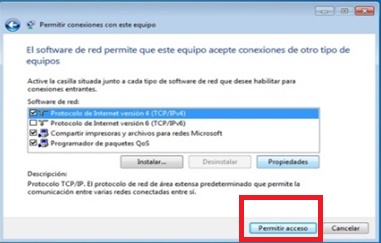
- Then allow or disallow certain protocols. If you are not sure, I recommend that you leave the default options. Then click “Properties“.
- Next set the IP address of the server. When the window appears “Incoming IP Properties“, enter the IP addresses you obtained.
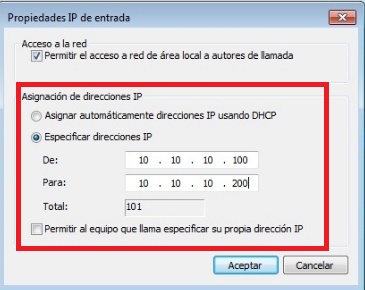
- Then click “Allow access to the VPN server“.
- Thereafter, select people that can connect to your network, usually only you.
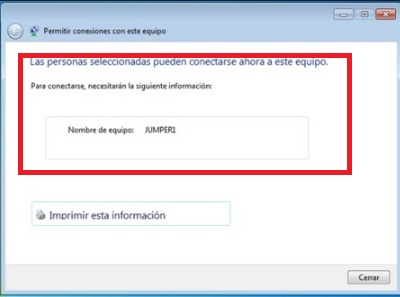
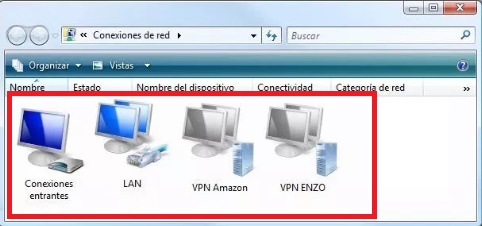
- Later, the new connection appears on the screenyour W8 virtual server is already configured.
VPN connection problems and solutions in Windows 10
If you as a user experience problems with your VPN using Windows 10, the error can be: from the equipment, from the VPN or from the infrastructure you are using.
In these cases we proceed to:
- Diagnose the problem: You should try to connect to the VPN using a properly configured client computer and a trusted user account to determine if it can establish a remote desktop connection.
- Often we forget that a firewall can contribute to remote desktop connection problems. However, this is quite often the case, make sure the port is active.
- Network level authentication: The basic idea is that the session host must authenticate the user before establishing the connection.
Windows 7 VPN connection problems and solutions
The problems you encounter are very similar, although with some slight differences in terms of solutions since they are different interfaces.
- I recommend you delete the connection interface and recreate itjust go into the control panel, windows network, network center, change network adapter and delete the interface.
- You should check installed plugins, which affect your VPN connection. Simply uninstall. And reinstall. The route to follow is Control Panel, Uninstall program and select the plugin, What remains is to re-make the VPN-SSL connection with the browser and install the plugin again.
- Check the connection with your internet service provider. The other is to check the list of available services. In the property, its state has to be started and in automatic mode. Otherwise activate it. Once that is done, the fault should have been removed and you should have connection again.
VPN connection problems and solutions in Windows 8
For W8, the protocol is the same. You must follow the steps indicated to restore the fault as I mentioned in the previous case.
- I advise you to remove the connection interface and recreate it, just go to the control panel, network, network center, change network adapter and delete the interface.
- Check installed plugins, which affect your VPN connection. Simply uninstall. And reinstall. You already know the route: Control panel> Uninstall program and select it, What remains is to re-make the VPN-SSL connection with the browser and install the plugin again.
- Check the connection of your internet provider. Look and check the list of available services. Your state should be started and in automatic mode. If not, activate it. If it does that you should have your virtual private connection ready to go.
Operating systems