
UPDATED ✅ Do you need to configure a local network for printers and you don’t know how to do it? ⭐ ENTER HERE ⭐ and discover how to do it step by step with this TUTORIAL ✅ EASY and FAST ✅
Today sending jobs and documents through any medium is extremely necessary. But beyond that, having a physical role is sometimes made mandatory. For this reason, for some time now, printers began to take on value, this in turn has brought with it new ways of passing information without having to go to where it is. For example, if you work in a large office you can share the computer network, in this case Windows and macOS to transmit it.
The moment you establish the connection of this device with the rest of the equipment, you make it possible for several people to use it simultaneously to export their products and services. But in order to achieve this, you need to have a printer installed with at least one of the computers you have in use.
If you don’t know how to do it, in this article we will explain how you can share the network printer of computers with these operating systems. In the same way how to do to be able to print from the different connected devices. To discover it, you just have to follow these simple steps that are indicated below.
Steps to share a network printer on Windows 10, 7 and 8 computers
Today, the latest models of this hardware incorporate the WiFi network, this to provide the user with a more comfortable and practical way to print. Now you can be at your workstation and from there request a printout with a single click and without having to move.
To know how to do it from different versions of Windowsin this part we will provide you with some alternatives that you need to know in order to share information successfully.
Using the HomeGroup option in Windows
This Windows operating system gives us the option for creation of a group called “Home group”. With this you can share all the content you want, A clear example of this would be with important documents or with those that we use to entertain ourselves. All this we can do only if we use a password to join said set. To know how to do it, follow this step by step.
- The first thing you should do is go to the button “Start” of Windows and locate the “Control Panel”.
- Later you must choose “Network and Internet”followed by “Home Group”.
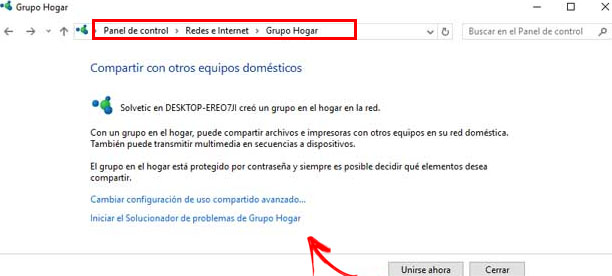
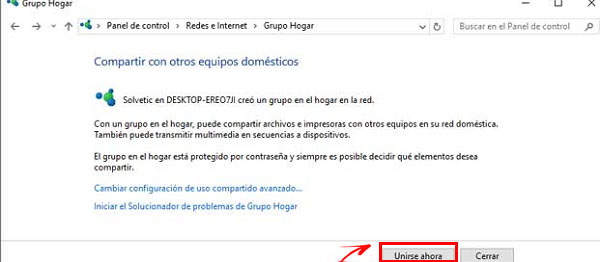
- After this, a window will appear where you must select the option “Join Now”.
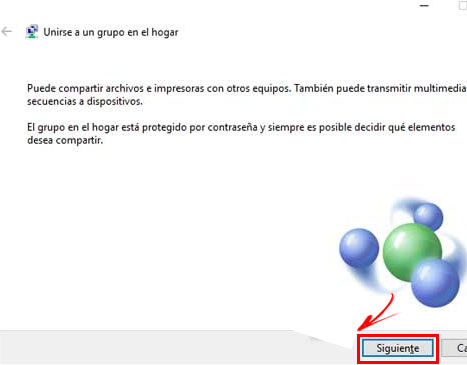
- A tab will appear where it explains everything you can do with this, there you will have to click on “Following”.
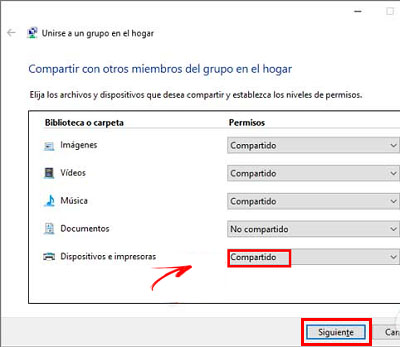
- Next, you will have to choose which files you want to share with other users. Also check that the option “Devices and printers” this with the election that says “Shared”.
- Then you will need to enter the password for the “home group”. This key will be provided to you by the owner of the computer where it was created.
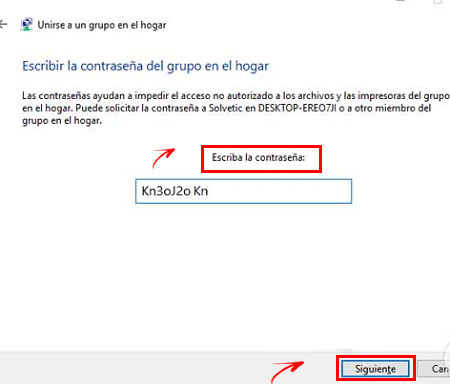
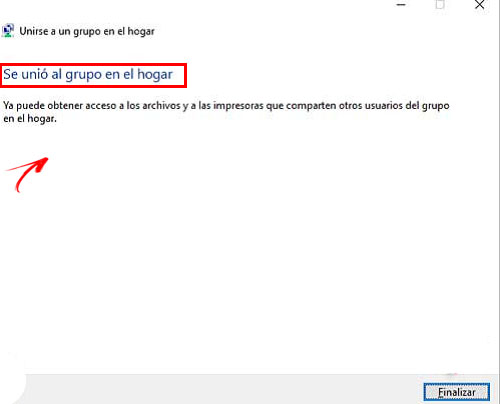
- Finally, you will be able to see the verification process and you will notice that you have joined. From this window you can even see which users have access to this printing peripheral.
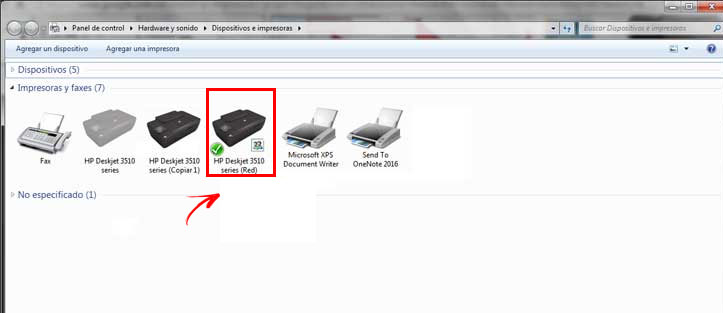
- If you want to verify the process, you will have the option to enter from another computer and realize that it is shared on the “Home group”. In this way you will have already achieved it.
Without using HomeGroup in Windows
We already showed you how to do it using HomeGroup in Windows 10, 8 and 7but now we will show you how you can achieve it without using it. In this way you can also transmit everything you want without having to go to where the other person is, but you can use it through your team.
- The first thing you have to do is share it so that other users have access to it.
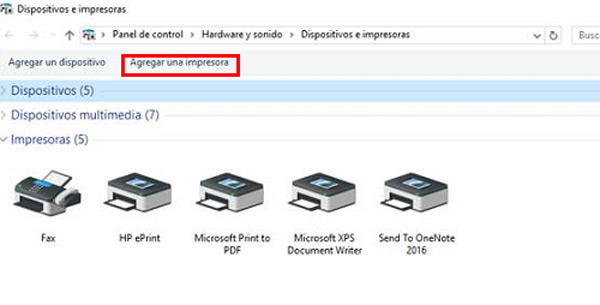
- Then, when it is already shared, it will be up to you to go to the option of “Devices and printers” where you will have to choose “Add a printer”.
- Once you do the previous step, a window will appear where you must select and click where it says “The printer I want is not listed.”
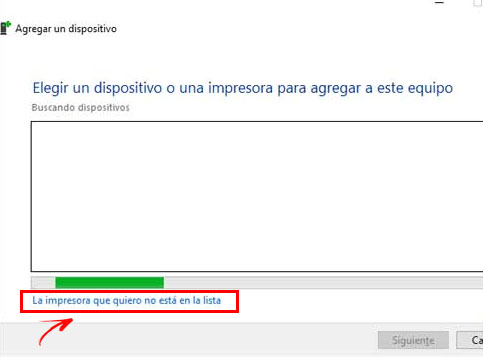
- Subsequently, a window will appear where you can see several options, there you will have to select “Add a printer by TCP/IP address or host name” and then press “Following”.
- Then it will ask you enter IP address of the device and press “Following”. The system will proceed to start the search process.
- Once the process is done, you will have the option to set it as the default.
Connect directly to the network
In this part we will see how you can connect your device directly to the network by following the necessary steps. We know that There are many different brands and therefore, they can vary at the time of configuration. However, we will explain what you should do in a simple way with a function that can be applied to any manufacturer that has this option.
- The first thing you should do is use the installation CD.
- Then you will have to configure it and activate the WiFi of it, in order to connect it directly to the network.
How to share the printer on a local network for MacOS computers?
It is time to know how you can share the device on a local network, on computers like MACOS when you have several computers. Particularly these have another way of doing it that you should know in order to execute it.
- The first thing you should do is go to the printer settings on your computer. Mac has a peculiarity and it is that detects it and adds it to the list automatically.
- When it is added you will have to go to the panel “Share” To be able to activate the option, from there you are going to select and click on where it says “Share printer”.
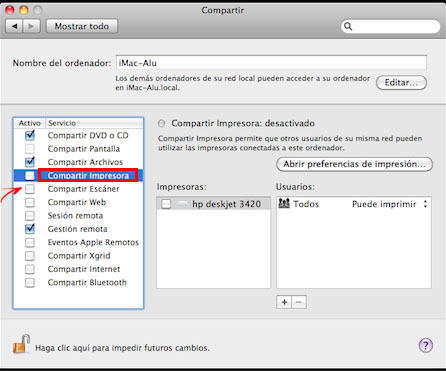
- Following the previous steps, when you are on the interested computer, you will have to add the new peripheral. You will have to do this by going to the panel “Print and fax”.
- Then at the bottom you will get an option called “By omission” inside options “Add printer”. This time it should appear with its respective name.
- If, on the other hand, it does not appear, you must manually add the IP address of the computer to which it is connected.
However These are all the steps you have to take to be able to use your printing device with your computer, be it Windows or MacOS. To access the information you want to share and print.
networks