Index:
UPDATED ✅ Do you want to know more about the format of images in Microsoft Word documents? ⭐ ENTER HERE ⭐ and learn everything FROM ZERO!
Word being such a useful tool that it is common work with graphics in this class of documents. But few people know the scope of the functions of image formats that this processor has.
In order to get the most out of editing images, within a text, you should use the Image Tools function. Which contains a wide variety of settings that will help you work like a professional.
Then, It will be necessary for you to know well all the secrets that this powerful Word tool haswhich you can discover in this article.
What is the format of an image in Word and what is it for?
Image formatting is a set of tools used to give a certain style to a photograph that has been inserted into the text. In this way, you can adjust the color and give different artistic visions. It will also be possible to incorporate effects to the images and establish a certain position within the sheet.
It is a useful tool when you need your images to have a certain look that it is consistent with the wording and that they can reinforce the idea of the text so that the reader feels comfortable and attracted by the illustrations.
What are the differences between the format of an image and that of a text in Word?
Image formats are related to the color and effects that illustrations can have. As well, it also provides the option of being able to add borders of different color and thickness. It is dedicated to the position that the image will have on the sheet and the possibility of modifying the margins in the printing area.
Instead, the text formats are related to the type of font, with the color and size that a title (and the rest of the paragraphs) will have within the document. In addition, it takes care of the type of typography that can be applied, for example, the location of a shadow or what variety of illumination each letter will have.
Steps to set the format of an image in Microsoft Word
To be able to configure the format of an image you must first insert it and then you will have to select it. This will automatically activate the function “Image Tools”which you can see next to the name you gave the document.
When you tap elsewhere in the text, this feature is automatically disabled. So that you know in depth what the format of an image is about, we will analyze it by group of functions. You must bear in mind that you will have to click on the tab “Format” so you can work with all the options.
Adjust

In this group of functions you can use the following tools:
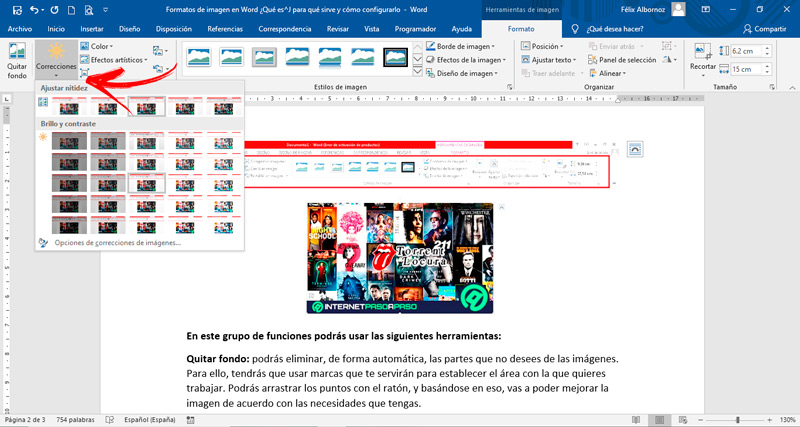
- Remove background: you will be able to eliminate, automatically, the parts that you do not want from the images. To do this, you will have to use marks that will help you establish the area you want to work with. You will be able to drag the points with the mouse, and based on that, you will be able to improve the image according to your needs.
- Fixes: With this function you can adjust the brightness, sharpness and contrast of the image. You should keep in mind that you will need the illustration to have an aspect that is consistent with the text, so you will have to find the right balance so that the work done is as the experts do.
- Color: When you need to change the hue or saturation of the image, you can choose from some of Word’s preset formats. If you prefer, you will also be able to use other types of variations and define a transparent color so that the image is in optimal conditions.
- artistic effects: this tool is useful when you want the image to have a painting or sketch look. In this way you will be able to generate balloons with mosaic, visual blur and light screen, among many other options.
- Adjust: In case you need to compress the image, you will have to click on this function so that it is left with the right size. You must bear in mind that this format must be done correctly, since the size of the illustration is the most important aspect that you must consider in a text.
- Change image: you can exchange the photo that you have entered in the text for another, which can be on the computer or on the Internet. This function will help you when you see that the Illustration you have chosen is not clear enough or does not match the general theme of the writing.
- Reset Image: Word allows you to go back to the original image once you have edited different aspects of it. This will help you to try different functions and, when you combine them and see that it is not what you are looking for, you can return to the starting point.
Style

The tools that you can use in this group are:
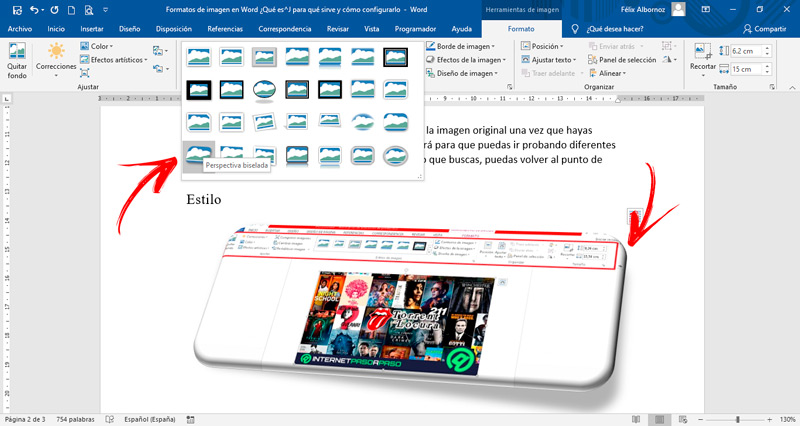
- Image Styles: When you need to give a different look to your image, you can select some default skins, which will help your illustration to have an eye-catching effect. In this way, you will combine the orientation and lighting that the graphic will have in the document. In case you do not find the style you need in the most used, you can click on the drop-down menu to find a wide variety.
- Image borders: you will be able to change the style of borders that the illustration has with ease. You should consider that Word has, by default, an invisible border so you can choose a large number of sizes and colors for this element of the illustration.
- Image Effects: this tool is useful when you need the graphic to have a 3D look, shadow, reflection or any other style that you can combine. This will make the image stand out in the document so you can give the reader neat, bold text.
- Image design: if what you are looking for is to convert the images into SmartArt, with this tool you will be able to give it a title and modify the size of the illustrations quickly. In this way you will convert the images into graphics with a few steps and then you will be able to edit them with ease.
Organize

The functions that make up this group are:
- Position: By default, Microsoft Word places the image in a paragraph exclusively, so you’ll be able to find text above and below the graphic. But this is not the only option you can count on, you can also place the illustration anywhere and write next to it for a more informal look. It is ideal when you write stories or work with images that are not sufficiently
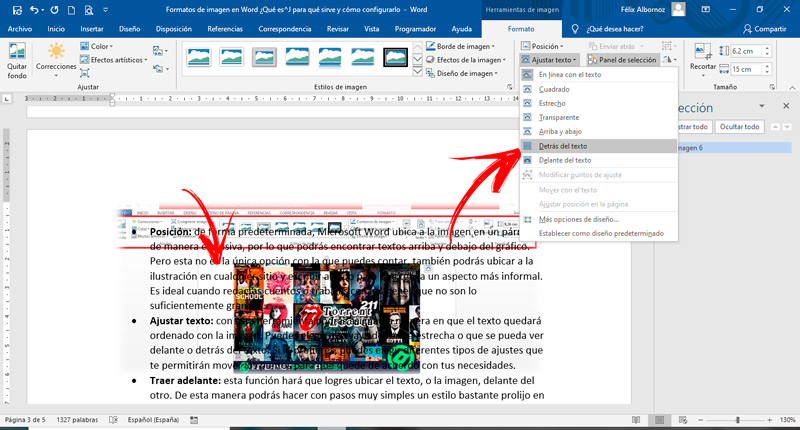
- Adjust text: With this tool you can assign the way in which the text will be ordered with the image. You can choose to go narrow or to be visible in front of or behind the text. If you prefer, you can choose different types of adjustments that will allow you to move the points to suit your needs.
- Bring forward: this function will make you manage to place the text, or the image, in front of the other. In this way you can make a very neat style in the text with very simple steps.
- Send Backward: is the inverse of the previous function.
- Panel selection: if you need to have a list of all the objects you have, you can include a panel that will appear to the right of the text with all the graphics that you have in the document. In this way, you will be able to click on each of them and select them automatically.
- To line up: in case you work with different sizes of images, you can align them according to the format you have in the text. This will make your work look professional and you can have the same border on the page in relation to the other elements.
- Group objects: this function is useful when you have incorporated different graphic forms in a text and you need that each time you move the image is activated together. For this, you will have to select by pressing the key “ctrl” and clicking on each of the illustrations.
- Rotate objects: It is very useful when you want to give another orientation to the image that you have inserted and you see it convenient for the reader’s interpretation.
Size

When you need to work with the size of the image, you will have these functions:
- Size: in case you want to crop the illustration, since you are only interested in a part of it. You will have to select this tool and then move the coverage area. This will automatically make the part you don’t need disappear.
- Shape height: In this function you will find next to its icon a field that indicates the centimeters that the figure that you have incorporated into the text has. To enlarge or shrink it, you will have to click on the directional arrows.
- Width shape: as with the height, you can also work with the width of the image. You can add or remove centimeters with the arrows.
Computing