
Index:
UPDATED ✅ Do you want to know what are the best Windows 7 tricks that every user should master? ⭐ ENTER HERE ⭐ and Learn all about it
Windows 7 refers to a version of Microsoft Windows that was released in 2009 and, today, it is still an operating system managed by a large number of users. Either because they prefer this OS over Windows 10 or simply because their machine can support up to version 7 of Windows.
However, although it is a software with such a long history worldwide and that has been used by countless users, the truth is that certain things of interest about Windows 7 are still unknown. Because, many only use it to perform common tasks and do not go beyond that.
But, in order to get the most out of Windows 7, it’s worth knowing the best tricks, tips, utilities and little exploited resources of this operating system. Therefore, in this post, we want to point out 30 tricks that you can execute in said operating system to work more efficiently.
List of Top 30 Windows 7 Tricks Every User Should Know
Just as we indicated at the beginning, in order to obtain the maximum performance of Windows 7, it is necessary to know several tricks of interest that will allow you to discover functions that are rarely used in this operating system and, also, acquire a much higher quality user experience.
So, if you’re still a loyal Windows 7 user and want to improve your PC skills, it’s worth try the following tips that we mention here and do not miss any of them:
Speed up Windows 7 startup (micro 2 or more cores)
Typically, W7 boots the computer using a single core, but if the machine has a processor with more than one core, It is of great importance that you choose to take advantage of it so that this operating system starts much faster.
So, if you want to access it, you have to do the following step by step:
- First of all, go to the Start menu and type the following word “msconfig”for later “press Enter”.
- Next, in the window that shows the system, you will have to click on the “boot” tab.
- Subsequently, Press the “Advanced Options” buttonso you can enter the Advanced Boot Options window.
- Now, check the box that says “Number of processors” and choose how many cores to use at most, then proceed to check “Amount of memory” and there enter the total of your RAM. Example: If it is 1 GB, put “1024”.
- done the above, press the OK button and then the same button again to be able to exit msconfig. Finally, hit the reset button and voilanow you will have a faster system boot.
Start the OS with your favorite music
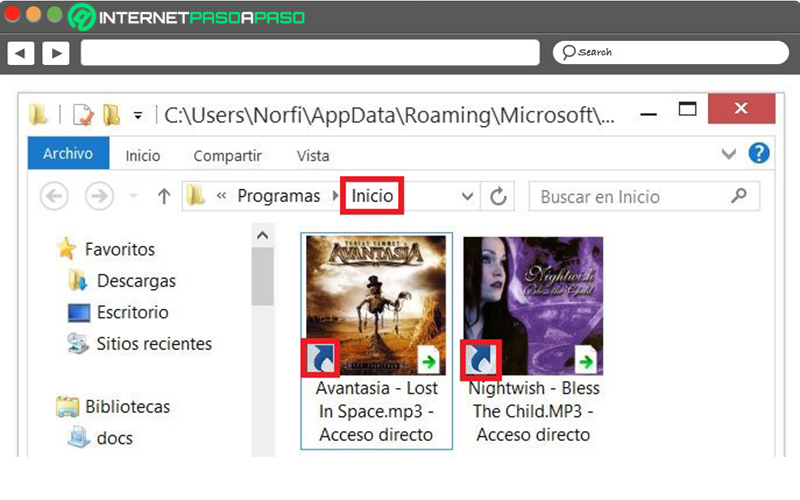
If you are a fan of music, you will surely like that Windows 7 starts with some of your favorite songs and, luckily, there is a possibility that your favorite track will be played when you start the operating system. Which, although it may seem complicated, is really very simple because it is achieved by simply copying the song to the Start folder.
Here are the steps to carry out:
- Directly from Start, type or paste the following: “shell:Startup” and press the Enter key.
- Next, the Startup folder will open and there, you will have to create an access address to the boot song you want. You do this by right-clicking on the track’s MP3 file to drag and drop it into the Home folder, or by copying and pasting the entire song.
Since then, every time Windows 7 starts up, that song will start playing from the PC’s default player.
Disable computer lock
While it is true, a Windows 7 computer can be locked by pressing the following keys “Windows + L”and if for some reason you have restricted the PC with said lock function by accident and want to disable it, there is a simple way to do it; the process to follow is:
- First of all, go to the Start menu search box and enter the word “regedit” there to press the Enter key.
- With the above, it will open the “Registry Editor” and from there, on the left side, navigate to the following string: “HKEY_CURRENT_USERSoftwareMicrosoftWindowsCurrentVersionPolicies”.
- Now, within the “Police” sectionclick on the folder “System”. If it doesn’t exist yet, you can create it by right-clicking on the “Policies” folder, then select “New” and “Password”in order to have the new folder called “System”.
- Once the above is done, you will find yourself in the path “HKEY_CURRENT_USERSoftwareMicrosoftWindowsCurrentVersionPoliciesSystem” and there, on the left click on “System” and on the right side, search for “DisableLockWorkstation”.
- If it doesn’t exist, do the following: Go to “Edit > New > DWORD (32-bit) Value” and you will call him “DisableLockWorkstation”.
- Then double click on “DisableLockWorkstation” and there, modifies the value information to “1” for now click on “To accept”.
- Finally, restart the computer and in case you press “Windows + L”the lock will no longer be activated.
Create Quick Notes with Sticky Note
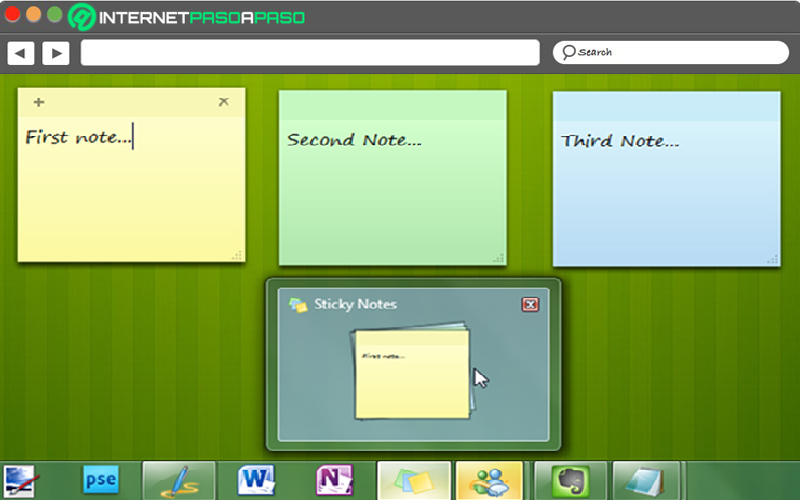
In case you didn’t already know, the application of “Sticky Note” you can use it to jot down phone numbers, write a to-do list, or make any notes you need to set as a reminder. Since, this sticky notes app works like a kind of notepad.
In this way, if you are interested in using this tool on your Windows 7 PC, you only have to go to the Start search bar and type there “StikyNot”for later press the Enter key and you’re done.
Create a system repair disk
In case, unfortunately, you have lost the Windows 7 repair disk and want to recover it, or you have bought a computer with the OS already installed and you do not have that disk of great importance, there is a trick that allows you to create it easily.
For that, you need to make use of a blank CD or DVD. Next, you will have to perform the following procedure:
- Start by accessing the Start menu on your computer and type “recdisc” in the search barto press Enter.
- With the above, you will be redirected to the window of “Create a system repair disc” and once you are there, you must insert the blank CD or DVD into the drive of the machine.
- In conclusion, click the “Create Disc” button and now just wait for the process to finish.
Recover sticky notes (Sticky Notes)
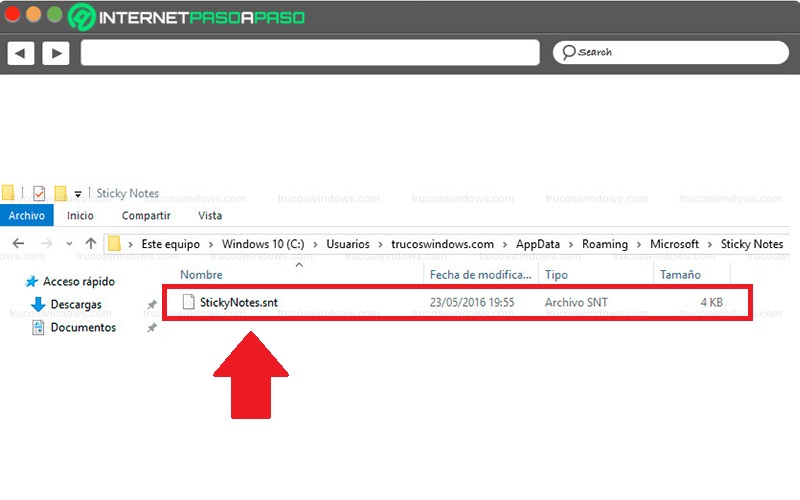
In case you need to recover W7 sticky notes or want to create a backup of them, it is required to have access to the hard drive partition where the operating system is installed. For which, mainly, you will have to go to the path: c:usersUsernameAppDataRoamingMicrosoftSticky Notes.
In this case, the letter “c” will correspond to the letter of the disk drive that is associated with the OS (if it is not “c”, of course you must substitute it) and, in addition, followed by “Users”, you will have to enter the Windows username from which you want to recover the sticky notes in question. After this, the steps to be completed are:
- At this point, it’s time to copy the StickyNotes.snt fileas this is where all post-its are stored.
- Later, you have to go to the new Windows, to find the path that corresponds to the user to whom we want to restore these notes.
- Lastly, you must replace the StickyNotes.snt file with the old Windows and thus, you will be able to open these post-its in the new OS as if you were in the old one.
Typically, this trick is used when the user you want to upgrade from Windows 7 to a newer version.
Speed up computer shutdown
Just as you can get a faster boot in Windows 7, so can shutting down your PC. So the trick is to decrease the time it takes to close each open processeither 6 or 8 seconds to speed up the shutdown (by default, it takes about 12 seconds).
Next, the step by step to follow to achieve this speed:
- Access the Start menu and in the search box, enter the word “regedit” to press the Enter key.
- With the above, the registry editor will open and on the left side, you will have to look for the following path: HKEY_LOCAL_MACHINESYSTEMCurrentControlSetControl. for so, keep the Control folder selected.
- Then, inside the Control folder, look for “WaitToKillServiceTimeout” and there, you will see that it shows a value of “12000”. Which, refers to the 12 seconds delay to close all processes.
- Next, in the window that they show you, proceed to modify this value by “8000” (ie 8 seconds). Thus, the waiting time to kill a service when you turn off the PC will be 8 seconds and not 12.
Record audio with sound recorder
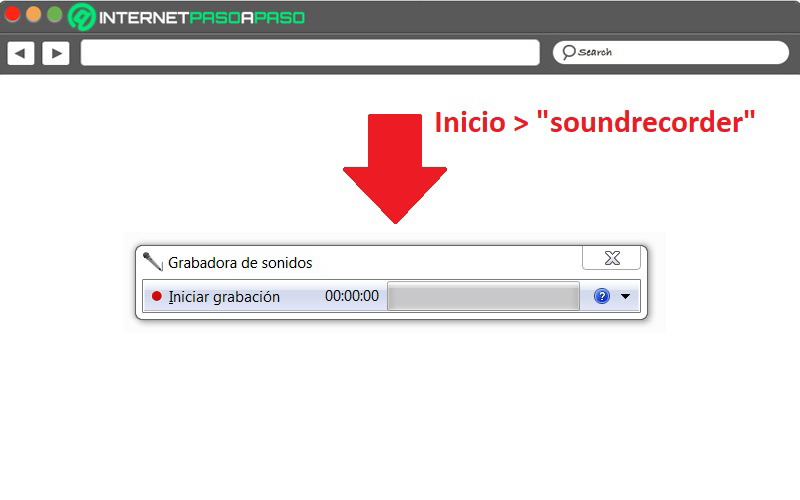
If you want to record any audio or sound directly from your computer, without having to use your mobile phone, there is a trick for it in W7. For this, you will have to use the famous system sound recorder that allows you to make quality recordings and save them on your computer as any audio file.
In this way, you will have to make use of a microphone connected to the sound card of your PC to emit the sounds or of any audio device. Once you make sure of this, it only remains to start the W7 sound recorder, with just type in the start bar “soundrecorder” and press the Enter key.
Turn off search history
For all Windows 7 users, the search offered by this OS is usually very useful. But, once the search history is full, the privacy could be affected and, well, show the rest of the people all the searches that are carried out. Thus, Many people choose to deactivate this function through the following procedure:
- In the Start menu, specifically in the search box, you have to enter “gpedit.msc” and press Enter.
- Thus, a window will open that belongs to the Local Group Policy Editor and there, from the left part of the panel, you must access “User settings”.
- After the above, go to “Administrative Templates”now in “Windows Components” and later, in “Windows Explorer”.
- Next, in the right section, look for “Turn off showing recent search entries in the Windows Explorer search box” and right click on this entry.
- In the available options, choose “Edit” and in the window that is displayed at that point, click on “Enabled”. After, click “OK” and close the local group policy editor.
Once all of the above is done, Windows 7 will stop storing search history on the system.
Use Snipping to take screenshots
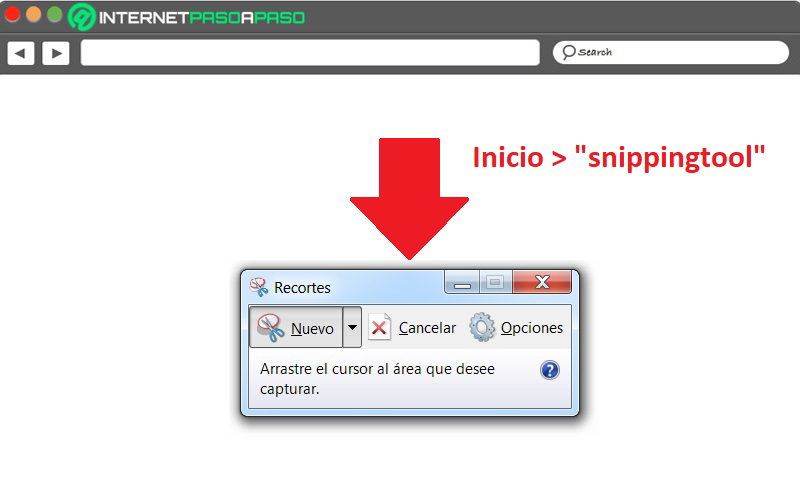
Although it is a very simple trick of W7, it can certainly be very helpful for users who need to take screenshots constantly. Thus, a ruse that relies on the operating system’s “Spinning Tool”.
In that sense, to take a screenshot or cut out any existing object on the screen and then edit, save or share the image; You will have to enter the Start menu and type in the search bar “snippingtool” to press Enter and thus start using the tool.
Get Power Efficiency Report (for laptops)
In Windows 7, you can use a command that generates a report about your computer’s power efficiency. Which, lets you know if there are errors or dangers and more details of interest. To do this, before proceeding, you will have to make sure to close all open documents and applications on the laptop.
So, do the following:
- From the Start menu, Go to “All Programs”.
- Now click on “Accessories” and then select “Symbol of the system” to right click there and then you should press “Run as administrator”.
- Then in cmd, copy this “Powercfg -energy -output trickswindows.com.html” and press the Enter key.
- After one minute to complete the monitoring, you will get a complete report based on energy efficiency issues.
It is opportune to highlight that the “powercfg” command has many other utilities of interest and if you want to know what they are, just type “Powercfg /?” in the cmd to know them one by one.
Use the W7 magnifier
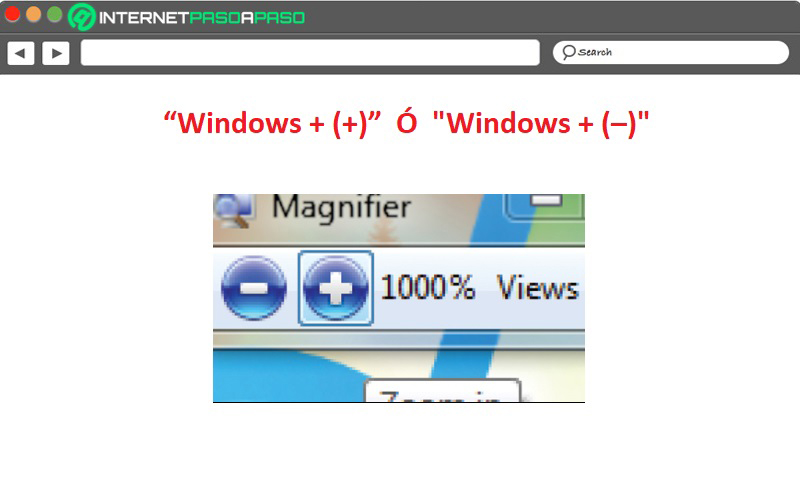
For many users who have vision problems or prefer to adjust the size of the screen according to their preferences, there is a trick that they can easily use for this in Windows 7. It is based on activate the magnifying glass that contains the system and thereby zoom in or out of the entire desktop and certain parts of the screen.
In this sense, to be able to enable the magnifying glass, you will have to press the Windows key together with the “plus” or “minus” key to open a rectangular magnifying glass to zoom in or out as much as you want on the panel. That is, pressing “Windows + (+)” you can zoom in and pressing “Windows + (–)”you can move away Additionally, they allow you customize magnifying glass; either to follow the keyboard cursor or the mouse point.
disable restart automatic
In case of errors, it is very helpful to disable automatic restart of a Windows 7 PC. Given that, in this version of Windows, whenever a failure occurs, the system proceeds to show a blue screen with white letters indicating all the details of the error that has occurred, but since the OS automatically restarts, it is not possible to read it well.
Then, To be able to see this information in detail, do the following:
- In the Start menu, access the Control Panel.
- Second, click “Security system”then go to “System”.
- Now, on the left panel, click where it says “Advanced System Settings”.
- Subsequently, go to the tab that indicates “Advanced Options” and in “Startup and Recovery”click the button “Setting…”.
- In the new window that opens, specifically within the system error, proceed to uncheck the “Automatically restart” option.
- Lastly, click on “To accept” twice and from now on it will not reboot every time it shows a blue screen error.
Track all actions with Problem Steps Recorder
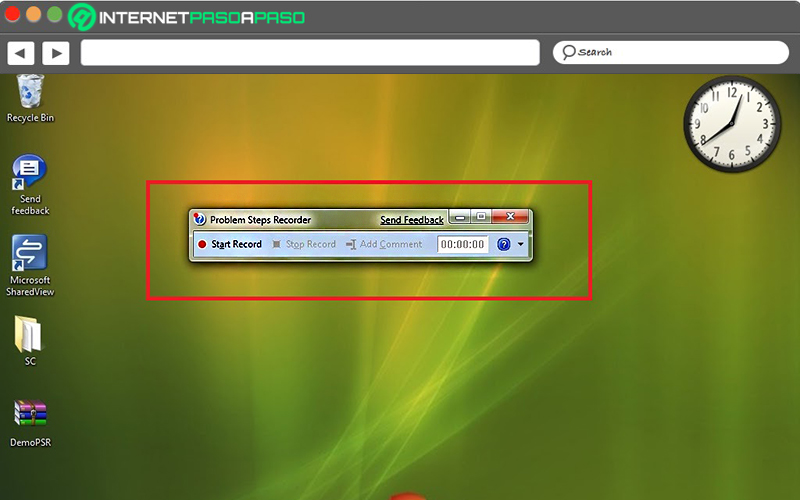
Through a diagnostic tool known as “Steps recorder problem” which was developed by some Microsoft engineers, it is possible to track all the actions that are carried out on the computer. Since this tool combine screenshots with mouse tracking in order to record all the tasks that are executed.
In that sense, if you lend your PC to anyone and want to know what they do during the experience, you can start said program directly from the Start menu. Through the following procedure:
- In the Start search bar, type “psr.exe” and press the enter key.
- Next, you have to press the “Record” button so that the tool starts tracking around mouse and keyboard input, while also taking screenshots based on each new action.
- Once you stop recording, the session will be saved on your computer using an HTML slideshow that recreates all the steps executed on the machine and even allows you to add annotations and comments.
Speed up Internet Explorer 8
If you prefer to use Internet Explorer before any web browser, this trick can be very helpful. Since, it is based on the registration of a DLL file that is responsible for speed up your Internet Explore 8. Being that file, a module that contains the functions used to form the ActiveX COM interfaces.
Therefore, if the idea of speeding up said browser catches your attention, before proceeding you will have to make sure that close internet explorer 8. Then complete the following steps:
- In the Start part of the computer, go to “All programs” and then to “Accessories”.
- Then selecting and right-clicking on “Symbol of the system”proceed to press “Execute as an administrator”.
- After that, they will show you a User Account Control window and there, simply you have to click on the “Yes” button.
- In this point, type “regsvr32 actxprxy.dll” directly in the Command Prompt window and press Enter.
- Thus, a window will appear indicating that DLL actxprxy.dll has been registered and with that, you just have to press OK.
- Lastly, proceed to open internet explorer and verify that now it works much faster than in the past.
Calibrate text and color on a laptop
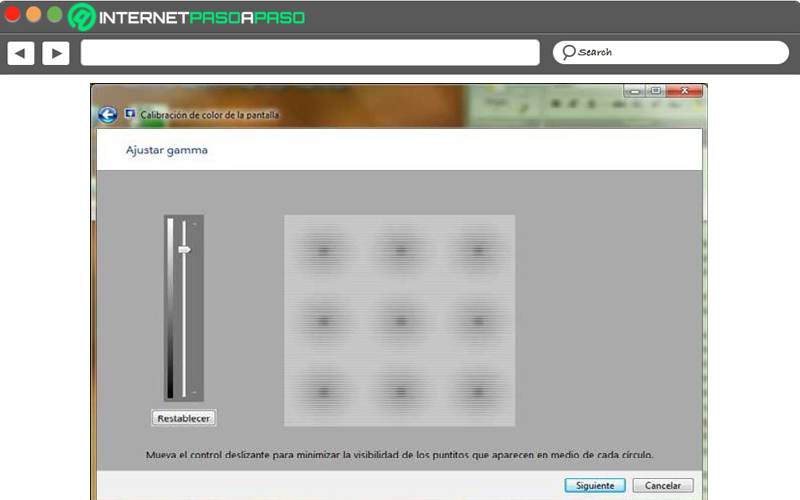
This is a tactic you can use on any laptop running Windows 7 to adjust text and color to your liking. Thus, it consists of a procedure based on calibrate the text ClearType and Display Color from two built-in wizards that guide the user through the entire process to avoid any problems.
Here are the steps to specify:
- Then start the ClearType text wrap with just write “cttune” in the search bar of the Start menu.
- Once you open the search result, you must complete a series of brief steps that are requested, so that the system can identify the most fascinating text rendering method.
Now if you want to calibrate screen color to use W7 with large search LCD screen or projector, the process consists of:
- Directly from the Start search box, type the word “dccw” and press Enter.
- You will then also be taken to a series of pages from which you can adjust screen brightness, contrast, gamma, and color so that all the images look to your liking.
Disable smart window placement
Although it is true, when you press a window in Windows 7 and drag it all the way to the top and then drop it, it is automatically maximized. Thus, if you click on it again and drag it down, it will return to its previous position. Although it is usually useful for many people, the truth is that many others do not like it.
Therefore, There is the possibility of deactivating the placement of smart windows and here we explain how:
- In the search bar of the Start menu, type “regedit” and press the Enter key.
- With the above, the Registry Editor will open and on the left you will see the following string “HKEY_CURRENT_USERControl PanelDesktop”. So, keeping selected “Desktop”, look for “WindowArrangementActive”. If it does not exist, you can create it from the right mouse button, following the shortcut: “New > String Value” > Naming it “WindowArrangementActive”.
- Then double click to edit the chain and in “Value Information”change the value 1 to 0. Finally, click “OK” and restart your computer to save all changes.
Rearrange icons on the taskbar
![]()
Although it is a simple trick, the truth is that it is extremely interesting because it offers the possibility of rearrange the icons on the taskbar, just as you wish. Either to start new instances or to change the execution of the first 10 programs of the taskbar and thus, access more quickly.
To do this, you simply have to use “Windows + 1”, “Windows + 2”, “Windows + 3” and so on. It should be noted that W7 also allows you to rearrange the system tray icons or move them out or back there. In this way, you can better manage your most used applications.
Unzip files without installing any software
It refers to a very easy way to unzip files when there is no tool installed that allows you to do it from your computer. Because, the 7za executable is usedwhich works through the command line without having to install it in the operating system and, furthermore, without needing an additional file for its correct operation.
So, to perform said trick, you just have to do the following:
- To start, download and unzip the filewhich is admitted in ZIP-format natively by Windows.
- Next, you must keep the two files that are inside the compressed in the same folder.
- Now, to unzip any file, proceed to drag and drop it above the file “extract.cmd”.
- At this point, you can start unzipping any type of file (ZIP, 7Z, RAR, etc).
It is worth mentioning that it is important make use of the latest version of the 7za executable and you can get it from its official website, directly.
Control autoplay settings
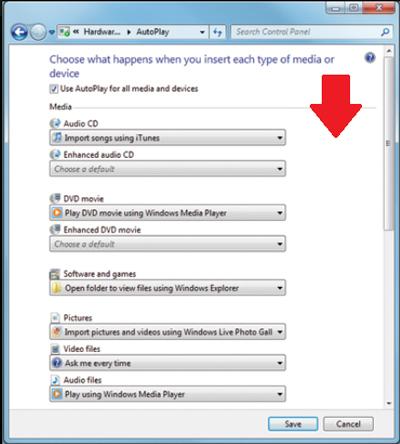
While it is true, the W7 version of AutoPlay provides the necessary tools to point out what to do with media types once you connect to an external drive or insert a disk. Thus, this operating system allows you to configure the autoplay settings by media type, however, for this you will have to look for additional adjustment options.
Here is the procedure to carry out:
- From the Start menu, access the Control Panel.
- Subsequently, click on “Hardware and Sound”then choose “Autoplay”.
- Although, by default version 7 of Windows uses autoplay for all media, you can uncheck that option and with it, customize the actions you want. So choose your favorite app as default autoplay option.
It is valuable to distinguish that, each type of multimedia music CD/DVD, multimedia files, video discs, blank media, software and games; gives you options based on Windows 7 utilities and third-party programs.
Disable hibernation by command
Although not all users use jailbreak, by default it is enabled in Windows 7. However, you can easily disable it to gain space on the PC’s hard drive, for which you must do this:
- Go to the Start menu, Go to “All Programs” and select “Accessories”.
- Now in “Symbol of the system” you have to click the right mouse button for there choose “Run as administrator”.
- Later, in the Command Prompt window, type “powercfg -h off” to disable hibernation.
If, after this, you want to activate it again, you have to carry out the same process and enter “powercfg -h on” in the last indicated step.
Create keyboard shortcuts for certain programs
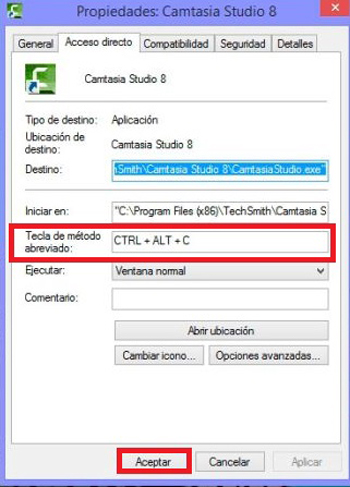
This is a very useful trick that can be used on all versions of Microsoft Windows in use today. Thus, a method that is based on creating keyboard shortcuts for any program or application installed on W7, in this case.
Right away, we detail the steps to execute:
- To get started, find the program you want to create the keyboard shortcut for and click with the right button on its icon.
- After the above, select the “Properties” option and then click on the tab “Shortcut”.
- At this point, it only remains enter the Shortcut key you preferspecifically in the bar “Shortcut key” to click OK and you’re done.
Run applications with another user
One of the best advantages that Windows 7 exhibits is the ability to run the applications you want with any user. In this way, the method consists of:
- Initially, you must right click on an application executable (ie the file in .exe format).
- Then they will show you the option “Execute as an administrator” and if you hold down the key shift without releasing it at the same time that you right click on the executable, you will see the option “Run as other users”.
- With this, press that option and you will have to Enter both your username and your password to get it running.
Of course, it is an ideal trick for those users who manage a computer with several accounts or have problems running a certain program with one of those accounts.
Add videos to home menu
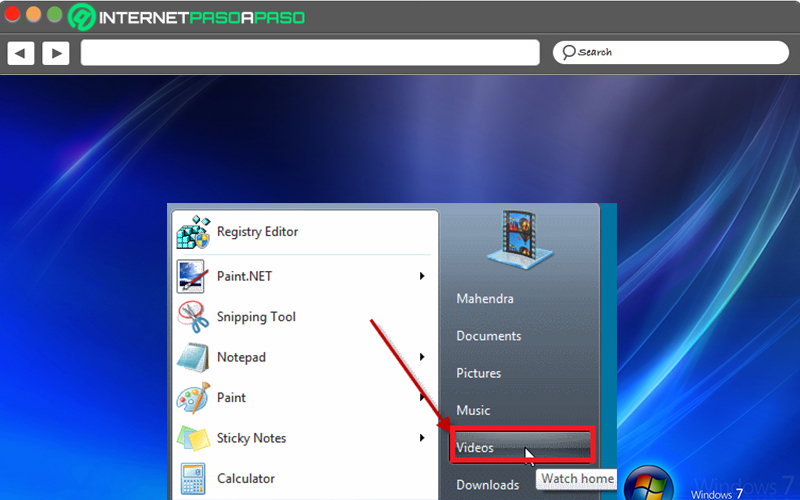
Although this operating system does not place a link to your videos by default in the Start menu, there is a trick to add them very simply.
In this sense, what you should do it is:
- Click with the right mouse button on the Start option of the computer.
- Afterwards, you have to click on “Properties” and then select “Personalize”.
- Now, access the Videos section at the bottom and finally choose the option “Show as link”. That’s it.
Speed up taskbar preview
On any computer with Windows 7, once you go to the taskbar from the Start button and the Windows clock, you will see all the applications you have running and if you proceed to move the mouse over each one of them, you can see a thumbnail preview of the program. Default, the time it takes to display is 400 millisecondsbut this you can speed it up.
So, in order to reduce the waiting time to preview each app on the taskbar, you must carry out the following procedure:
- Click on the Start menu or the Windows key on the keyboard to enter “regedit” in the search box there and then hit Enter.
- Then, in the left section of the Registry Editor, look for the string “HKEY_CURRENT_USERControl PanelMouse”.
- So, inside the Mouse folder, proceed to search for “MouseHoverTime” and double click on it to edit it. In this way, you will see a new advantage where you can see the information of the value of the time it takes, which is 400 and you have to modify it to 200 or 100 (as you prefer).
- Finally, click the OK button, close the Registry Editor and restart your computer.
Enable quick launch bar (Quick Launch)
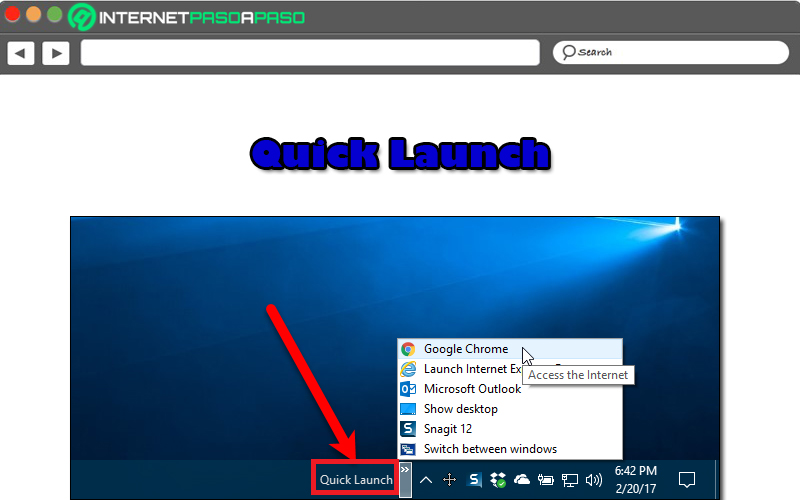
By nature, Windows 7 does not contain the Quick Launch toolbar, but you can activate it from a trick that we teach you, below:
- In the Windows taskbar, you have to right click and select the option “Toolbar”then go to “New Toolbar”.
- Right after that, they ask you for the folder and you must place “%SystemDrive%Users%username%AppDataRoamingMicrosoftInternet ExplorerQuick Launch”. Then press the button “Select folder”.
- At this point, you will already have the quick launch toolbar and you can customize it by clicking the right mouse button on the Windows taskbar, to click on “Lock taskbar”.
- Then just about “Quick Launch” you have to click the right mouse button again and disable the “Show text” and “Show title” options.
- Then right click on the taskbar and choose “Lock taskbar”to finish the installation of the quick launch toolbar.
Enter God Mode in Windows 7
This trick to activate God Mode works both on W7 32 bit as well as 64 bit. In which, an access to a panel is created in which all the accesses to the PC control panel configurations are available.
In this sense, to be able to enter, the first thing you should do is create a folder anywhere on the computer (on the desktop, for example). That is, by right clicking, selecting “New” and clicking on “Folder”. Which, should be called “GodMode. {ED7BA470-8E54-465E-825C-99712043E01C}”.
With the above, you will notice that the icon will be changed immediately by the one you have in your control panel and once you double click on that iconyou can enter the “God Mode” either System God Mode.
Use Aero shortcuts
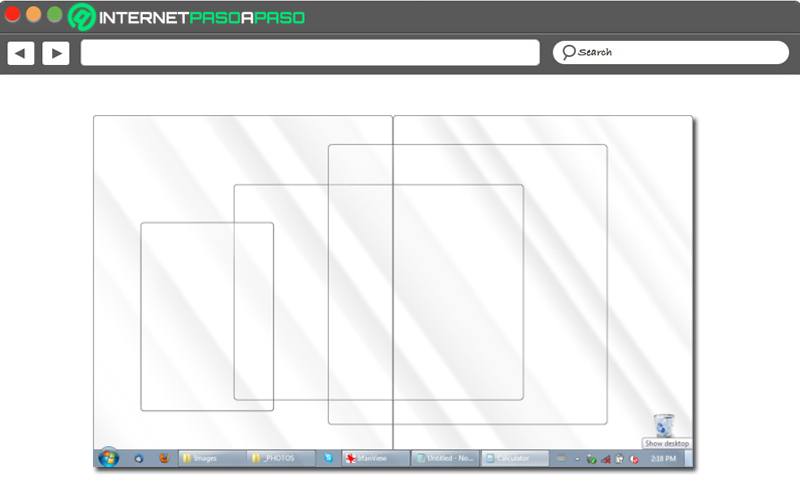
Aero shortcuts can also be of great help in maximizing the user experience in Windows 7. Next, We present each and every one of the ones we recommend using:
- “Windows + Space Bar”: With this shortcut you can make all open windows transparent so you can see icons and gadgets on the desktop. (Aero Peek).
- “Windows + D”: It is responsible for showing or hiding the desktop. (Aero Peek).
- “Windows + Start”: Minimizes all windows except the currently selected one. But, you can reverse the function by clicking the key combination again. (Aero Shake).
- “Windows + shift + up arrow (or down arrow)”: Enlarges or restores the chosen perk in vertical dimension only. (Aero Snap).
- “Windows + left arrow (or right arrow)”: Fits the selected window to the left or right half of the computer screen. (Aero Snap).
- “Windows + up arrow (or down arrow)”: You can maximize or restore the window that is selected. (Aero Snap).
- “Windows + Tab”: Starts the 3D rendering of all open perks. (AeroFlip).
Check if Windows 7 is activated
In case of doubts or an error of this type, it is opportune to check if the operating system is enabled and, luckily, to be able to verify it you will only have to execute a command. Next, we propose the simple procedure to follow:
- Start by going to the Start menu on your computer and in the text bar, enter: “slmgr.vbs –xpr”. But, if you prefer, you can also press the keyboard shortcut “Windows + R”, to get the run window to place that text as well.
- Later, press the Enter key and after a few seconds, you will be shown a window called “Windows Script Host”. Which indicates if your Windows 7 Ultimate is enabled with the following message “The computer is permanently activated”.
The most popular keyboard shortcuts on W7
|
key combination |
Function |
|
Win+E |
open windows explorer |
|
Ctrl+Alt+Del |
Access the Task Manager, (it is very effective to stop tasks and processes in the blocking of programs and applications) |
|
Shift+Delete |
Delete a file or folder completely without moving it to the recycle bin |
|
Ctrl+Shift+N |
Create a new folder and thus, it allows to dispense with the common right click > New folder |
|
Ctrl+Mouse wheel |
Modify the size of the desktop icons and if it is used with the browser open, it proceeds to change the folder view. That is, you can toggle between: Large Icons, Medium Icons, List, Details, etc. |
|
Alt+F4 |
Close a window or program |
|
Win+R |
Open the Run command |
|
Shift+F10 |
View the context menu of the selected item. It is the same as right clicking with the mouse |
|
Win+B |
Focus on the “Show hidden icons” button in the system tray |
|
Alt+Tab |
Cycle through all open windows |
|
Win+X |
Start Windows Mobility Center. It is useful if you are working on a laptop |
Is it advisable to install Windows 7 now that Microsoft has removed support for it?
In case you still did not know, we distinguish that Windows 7 support by Microsoft has come to an end as of January 14, 2020. Which is because the company only committed to providing 10 years of product support for this version of the operating system that was released in 2009. For that reason, both the software updates and the Windows Update support that help protect the PC, is no longer available in the product.
In this way, both the same company and also a A large number of experts recommend that users start using Windows 10, in order to avoid any daunting situation for people still using W7. Well, since they are no longer responsible for the service, Microsoft will not guarantee the security of this OS version and, therefore, it is best to stop installing Windows 7.
Apart from security, it should also be noted that W7 is an operating system that it will be completely obsolete in the coming months and, given that it is so fundamental to delve into the development of technology and all the benefits it offers, At present, it will be most optimal to use the newest version of Windows, i.e. W10. As the same company has repeatedly asked users of Windows 7 and other previous versions.
Operating systems