Index:
UPDATED ✅ Do you want to know more about backups on a Raspberry Pi? ⭐ ENTER HERE ⭐ Learn Everything FROM ZERO! ⭐
Being able to work with a raspberry pi without a doubt, it is a great advantage for everyone, especially since it is very easy to be able to restart the entire operating system or change it in the event of a disaster.
Many times you can be working on them for a long time and suddenly a problem can occur to spoil all our work, so you’ll need reinstall the operating system.
Therefore, if you constantly use these plates, it would be very good if you made a backup from time to time. This is how here we are going to teach you what a backup and how to create them on your mini PC in an easy and fast way.
What are backups and why is it important to do them on my Raspberry Pi?

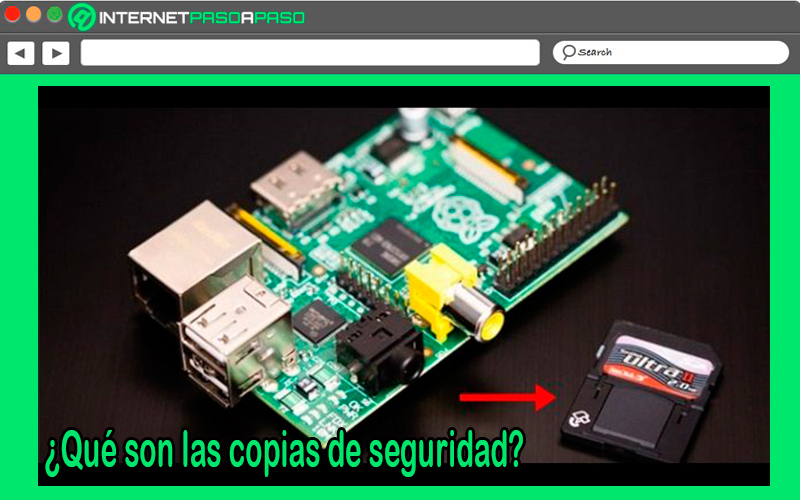
If there is something to take into account, it is that the Raspberry Pi they are a miniature computer, so create backups in it will be very important, especially because these plates are used to carry out different types of computer or electronic projectswhich means that a large number of data and information truly important.
get to lose files, documents, photographs, passwords, audios, videos or any other type of file can be fatal for anyone, especially if you do not have any type of backup for that information. In addition, the procedures to try to recover this lost information are very difficult to carry out and No they are 100% safeso it is worth being quite cautious in these aspects.
In the case of these microcomputers, they sometimes present some faults in their operating systemsespecially when they spend a lot of time working, these failures could cause the destruction of the operating system completely, which will cause a data loss and information and will force you to install the OS again. One way to try to solve these inconveniences is by carrying out these Backups from the system from time to time or even every time you spend time working on your projects.
In accordance with all this, here we are going to leave you some advantages offered by backup copies in the Raspberry Pi:
- A security copy it will permit you recover all your data in an easy and fast way.
- You can have full control of the versions of said data.
- All your files and folders contained in the plate will be under the same unit.
- You have a immediate availability of the information.
- The storage and copy of the information is always done in the scheduled instant.
- When you store data outside of your computer, you’re going to have a greater server spacewhich will allow the operation to be much more efficient.
Learn step by step how to make backups on a Raspberry Pi from scratch and without errors
If you are constantly working on your Raspberry Pi and your projects require of a lot of time and dedicationthen it is very important that you make your backup copies so that you can have a kind of backup in case a problem occurs in your operating system, taking into account that anyone can be affected by it.
Considering how important this is, here we are going to show you different methods so that you can start creating your backups from scratch and without errors:
Copying image from SD card
This method is possibly the simplest to carry out a backup on your Raspberry Pi, this being one of the reasons why it is the most used. In this case it consists of copy the entire SD card as an image, It is a technique that is the reverse of Flashing your SD when an operating system is installed. Therefore, here you will not have to copy an image file from your computer to SD cardIf not, the entire micro SD is copied to an image file on your computer.
Therefore, the image files will first be created, for this you must follow these steps:
- the first thing will be turn off your microcomputer and remove the micro SD card of the plate.
- Now you have to place it in a SD card reader and plug it into your computer.
- Next you will have to open the window “Terminal” in a Mac and Linux computer and type
dfto view the devices on your system. - After this you should connect sd card to your computer and type
dfagain.
If you want to see the newly mounted drive and you have a linux machinethen it will be something like the following: /dev/sdb1while in a Mac it will be something like this /dev/disk2s1.
Note that the numbers in these cases may be different, so you’re going to have to check all of this very carefully:
-
On a Mac:
sudo dd bs=4m i f=/ dev/rdisk2 of=raspbian.img -
On Linux:
sudo dd bs=4m if=/ dev/ sdb of=raspbian.img
After this you can use the file raspbian.img in order to restore your entire operating system to the state where the last backup was executed to the SD card using dd backwards or using an application like Etcher to Flash the micro SD. Lastly, if you are windows userthen you will have to make a backup using the program Win32 Disk Imagerwhich we will explain later.
Copying home folder
Another way to carry out these backups is by making the backup directly from the home folder, for this you must remove sd card from your raspberry pi and connect it to a PC or a Mac and complete the entire backup by storing on the computer.
The second thing in this case is to backup only your home folder as a ZIP file. To the unzip that file you will have the opportunity to explore and restore files individually, so you can retrieve only what interests you.
Here you should use the terminal on your Raspberry Pi:
cd /home/

Sudo tar czf pi_home.tar.gz pi
You must copy the pi_home.tar.gz file to one of your USB drives so that it can be kept safe. If you run the risk of losing said unit, then you can save it on some of your computers.
With Win32 Disk Imager
This program will allow you to Backups in an easy and fast way and it will also be available for Windows. Therefore, if you have already downloaded this tool and have not used it yet or if you want to download it for the first time, you will be able to do it from the following link.
Download Win32 Disk Imager for Windows
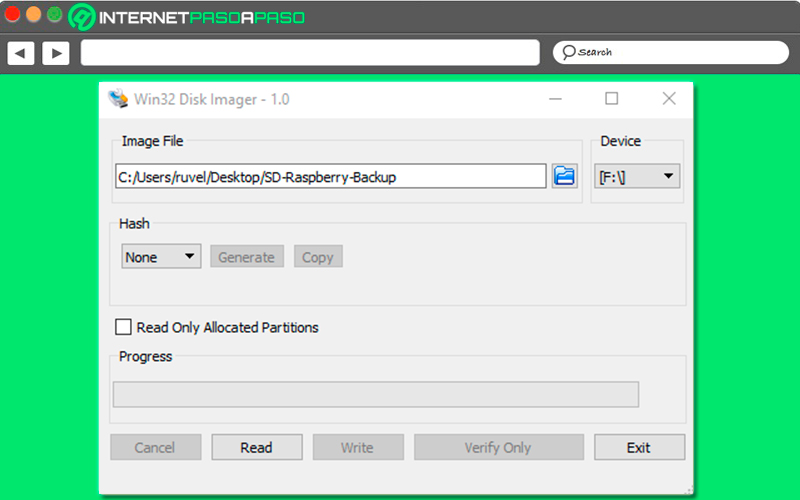
Please note that this tool used to write system images to memory cards. Therefore, when it has been downloaded the program The next thing will be to run the application and there you will be able to see its main window.

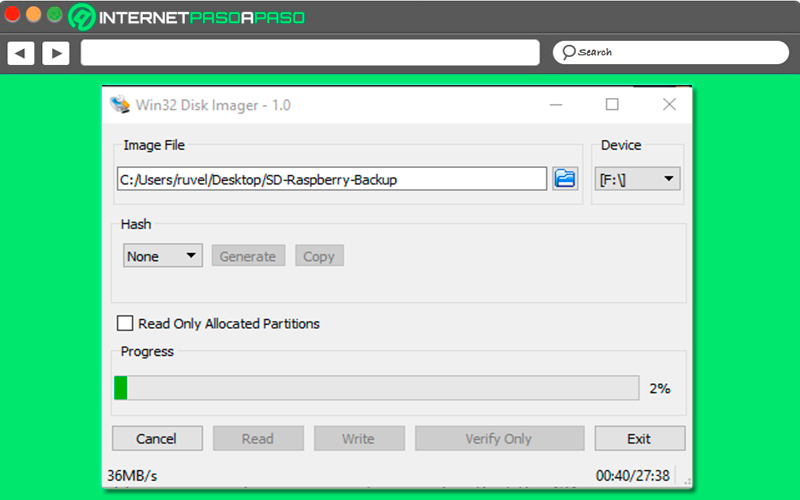
when you want record an image to a micro SD to be used in the raspberrypi, It will be necessary to select the letter of the unit where it is going to be recorded, you must select the image and then click on the button “Write” to copy it. Now if what you are looking for is to do the process inversely, that is, the copy of micro sd security to save it to your computer, then you’re going to have to select the drive letter and choose the name for the backup as well as the path where it will be saved.
After you have done this you will have to select the button “read”. When it’s over the micro SD backup, then it will be ready. This means that you can disconnect the card from your computer and reinsert it into the microcomputer and continue to use it normally.

It is possible that your card may present some type of error, but having the copy of security guarded on the main computer, you will only have to connect the memory card to the computer and from Win32 Disk Imageryou write the copy to it as if it were any other image, with the difference that it will already be fully configured and working.
Find out how to schedule a backup on Raspberry Pi to keep your files constantly safe
The best way to keep all your information completely safe is by scheduling backups in your RaspberryPi. Luckily, all this is possible to program manually through the command taralthough it should be mentioned that some of the users of this board choose to use rsync instead of tar, but this is just a matter of taste.
The main difference from this is that rsync intelligently copies updated files instead of full files, but you will need to create an exclude file that can ignore the contents of system folders. Now if you want a much easier approach to usethen you can use a program called let dup.
Which is characterized by being very easy to handle and allows you to make backup copies of your board using Amazon S3, SSH, FTP or by copying the files directly to the USB stick. You will also have the opportunity to select directories to either exclude or include in the backup. Also, it is important to clarify that it is very easy to restore the copies.
In this case, Déja Dup is installed by default in Ubuntu, but it is very easy to install for Raspbian, for this you must do the following:
Sudo apt-get update && sudo apt-get upgrade

Sudo apt-get install deja-dup
You are now going to come across a new program known as Backups in the menu and then in “Accessories”. There you will have to click on the folder to save and check that Home (Pi) it’s on the list. All folders that were skipped will appear in the trash can. You must click on the storage location and change from Amazon S3 to your USB stick.
There select the “Back Up”, Leave Dup will start the first backup of the home folder. Here you will be asked if you want to enter an encrypted password for added security, so enter the password in the field “Encryption Password and Confirm Password Fields” and then click “Continue”. At this point you should keep in mind that the first backup it can take a short time or a long time, this will depend on how big the home folder is.
In this way when let dup finish making the backup correctly, you will be able to configure a schedule. Here you will have to configure the function “Deactivate to On”. Then you have to click on “Programming” and it changes from week to day. This allows the backup to store all the information on your Home at the usb drive everydayso you can rest assured that all your information will be backed up every time you need it.
We show you how to restore a Raspberry Pi backup to recover your secured files
It is not only about knowing how to perform these security backupsbut you also have to learn how restore all your files insured in order to enjoy them again. Therefore, if your system has presented a failure and you have had to clean the micro SD card, it will be necessary that reinstall Leave Dup. Here you need to make sure that the backup USB drive is connected to the Raspberry Pi drive.
If this is so, then you will need to access “Accessories” and then in “Backups”, after this you should click on “Restore” in order to reinstall the lost files or directories. A new window will also open “Restore from where”, this must be opened in the case that it is being installed from a new image of Raspbian. Here you need to select your USB drive using the function “Backup” and then selecting “Resend”.
The next thing will be to select the date for when you want the backup to be restored and then click on the option “Resend”. Here you are going to get two options, one of them is restore files to their original location and restore to a particular folder. Here you must select the one that suits you, but mostly it is the first one to be restored from its original location and click on “Resend”.
If you made the decision to put a password in the previous steps, then you will have to enter the security code in the corresponding field and then click on “Continue”. All files in the folder “Start” in your previous backup will be restored. When this has been completed you will see a message “Restoration finished” there you must click on “To close” and all your files will be back where they always were.
Computing