
Index:
UPDATED ✅ Do you need to install and configure your printing hardware on a local network? ⭐ ENTER HERE ⭐ And discover how to do it step by step with this tutorial
A network printer is one which we will be able to use from different computers that you have at home or at work. This has become a great alternative for users who have two or more computers and a single printer. Usually, all of these peripherals can be converted into a network equipment, which will allow print from anywherewithout the need to have one installed per team.
This has become a great advantage for users since it avoids moving equipment from one place to another, either the printer or the computer. Being able to configure your network printer will make things easier for you, since from any computer you will be able to make the prints you want and other functions without any problem, you will also avoid having to transfer information from one computer to another via USB cable, memories or CDs.
In order to do this you need to have a network installed in your home or work. Otherwise, this cannot be done. If you want to be able to connect and configure it to a network and to your different computers, here we will explain how you can do this.
Steps to install and configure a network printer correctly
It is very important to be able to know how install and configure the network printer at your home or work, this will allow you to be able to work in a simpler and faster way when you want to make any type of print. This can be done through different steps which we will explain below. Keep in mind that these steps can only be carried out if you already have one. installed internet networkwhich will be the one that allows linking each of the equipment that you want to connect to your printing peripheral.
Install and connect the printer
To start with this installation and connection process it is important to be sure that it can be on the network, for this it is necessary that it be connected to an Internet network, either wireless or via Ethernet cable. Keep in mind that this process may change depending on the model of your printing hardware.
To do this through an Ethernet cable you must follow these steps:
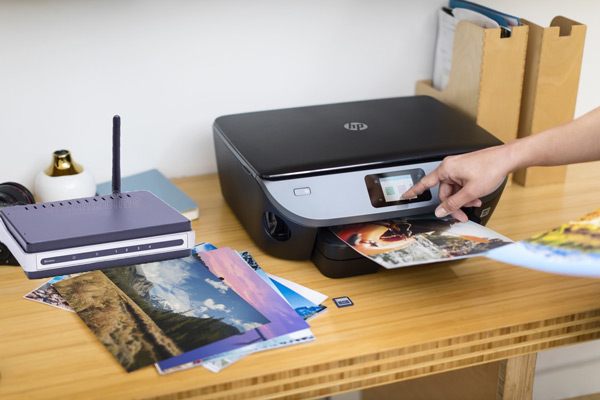
- To do this we must place the printer near the internet router.
- Then we will connect it to the router through the wire.
- At the time of making this connection it is recommended turn off the routerbut it is not mandatory if they do not want it.
- Once both devices are connected, we turn them on, andThe computer will automatically recognize the printer.
Now if you want to make the connection through a wireless network you must do it in the following way:
- This will depend specifically on team brand.
- The first thing you are going to do is turn it on, then select “Wireless LAN connection”.
- then you will connect to the network.
- Finally, we introduce the “Password”.
Set up the printer on the network
You are going to do this from your computer, here you are going to start what will be the configuration of both computers, for this you are going to do the following:
- To get started, you’re going to go to “Setting” from your computer.
- Next you will select “Control Panel”.
- They will now enter “Hardware and Sound”.
- Then you will enter “View devices and printers”.
- Now select “Add new printer” The computer will automatically start searching the network, either wired or wireless, for new devices.
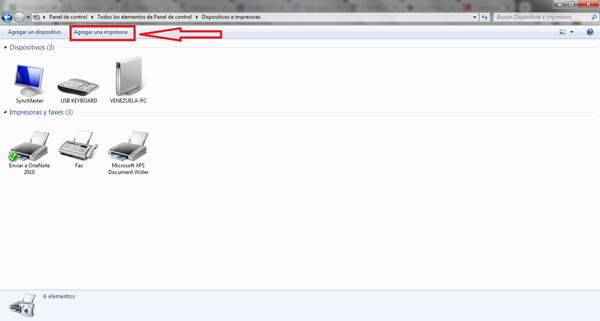
- After a few minutes the devices found will be displayed on the screen, we must select the corresponding one and finally click on “Following”.
Share the printer on the network
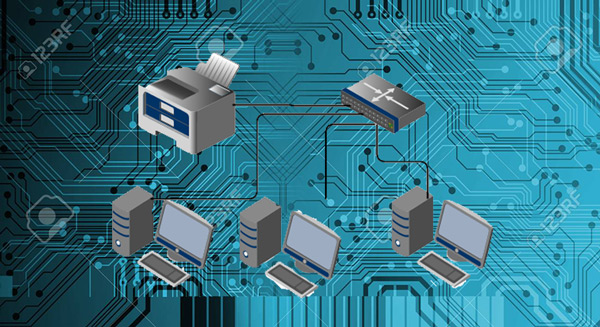
Once the equipment has been installed and configured, the next step is to be able to share a printer on the network so that other computers can connect to it and print over the wireless network. To do this, this peripheral must be searched from the computer, we will do this in the same way as the previous step:
- The first thing will be to enter “Setting”.
- Then we select “Hardware and sound”.
- Now “Devices and printers”.
- And finally “Add a new printer”.
Once it appears on the screen, we will select it and perform the following steps:
- Right click on the icon the printer to configure.
- In the options menu that is displayed we are going to select “Printer properties”.
- Now a new window will open where we are going to select the option “Share” and then we choose the section “Share this printer” and then “Submit print jobs on client computer”
- Once all this is done, we just have to click on “Apply” Y “To accept” this will already be shared and can be accessed in an easy and fast way to be able to carry out the printing and other functions that we want to do through the equipment.
Create a workgroup
Once all this is done, it will be installed and connected to the computer. In addition, it will be ready to be shared on the network. Namely, the other computers that are under this same wireless network will be able to connect to it without any problem. For this, the other computers that want to connect to the printer must join a group, this will make the operation of the printer much better.
To be able to create or join the group you just have to follow these steps:
- The first thing you have to do is enter the computer and go to the “Setting”.
- Next you will select “Network and Internet”.
- Once inside this window you will select “Home Group” either “Work Group”.
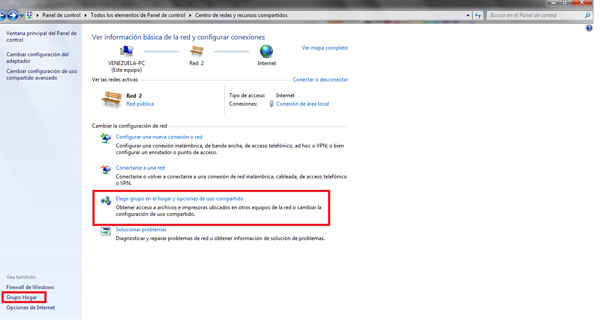
- Now you have the option to join one of them or just create a new group.
- It is important to ensure that the option “Printing machine” is selected.
- To finish, just click on “Following” and we introduce the “Password” from the group and select “To accept”.
Set up the printer on the rest of the computers

as last step we only have to connect or configure it to the other computers at home or at workin this way we will be able to know if we have carried out the entire procedure successfully, for this we are going to carry out the steps that we will explain below.
- To start we are going to enter “Control Panel”.
- Now we choose the option “Hardware and sound”.
- Then we click on “Devices and printers”.
- Once inside the section we will “Add new printer”.
- In the next step we will select “Add wireless network or Bluetooth”
- Once the device appears on the screen, we will select it and click on “Following”.
- Then a new window will appear and again click on “Following”.
- To finish, a new option will be opened to print, in this way we can check if all the steps have been done correctly.
networks