
Index:
UPDATED ✅ Do you want to fully customize your Twitch channel and make it unique? ⭐ ENTER HERE ⭐ and Learn Everything FROM ZERO!
If what you are looking for is customize your Twitch channel to the fullest and be a true professional Gamer you should read this article to the end. We will show you all the information related to the benefits you will get when set up your channel.
But this is not all you will find in this article, We will also show you the step by step to fully modify your channel and make you stand out among other Gamers.
Finally, we will show you a list with the best tools you can use to set up your Twitch like a real pro and in this way obtain incredible results.
What are the benefits of customizing your Twitch channel?
To get more viewing of your channel and thus make viewers feel comfortable and enjoy your content more, it is necessary to customize your channel. With this we do not only mean to modify the banner and create a very attractive image of your profilebut also to choose the best color that suits the theme of your videos, among other elements.
Therefore, when you customize your Twitch channel you will have the following benefits:
- You will generate an exclusive image and professional looking, which will allow you to differentiate yourself from your competitors more quickly.
- you will make it easier to find your channel and your emissions for the rest of the community. This is because the images are seen by users and they will easily associate them with you.
- You will be able to create clips more easilywhich will help you promote the channel and convey your brand image better, since you will include in the short videos a professional look that was created exclusively by you for your viewers.
- In a short time users will feel comfortablewhich will be broadcast in thanks and then in donations that you will receive through Twitch Bits.
- Stats will improve substantially. This will help you be more efficient and have more interaction with your followers.
- If for some reason you make a mistake during the direct, your followers will know how to understand this slip, since you always transmit professionalism and you worry about improving the attention of your viewers.
- When you personalize your channel you will also be segmenting your audience. This can help you be more efficient in your marketing plan and therefore differentiate yourself from the rest of your competitors.
Learn step by step how to fully customize your Twitch channel and stand out among other gamers
We will show you below the step by step that you must carry out to fully customize your Twitch channel and thus make you stand out among other gamers.
Check out:
custom logo
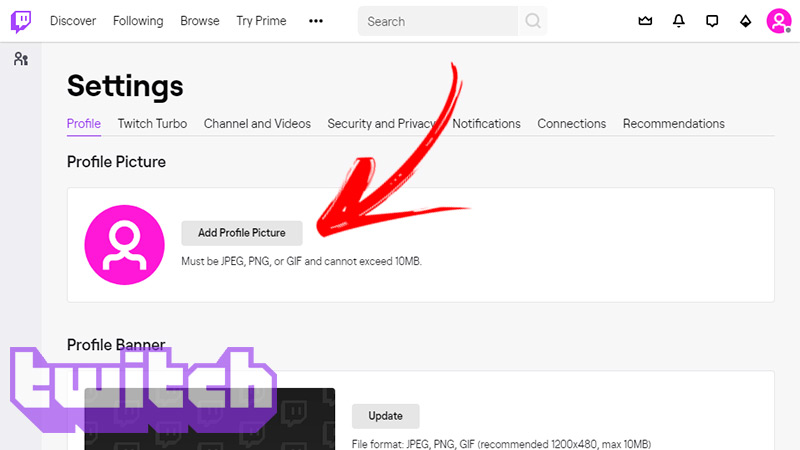
If you want to become a professional streamer and you don’t get the desired number of followers is because, perhaps, no one is following you because of your common profile picture. Therefore, it will be necessary to urgently intervene in this matter and create your own logo to generate a great visual impact and transfer a very professional appearance to the community.
To create a good logo you can do it using a specialized image editing program, such as photoshopor search in an image portal, in this case we recommend Canvas. For the first option you will have to use your browser and visit the web https://www.adobe.com/la/products/photoshop.html to download the software.
While to download an image in canvas you will have to click on https://www.canva.com/. If you don’t want to create it yourself because you don’t have much creativity, you can hire it through the platform at Fiverr for less than €5. To do this, go to https://es.fiverr.com/ and use the search bar. Once you have the image that will be your logo, what you will have to do is enter your account at Twitch.
Then perform these steps:
- Click on your profile picturewhich you’ll find at the top right of the screen.
- A menu will open in which you will have to choose the tool Setting.
- click on Profile.
- Choose the option Image Profile. Then tap on Add profile picture for you to choose the image that you have downloaded from the sites or programs that we mentioned before.
- When everything is ready click on To update.
Remember that the profile image should not exceed the 10 MB nor the 256 x 256 pixels. Also, the format should be .png, .gif or .jpg to be compatible with the platform.
With custom emblems and badges
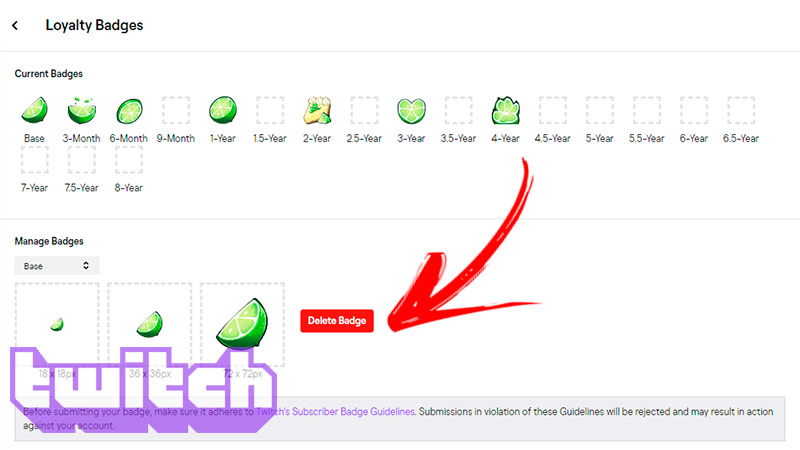
Having custom badges on your Twitch channel will get more users to subscribe as will show different achievements as they talk in chat. In addition, over time they can change their subscriber badges for better ones and in this way they will be thanked for their support. The first subscribers of your channel can have a founder badge.
You must bear in mind that the badges can be created respecting the Community Guidelines and the Twitch Terms of Service, which speak in general of common sense to establish guidelines and that the content is appropriate for all users. If you want to know more about these two regulations you can click on https://www.twitch.tv/p/legal/community-guidelines/ and in https://www.twitch.tv/p/es-es/legal/terms-of-service/respectively.
Therefore, once you know what type of badges you can give to your subscribers, you must follow these steps:
- go to control Panel of your account Twitch.
- Next, tap on the drop-down menu represented by an icon 3 horizontal lines.
- Choose the option preferences and click on it.
- click on Partner or Affiliate.
- Scroll the screen and select the tool.
- After this, click on loyalty emblems.
- A screen will open where you can add, choose either modify your emblems.
- If you want to add a new you will have to click on the + sign and then choose the image. Remember that the image cannot exceed the 18 x 18p, 36 x 36p or 72 x 72p. Also, the format should be .png with a transparent background and not to exceed 25KB.
In case you want to customize a subscriber emblem you will have to do this guide:
- Go to the option Partnerlocated within preferences. To do this you will have to enter through the creator’s control panel.
- Then select preferences.
- Choose the tool subscriptions and click on it.
- click on loyalty emblems.
- Choose Manage emblems.
- Then go to the image with + sign and make all the changes.
- To finish, click on Save Changes.
overlays
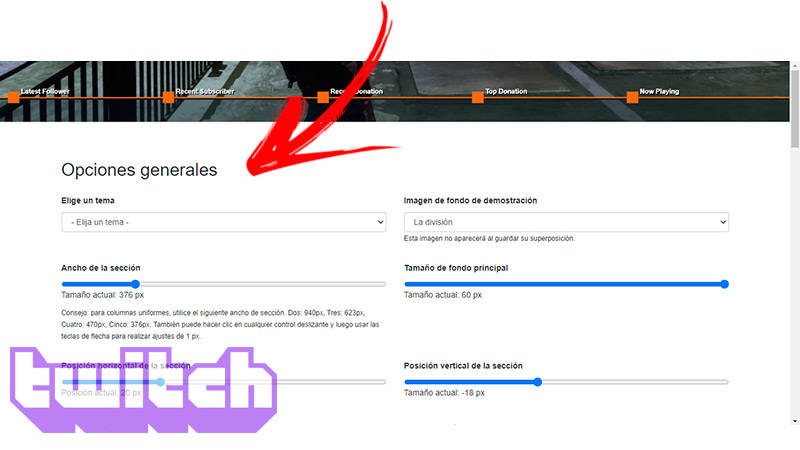
Having an overlay can make your live shows much more attractive and striking thanks to the special effects they have.
To create them you can use Photoshop or else you can use a template of some online editor, with these you can create them much faster and you will not make mistakes. Don’t forget that for use an overlay you should have OBS Studio installed on your Windows or MacOS.
If you want to create this type of frame in your videos, follow these steps:
- Access an online portal. In this case, in order not to complicate the steps too much, we will do it with this option, so you will have to open your browser and type the URL
https://nerdordie.com/resources/free-resources/customize-your-twitch-overlay/. Then click on the button See the application in full screen. - The first thing you will see is the page called General Options. So you’ll have to go to the field Theme and display the menu to choose the theme that you like the most.
- Then, you will have to choose the width of the separation that the sections will have. You will do this from the section Section width. In turn click on Horizontal position of the section To choose whether you want the screen to scroll more or less, you can also use the function Vertical position of the section.
- Choose Top line height to customize the separation that the overlay will have in order to the background image. You will have to do the same with Top line vertical position to take off to the bottom line.
- Select the background color and top line color.
- Then choose Demo background image to change the background photo of your channel. You can also change the space it occupies if you click on the tool Main bottom size.
- Once you are done with this stage you will have to customize the divider. To do this, you will have to modify its width, height, position and also its color.
- Now modify the text that will appear on the screen of your direct Twitch. You will do this using the functions located in the field text options.
- When you have finished with all the previous steps and you see that the result was as you expected, you will have to download the file. For this you will have to click on the option Discharge located in the field Download your overlaylocated at the bottom of the screen.
Next, you will have to enter OBS Studio and follow the steps of the broadcast. Remember that to add the overlay you will have to select the option viewthen click on Add and finally choose the file you just created.
Emoticons for your channel
Emoticons are one of the elements that allow Twitch be a platform different to the rest. In addition, thanks to their use, the interaction between followers is much more fluid, so customizing them for your channel is a good idea if you want to differentiate yourself from the rest of your competitors.
Uploading emoticons is very easy:
- Go to the creator panel which is located in the upper right corner.
- Then it will open a dropdown menu. You will have to select the tool preferences.
- Next, you will have to click on affiliate.
- Look for the option emoticons and click on it.
- You will now see a list of all the emoticons you have available. In addition, you will find some spaces that do not yet have any graphics, so you will have to click on upload gestures.
- Creates your own emoticon
- Finally, in the unique code you will have to enter a name for the emoticon and then you will have to save the changes.
panels
It is recommended that the panels Twitter have a medium size 320x200pbut usually streamers use the measures of 600x300p, since with these dimensions you will get a better image quality. The panels on Twitch have to show people who are watching your streams. In addition, they must contain information that is useful.
For example:
- profiles of your social networks.
- name of the sponsors that help you carry out your channel project.
- Information about your channel.
- Things and topics that you show in your directthey can be games or any other theme.
- Name of the users who more donations have been made Until now.
Issuance calendar
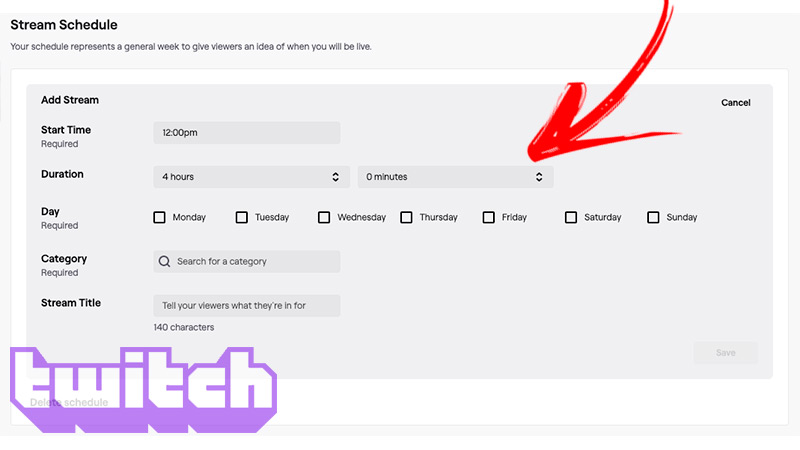
You will be able to incorporate the days and time in which you will broadcast your live broadcasts to the viewers. In this way, users will easily find the necessary information to join your broadcasts.
To include a broadcast schedule you will have to follow these steps:
- Once you have logged in, go to the channel configuration.
- Next, go to the top right corner of the screen and click on the your profile icon.
- That will bring up a menu in which you will have to choose the creator control panel.
- Find the tool preferences and press the same.
- then choose Channel and choose the function Create new.
- When the menu is displayed enter all the information you need. You will have to write in 5 fields, which are the time of start, duration, days of the week, direct category and title.
- once you finish you must click on the pencil to edit the information that you think is convenient.
- Lastly, click on Save.
Biography
The cover image is recommended that be 1200 x 380p in size. One tip is to highlight your streamer brand on your banner. In addition, it can include information such as sponsorships, schedules, social networks and the name of the channel.
To add a biography you will have to log in and then continue with this guide:
- go to the photo of your profile at the top right and click on it.
- Then click on the option Setting.
- Choose Channel configuration.
- Look for the option Profile Settings and write all the necessary information in the fields Username Y public name.
- To finish, click on Save Changes. Don’t forget to add the social media links for subscribers to check out.
List of the best tools to customize your Twitch channel like a pro
Known the best tools you can use to customize your Twitch channel and get results from a true professional.
look below:
sound alerts
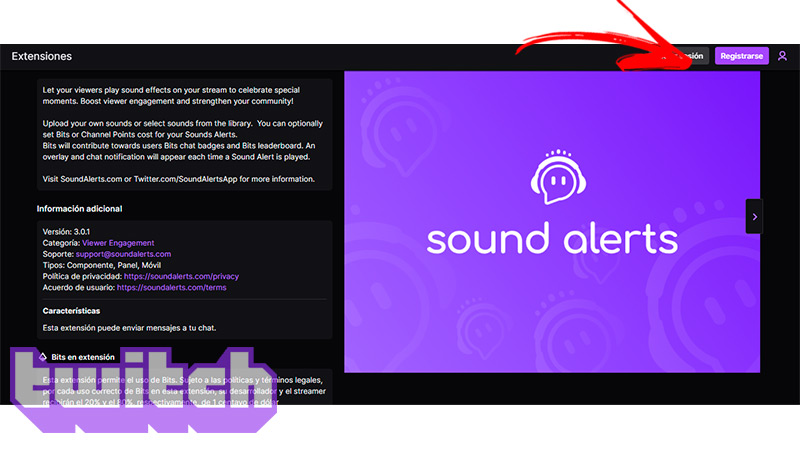
This is one of the best tools you can use on a Twitch channelas it allows the viewers of your live to reduce the sound at the time sound effects are performed. An important factor to highlight is its great flexibility because you can upload your own combination of sounds. You can also set a number of specific Twitch Bits for sound alerts so you can thank your fans for their support.
Download Sound Alerts for Twitch
TypeeeStream.com
It is a very useful tool that you can incorporate into your strategy, since with its implementation you will be able to solve a big problem for streamers, payments. It will allow accepting donations through credit cards, PayPal Y Bitcoins. With TypeeeStream you can also personalized alerts on the screen.
Twitchemotes.com
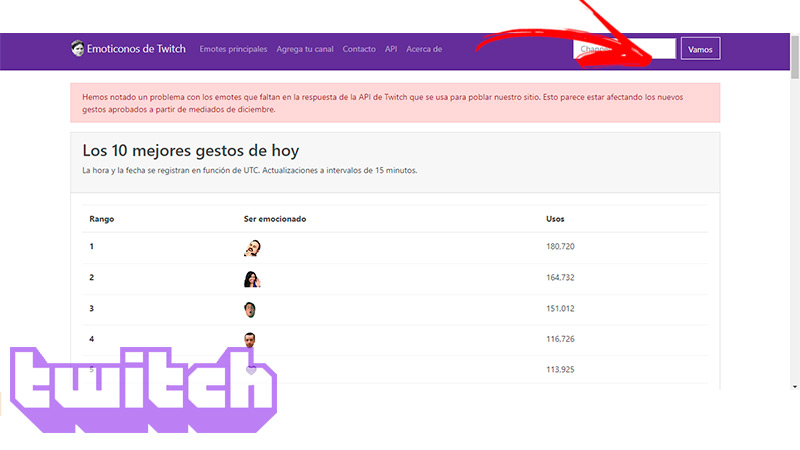
being Twitter a platform that is characterized by its system of emotes, It’s hard to keep all the emoticons online up to date. For this reason, with the use of this tool you can stay informed about current trends. Most important of all, they will allow you to grow your channel and all graphics are Twitch approved.
InfoWriter
This site is a tool that will help you create clips very quickly and easily. It has tools that will allow create shortcuts which makes it easy to trim the clip on the fly. This application became famous because it is possible to mark the time of activity, which makes clip search faster. This will help you upload your best moments on social networks without searching for hours and hours.
Download InfoWriter for Twitch
Exclusive Content for Subscribers
Having exclusive content for your subscribers will make the growth of your channel in Twitter be much faster. In addition to this, you will be able to increase your abilities to create quality content. This tool allows you to obtain exclusive content, which you can offer only to your subscribers. You can share images, anecdotes, posts, videos, reactions and many more.
Download Exclusive Content for Subscribers for Twitch
streaming