
UPDATED ✅ Want to reinstall your iMac’s operating system from scratch? ⭐ ENTER HERE ⭐ and Learn Everything! FROM ZERO! ⭐
Install or reinstall macOS from scratch on your Mac It is a process that not all users know how to carry out since, has a certain degree of difficulty so you must have the necessary knowledge to carry this out.
This process is very good to do mainly when you want to clean the computer either because it is working very slow or has some other failure or if you are going to sell or give away your Mac.
Therefore, here we are going to explain everything related to the macOS installation and how can you start improve your team’s performance. To do this, follow in detail everything that we will teach you throughout the post.
When is it necessary to reinstall macOS on your iMac?
There are several reasons why you can make the decision to reinstall the macOS operating system on your Mac. The main one is when the team has started to function in a way very slow so a solution for it is to revert to install the OS and in this way eliminate all the failures that it had.
It is also recommended to do these OS reinstalls when the computer goes to sell or give away since, this will be the only way with which you can ensure that the computer does not carry any of your information in the system. In addition, this will allow the team to be seen at the system level as a new computer.
Backup before Restore macOS
The most recommended before installing, restoring, or upgrading the MacOS operating system is to back up to avoid that you end up losing some important system data. For these cases there are several methods that you can carry out and below we will show you the two most effective.
To do this, follow each of the following methods:
With TimeMachineEditor
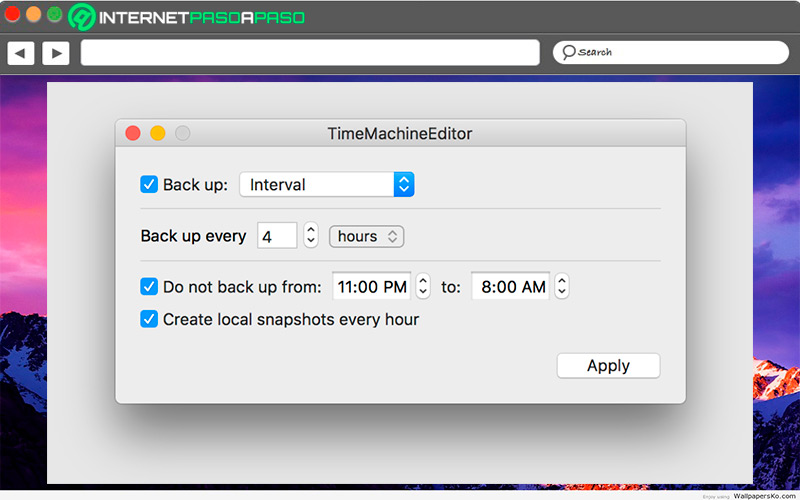
The easiest way of all macOS to carry out a backup is through timemachine. It is a apple tool that offers you different interesting functions that you can take full advantage of.
Here are some of its main functions:
- Offers backups every 24 hoursweekly or monthly.
- Lets do local snapshots.
- It helps you to organize disk space when there is little left and also deletes the oldest backups.
- You can browse all the history of your Backups.
Luckily, to make use of this tool, the only thing you will need is a storage unit for USB, Thunderbolt or Firewire that is connected to your computer. Here you will only have to start the process and when it is complete you will be able to carry out the functions you want. Keep in mind that timemachine offers you many available options.
Download TimeMachineEditor for MacOS
With BackupLoupe
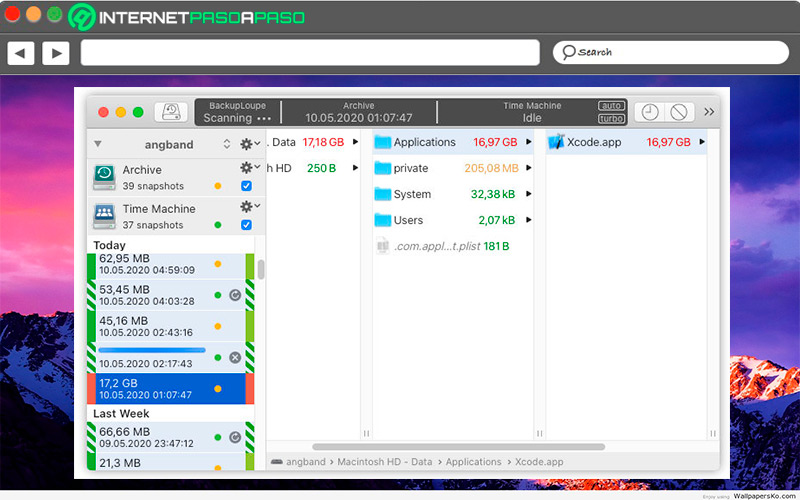
This tool has become the main alternative when it fails TimeMachine. It will give you an interface similar to Finder so you can make instant copies and observe the information that has been backed up.
Likewise, BackupLoupe is characterized by offering a list of the files that are taking up much more spaceit also sorts all the files with backup by sizeallows you to review each of your copies to see the backup files and their locationamong many other interesting functions that make it one of the best alternatives when it comes to making backups.
Download BackupLoupe for macOS
Learn how to restore macOS to avoid reinstallation
carry out a operating system reinstallation It can be a bit of a complicated process. That is why there are some alternatives that will prevent you from reaching this and in this case it is about making a macOS restore through a backup. Therefore, if you have made Backups with timemachine and your software is having problems in operation, then you should restore a backup where you are sure that the system was working correctly.
To do this you will only have to follow each of these steps:
- The first thing you should do is restart your Mac computer and subsequently boot from the recovery partition or from the Internet.
- At the time of start the partition you will find the option to “Restore a Time Machine backup” which you are going to select.
- Next, you must connect the unit to the backup with the computer and on the screen you will get an option of “To accept” which you are going to select.
- This process usually takes a few minutes, but which will allow you to return to have the Mac in optimal operation. You can also apply this procedure if you want to pass your mac as is to a new computer.
Learn how to install macOS from scratch on your iMac
carry out a fresh install of macOS on your Mac It will be the best option if what you want is to avoid problems that are related to installed application errors or system crashes. To carry out this installation you can use two different methods What create a USB drive with the installer or from macOS recovery.
Here we show you each of them:
Creating a USB drive with the installer
The first method we offer you is creating an installation drive since, it is a very simple process where you will have to download the installer to your Mac and once installed run a command on it. For this it is essential that you have a USB with a minimum capacity of 8GB.
In this case you will have to follow each of these steps:
- The first thing you should do is Download the MacOS X installer from the App Store. It will be saved in the folder “Applications”.
- Later you will have to connect a usb stickit must have a HFS-format+ (Partition type GUID) and assigned as name “USB”.
- The next thing will be to open the terminal and later run the command:
sudo /Applications/Install OS X El Capitan.app/Contents/Resources/createinstallmedia --volume /Volumes/USB --applicationpath /Applications/Install macOS X High Sierra.app –nointeraction - At the command of “Terminal” you will have to substitute the name of the version of the system that you want to use. In this case you must use this symbol as separator .
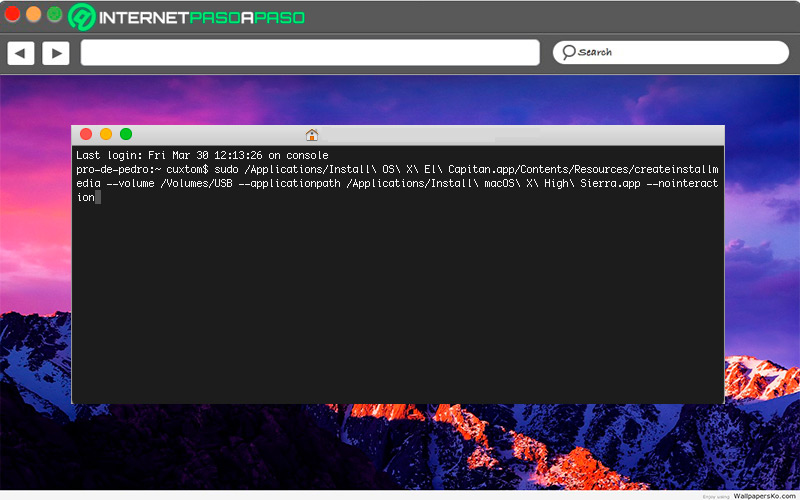
- This process it will not show you any information on the screen so, you will have to wait for it to finish. If you do not like it use this command for the same, then you can use other alternatives like Diskmaker X.
When the USB installer has been created and the process has finished, then you will have to restart the computer. In this case you will have to hold the key ALT or Option pressed and select that installer. Here it will appear on the screen and in the upper bar you will have to select the option “disk utility”. Within this section, select your “Main storage unit” and then delete it. After this you must exit and perform the macOS installation.
macOS recovery
The second method you can use to fresh install of macOS it is through the macOS recoverywhich can be executed as long as you have a Internet connection. This is done through a key combination during computer startup so that the Mac can download everything it needs to reinstall the OS.
Keep in mind that the steps to follow are the same as those mentioned in the previous section, but this time the following must be taken into account:
Comando (⌘)-R: Allows you to install the macOS version most recently installed on your Mac, without having to upgrade to a later version.Opción-Comando-R: Used to update to the latest version of macOS and that it is compatible with your Mac.Mayúsculas+Opción+Comando+R: To activate this command it is required macOS Sierra 10.12.4 or higher version and install version of MacOIt’s included with the Mac.
Learn how to Migrate data from your old MacOS to a new one
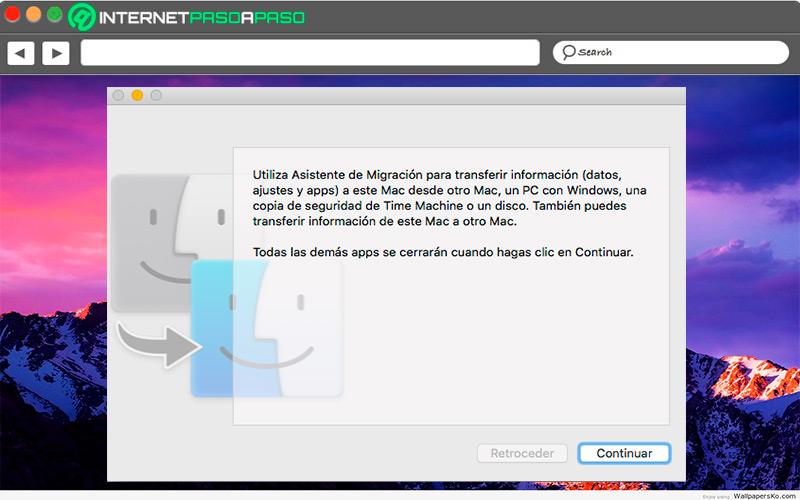
If you have bought a new mac computer and what you want is to pass all your data from your old equipment to the newthen you will only need a backup via timemachine, launch the migration wizard and then follow each of the steps indicated there. Keep in mind that this migration process can also be done from a Windows computer to Mac.
Best of all, when carrying out the migration process to your new computer you will have the opportunity to select what information you want to transfer and what not. The best thing to do in these cases is to pass only valuable information and thus avoid filling your new team with junk content.
Tips to improve the performance of your iMac
be able to have a good performance on the computer will be essential to achieve get the most out of it. That is why below we are going to teach you some tips that will help you improve the performance of your Mac.
To do this, follow in detail what we will teach you below:
Boot the computer without applications
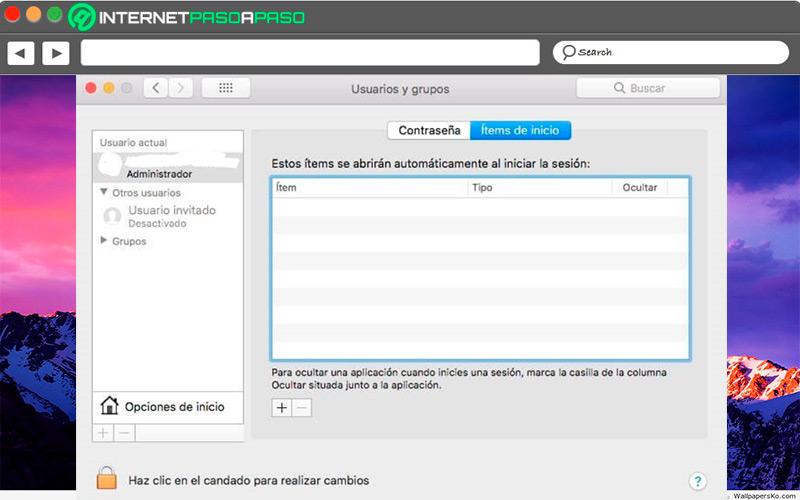
In general, many programs are usually integrated with the computer boot, which clearly makes the computer take much longer to start, which is why this operation is delayed. This is because the operating system immediately starts working with the apps to run them.
In order to know which applications are starting with the system, you will need to follow each of these steps:
- The first thing will be to enter “System preferences” and from there select the “accounts”.
- There you will select the “Start Itemsand from there you will go unchecking each of the applications that is activated so that it starts from boot.
disable some options
There are many options that are activated in the computer and that only consume resources of the same for what affects Mac performance. In this it is best to disable the options that are necessary such as the tools of connection, access, sharing, among other. Despite being useful tools, they can be kept disabled without any problem. To be able to see all these options you can do it from the “System preferences”.
Remove languages you don’t use
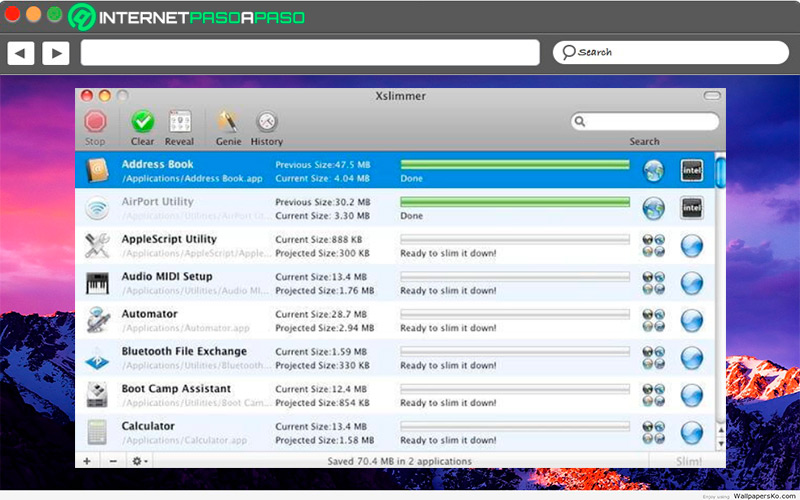
By default, Mac computers often have language packs that are active all the time and that end up taking up space on the RAM, which can be used for other functions. Therefore, it is best to remove all languages that you do not use. For this you can download a driver specialized in it, the most recommended is Xslimmer. It is a program that allows you to optimize and recover space to obtain a better functioning of the equipment.
Disable plugins
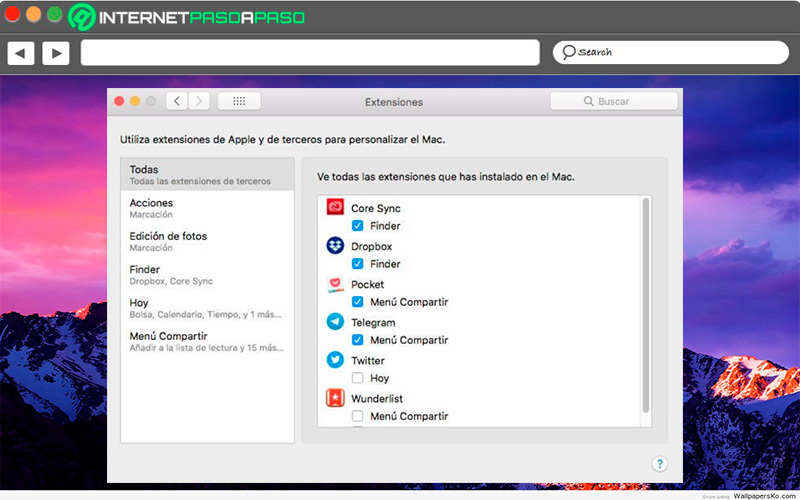
In the long run plug-in storage can become an unnecessary RAM occupation and that can end up affecting the performance of the computer. Especially since these accessories are usually used at specific times and now.
Therefore, to remove these add-ons and free up space on your computer’s storage, you will have to follow these steps:
- Access the “System preferences” and from there to the “Extensions”.
- From there you will have the opportunity to disable or delete those accessories that you no longer consider useful to have.
Clear system cache
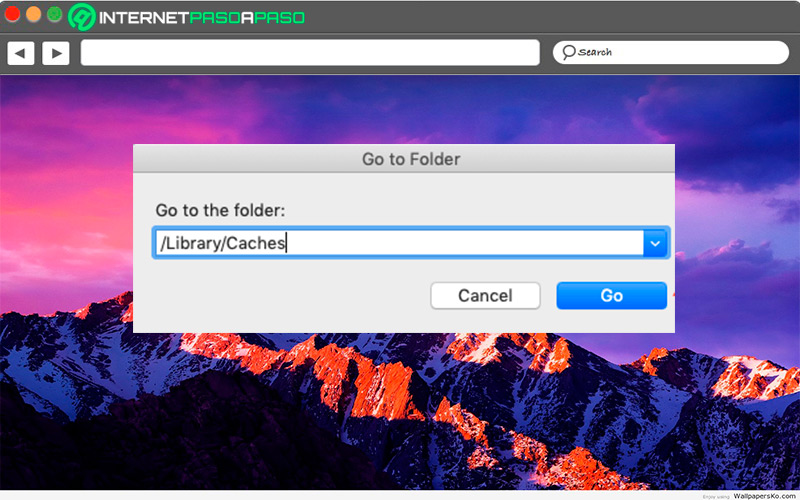
Systems typically have a cache that can be deleted periodically so that they do not continue to occupy unnecessary space in the computer’s memory. This will allow you to improve the speed of your computer.
To do this, it will be necessary to follow each of these steps:
- The first thing to do is close all applications and then press the key combination
Shift + Cmd + G. - The next thing is to write
/Library/Cachesin the text line so you can enter the system cache folder. - Now you’re going to have to click “to go” and from there select all Temporary files you want to delete and drag them to the “Paper bin”.
- Finally, if you are sure you don’t want to restore any of the deleted files and sent to “Paper bin”, then you can select “Empty Trash”.
Operating systems