
Index:
UPDATED ✅ Do you want to install the Raspbian operating system on your Raspberry Pi ⭐ ENTER HERE ⭐ Learn Everything FROM SCRATCH! ⭐
Raspbian is the official operating system of the Raspberry Pi Foundationso he himself is going to offer you the best experience you can have with this board.
It stands out for having a easy installation and also has a desktop version that will allow you to use the OS and thus test its operation before installing it on a RaspberryPi.
The best of Raspbian is that it will offer you great speed in machines few resourcesso it does ideal for these plates. This is how here we are going to teach you how to install this OS from scratch.
What are the requirements to be able to install Raspbian on my Raspberry Pi?
Before wanting to carry on installing Raspbian on your board, The first thing you have to take into account is the minimum requirements for installation Of the same. Since this will be what allows it to have optimal operation in the microcomputer, otherwise the installation may not be possible or it is not run correctly.
Therefore, here we leave you the necessary requirements to carry out this procedure:
- A micro SD card that is previously formatted with the FAT32 files. It is important that this SD card has as me16 GB storage minimum. It is also important that you use a recognized brand card as this will prevent future damage.
- Use a card adapter Micro SD to SD that allows you to connect the card to the SD card reader of your computer. In the event that your computer does not have an SD card reader, then you will have to buy one. SD card reader that you can connect to your computer via a USB cable.
- A raspberry pi Whichever version you prefer, it may well be the Pi 3B, Pi 3 B+, Pi 4 B, or the Pi Zero.
- keyboard and mouse USB.
- Display or TV.
- HDMI cablein the case of using the Raspberry Pi 4, then you will have to use a micro HDMI cable.
When you already have these all these requirements, then you can start with the Raspbian installation process on your Raspberry Pi.
Learn step by step how to install Raspbian on a Raspberry Pi with NOOBS from scratch
When all the requirements mentioned in the previous section are met, the following will be start the installation process. Keep in mind that this is a fairly simple and quick process to achieve.
To do this, you just have to follow each of the steps that we are going to indicate below:
Prepare the Micro SD card and download NOOBS
To start this process of Raspbian installation on your plate the first thing you will have to do is prepare the micro SD card that you are going to use to copy all the necessary files. Keep in mind that this card must be formatted, which means that you must make a backup of it if you have information or data stored on it. It is important that it is formatted with the FAT32 file system, the most advisable thing is to eliminate all the partitions that you have to avoid errors in the future.
When you have prepared micro SD, that is, formatted, the next thing you should do is prepare it to start copying all the necessary files. Here you will have to create a partition with the FAT32 file system where all the downloaded files will be saved.
Keep in mind that all these processes must be carried out from the “Windows Disk Manager” to access there you can press the keys “Windows + R” so that the window opens and then write “diskmgmt.msc”. Next, the disk manager will open on the screen and from there you will be able to delete all the partitions of the micro SD card and then create the new partition FAT32.
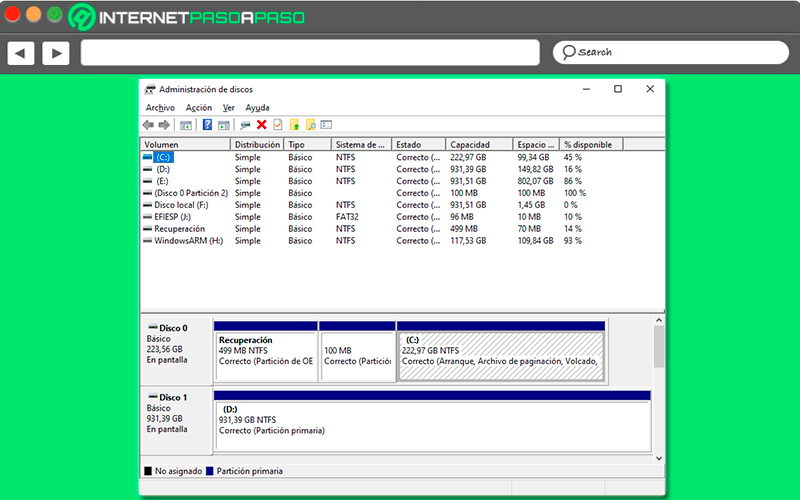
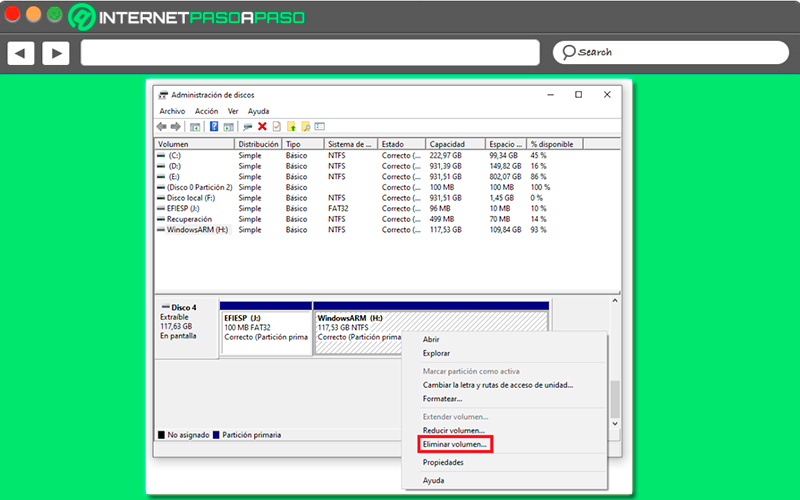
At this point you should have all available storage devices, there you will search your micro SD card where are you going to install Raspbian and delete all existing partitions. In order to delete them you must press the right mouse button on each of the partitions that the card has and then click on “Delete volume”. Keep in mind to delete the partitions you want and not the one that is being used.
For this it is important to pay close attention to the content of the mount point or drive letter before deletingsince if you delete an unwanted partition it will be very difficult to recover all the data that they were there.
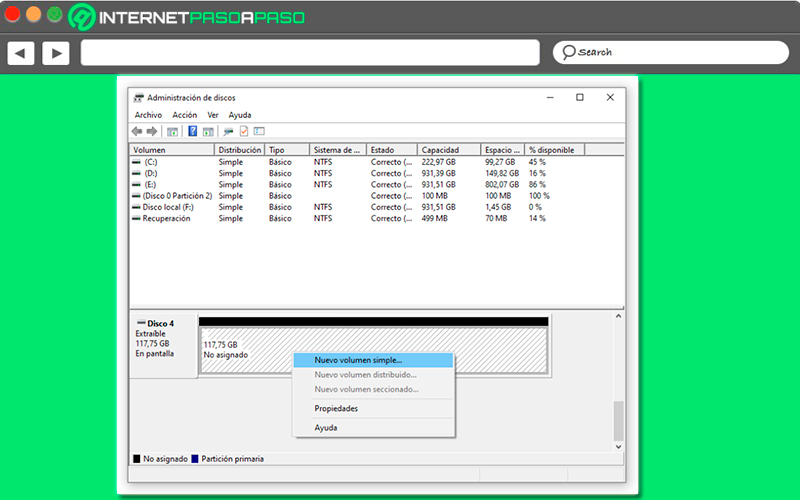
When the micro SD is already empty, you will have to create a partition to be able to copy NOOBS. Luckily this procedure is quite simple, for this you must right click with the mouse on the unallocated space of the SD card and then click on the option “New simple volume” that appears in the context menu. A wizard will automatically appear from where you will be able to create the partition for NOOBS.
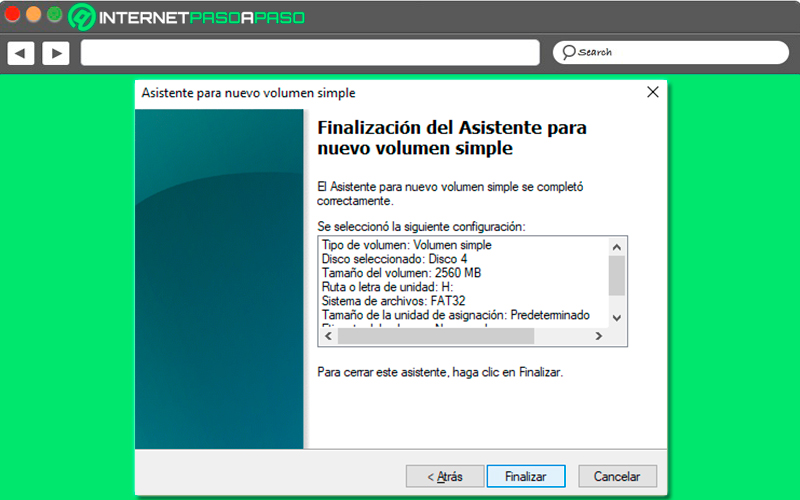
Continuing in the wizard you must select the option “Following” to advance in it, in the other window that appears you must assign the size of the partition. if it goes to use the full NOOBS imagethen the minimum you should use is 2560MBwhich is equivalent to about 5 GB to be able to store both NOOBS What the Raspbian image. Now if you plan to use NOOBS Lite, then with 512MB it will be enough to copy all the NOOBS files to the partition.
In the new screen that appears the assistant you will be asked what letter you want to assign to the partition, here you can place the one you want since this ends up being indifferent in the process. After you have set one simply click on “Following” to continue advancing within the wizard.
After this it will be necessary to format the partition and then configure the file system. It is important that this partition has been created with the FAT32 file system, since this is what allows it to be read by the Raspberry Pi. Therefore, you must choose to format this volume with the following configuration and in the section of “File System” must be placed FAT32. After this you should click on “Following” and later in “To finalize” and in this way the partition will have been created.
When you already have the card formatted and clean, then the next thing to do is “Download NOOBS Image” with Raspbian. This image can be found in the download section of the official Raspberry Pi website, for this just go to https://www.raspberrypi.com/software/. If you have an Internet connection, then you can download the version of NOOBS Lite and in this way the NOOBS itself will be the one in charge of download the Raspbian image for save it to SD card.
In case you are not sure, then you can download the full image which already comes with Raspbian and LibreELEC ready for them to be installed on the board. When you already have the file downloaded, the following is “Extract the content” of this at the root of the microSD. After this you can stop using your computer and start install Raspbian on your Raspberry Pi.
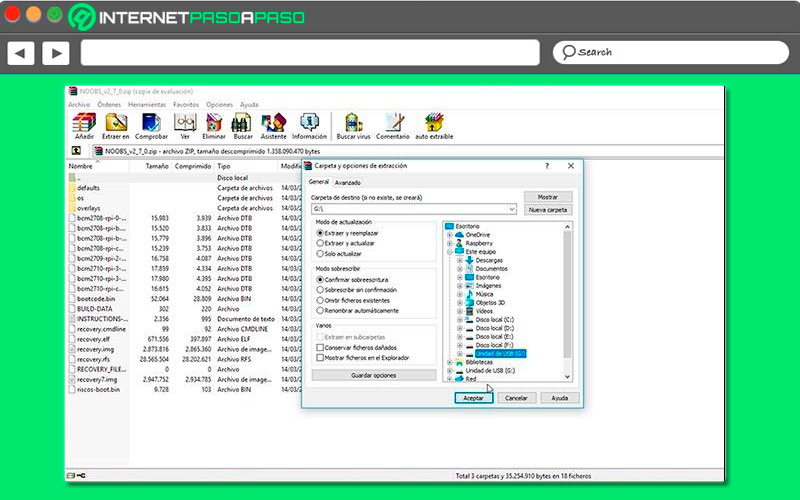
Installing Raspbian on the Raspberry Pi easily
- At this point it is essential that have a USB mouse and keyboard to bring about installing the OS on your board. Here you will have to insert the micro SD card into the raspberry pi and connect it to the power. There you will see a menu where you will have to choose the operating system to install, in this case you select Raspbian.
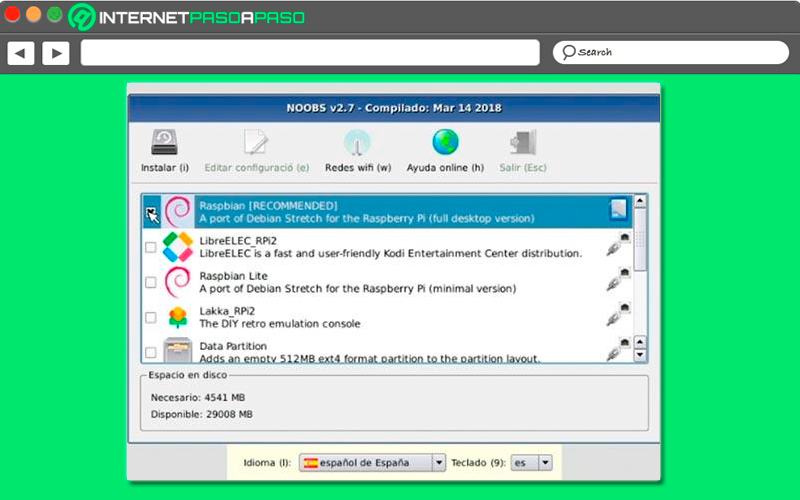
- After selecting you must click on “Install”, Keep in mind that if you want you can change the language to Spanish or simply leave it in English as it appears by default, since this is not very important since in the same way the OS will be installed in English.
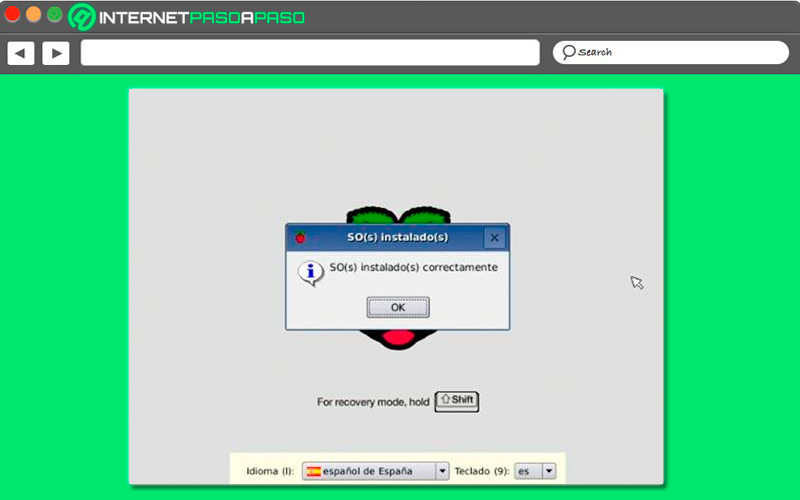
- It is a process that can take approximately 10 minutes to install, when the process has been completed, a message will appear warning you and there click on the button “Okay” and immediately the microcomputer will restart. After this you will successfully installed Raspbian on your Raspberry Pi.
We show you how to use Raspberry Pi Imager to install Raspbian on your Raspberry Pi mini computer
another form of power install Raspbian in your mini Raspberry computer Pi it’s through Imager, this is presented as an alternative procedure to the previous one and that will also allow you to install this operating system on Windows, Mac OS and Linux, so it is a bit more advanced.
Therefore, to carry this out, you simply have to follow each of the steps that we are going to indicate below:
Install Raspberry Pi Imager
- To install Raspberry Pi Imager in any of the aforementioned operating systems you will have to access the official site of raspberry pi to do so enter
https://www.raspberrypi.org/downloads/to be able to download the installation binary file.
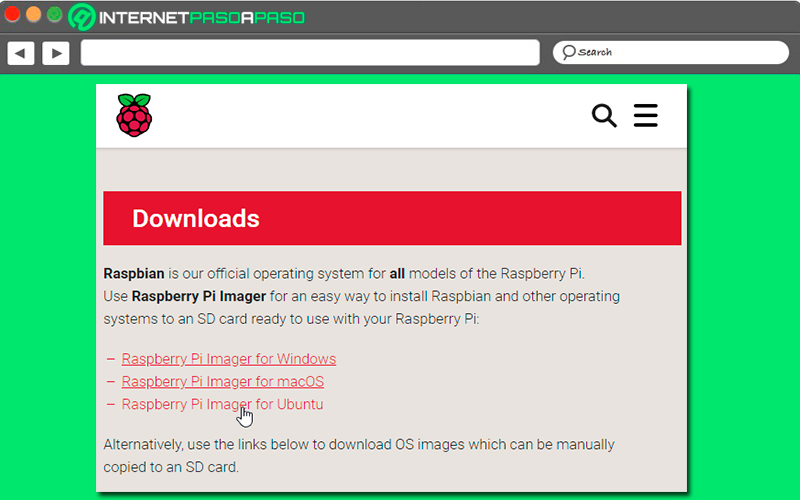
- When this file has already been downloaded, install it just like any other file is installed.exe on Windows, .dmg on MacOS, or .amd64 on Linuxso you shouldn’t have any problem with it.
Open Raspberry Pi Imager
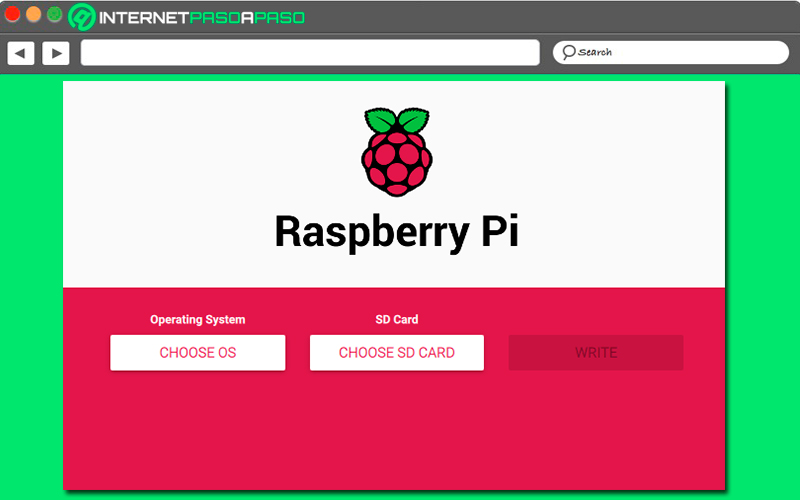
- After this you will have to connect Micro SD card to your computer and from there you go to open the software that you just installed. When you have entered there, the following will appear.
Select the operating system to install
- In the new window that appears you will have to select the button “Chosse OS” and from there you must select the operating system you want to install, in this case you are going to click on the option Raspbian since this is the one you want to install.
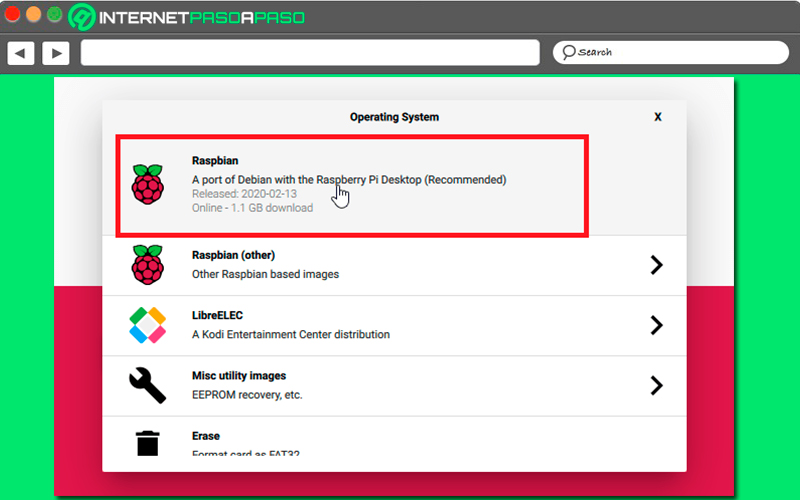
- There you will also see other available options that you can select as it is Raspbian Lite, LibreELEC or Ubuntu. As you can see, this Imager program does not yet allow you to install a large number of operating systems, so it is considered that it is still quite limited in that sense, although this list is expected to expand soon.
Select the micro SD card where the operating system will be installed
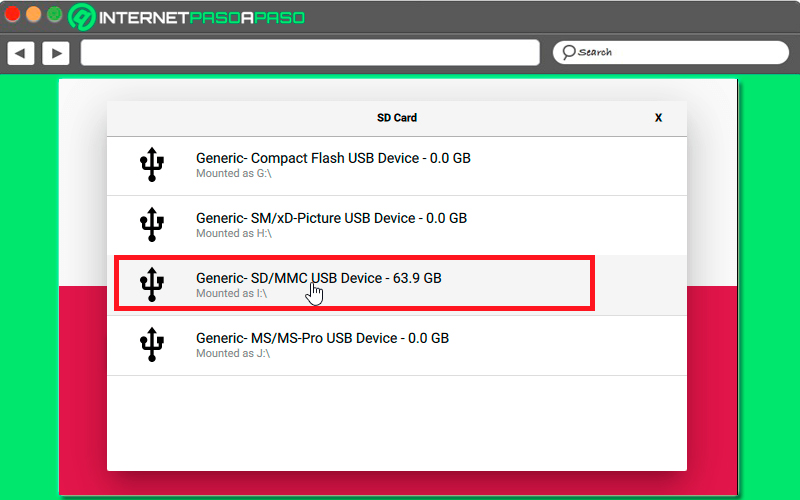
- Now you will have to click on the option “Choose SD Card” and then select the micro SD card you want to use for the Raspbian installation.
Install Raspbian on Micro SD
- At this point all you have to do Click on the “Write” option.
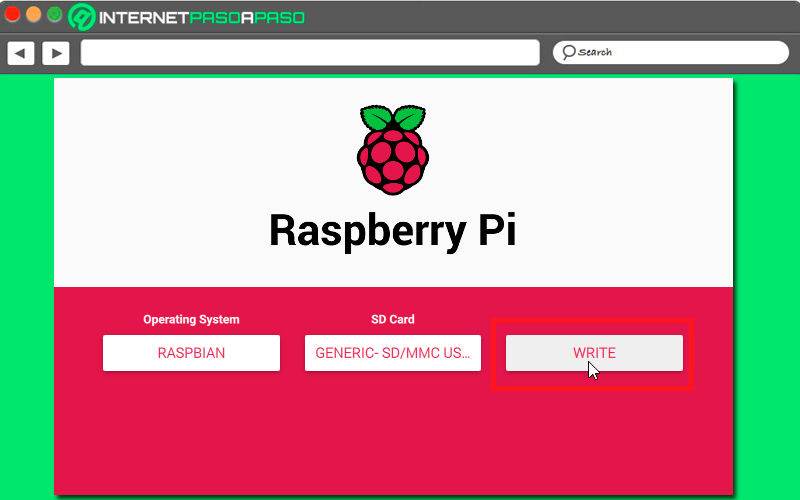
- Next, the installation of the operating system that has been selected in the SD card. When this process is finished and the download and installation are complete, then the following message will appear on the screen.
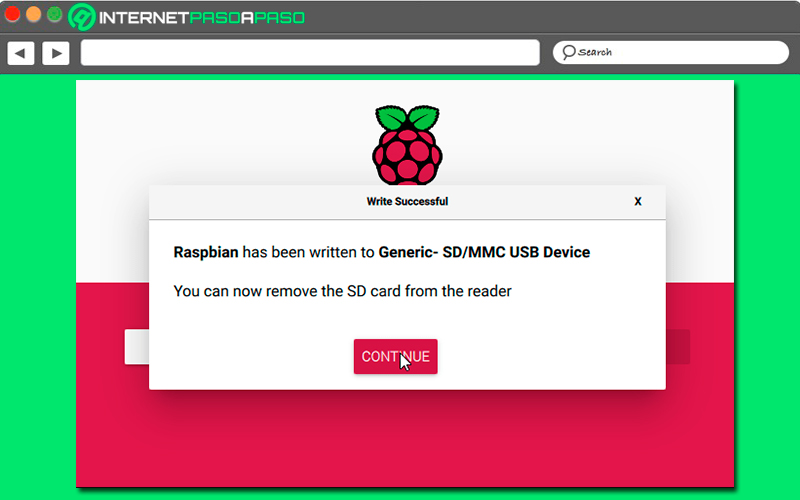
- As you can see the raspbian operating system has been installed correctly in the micro SDAs you can see, it is a fairly simple and quick process to apply.
- After this you will only have to remove the card and insert it into your raspberry pi.
List of the best models and versions of Raspberry Pi to install Raspbian without problem
Since the launch of the raspberry pi different have been presented models and versions each of them presenting improvements with respect to their predecessors. This is how not all of them are compatible with Raspbian, so you should know which are the best plates where you can use it without having a problem.
That is why below we show you the best Raspberry Pi where you can install Raspbian easily and quickly:
Raspberry Pi 3
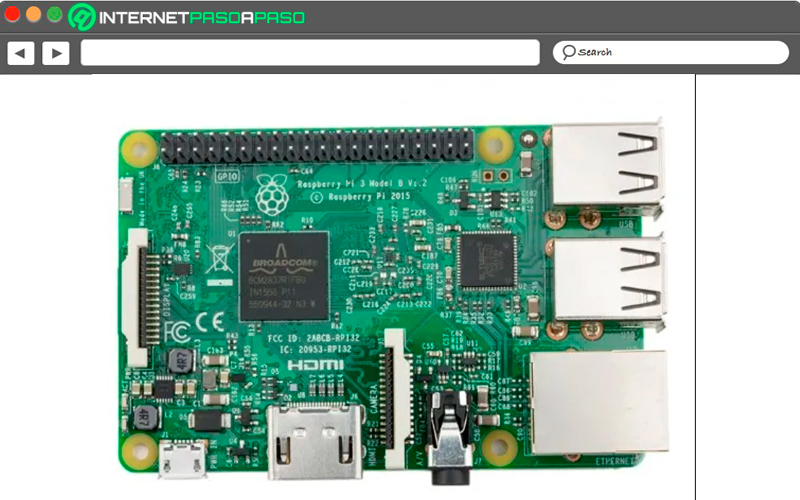
Without a doubt the Raspberry Pi 3 it became the version that would take this board to another level, this is how it would solve one of its main limitations, such as wireless connectivity. This is how this new version of the microcomputer maintains 1 GB of RAMbut which is responsible for using a revision of the processor to BCM2837 ARMv8which is also from 4 coresbut this time it works at 1.2 GHz.
It should be noted that this version is one of the first to use 64-bit instructions. I also include a new novelty that without a doubt is one of the most important as it is Connection WiFi and Bluetooth 4.1 base without the need for adapters, all this allowed us to expand its usability much more.
Raspberry Pi 3 Model B+
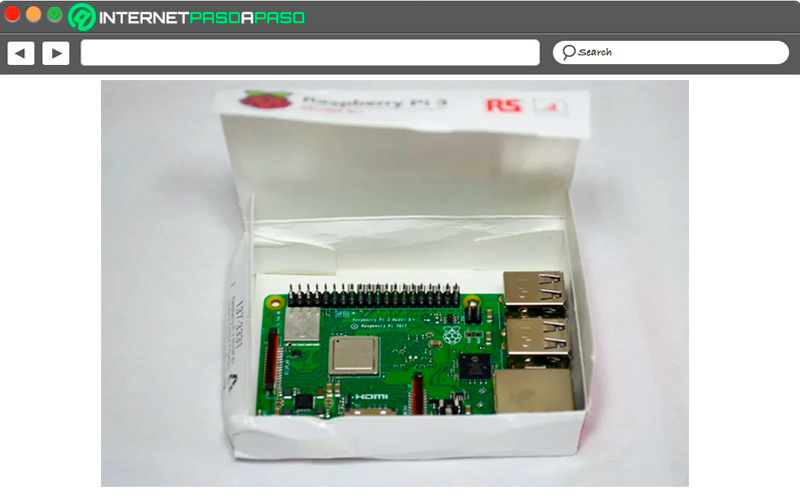
It is a plate model that was launched on the market when hardly anyone expected it, so it became a great surprise for everyone. This new Pi 3 version model It was launched to try to complement the weaknesses of its predecessor, so this new microcomputer presented a complete redesign of the silver, keeping the same size and position of all the available elements.
Nevertheless, presented some changes such as the processorwhich now had a much more powerful one that works at 1.4GHzas well as the inclusion of a network card, Gigabit Ethernet And best of all, you’re no longer limited to the 100Mbps but can reach the 300Mbps when operating over USB 2.0.
As for the technical specifications of this board, the following can be mentioned:
- HDMI.
- RAM of 1 GB.
- Ethernet Gigabit Ethernet over USB 2.0
- GPIO of 40 pins. CPU + GPU: Broadcom BCM2837B0, Cortex-A53 (ARMv8)
- Wifi + Bluetooth: 2.4GHz and 5GHz
- 4 USB ports 2.0
- Micro SD
- Power-over-Ethernet (PoE).
- Audio output stereo and composite video.
- CSI port to connect a camera.
- ISD port to connect a touch screen.
Raspberry Pi Model 4B
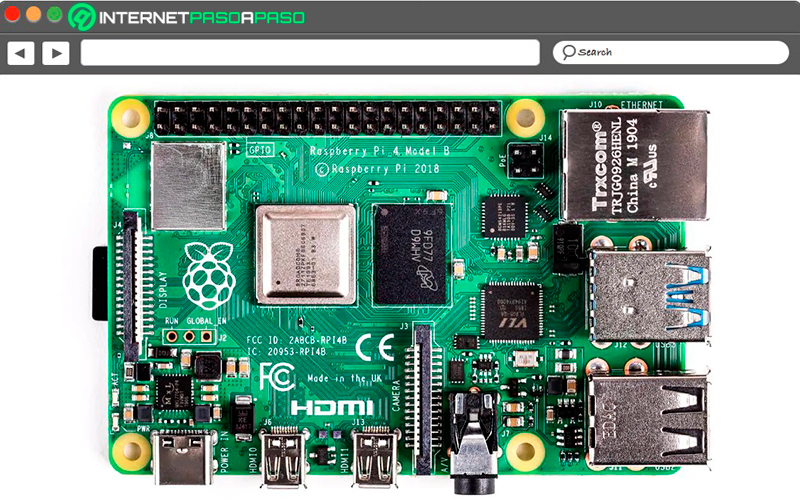
This is the latest plate launched on the market and which can be obtained for a value of 55 euros. It is worth mentioning that it is the most powerful board of all and that it has many important advances for the use of users. Perhaps the most important thing to note is its higher performanceall this thanks to the specifications such as those of its processor, the random access memory options, even reaching the 8GB.
Having these specifications, this version has allowed these microcomputers to be used for more demanding applications in RAM as it can become the desktop computer format. Another point to highlight is the large number of options offered by its ports, in this case it has two USB 3.0 and 2.0 portsthus achieving a standard that offers greater data transfer.
It also has two hdmi, which allows it to be connected to two televisions simultaneously. While its new graphic processor allows an output of 4k 60hz video. It’s like with this Raspberry Pi 4 you will be able to take advantage of many aspects that you couldn’t before, in terms of connections, with Wi-Fi networks AC and with a support for Bluetooth 5.0.
Raspberry Pi Zero/ Zero W/ Zero WH
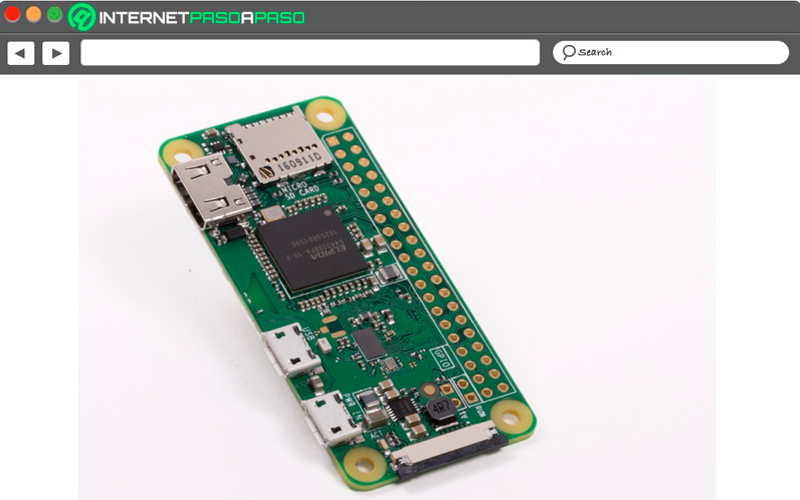
Finally, we present the Raspberry PiZero, It is a model that stands out mainly for being economical, and it is that the zero-line It has been launched precisely for that, so that it becomes low-cost plates and can be purchased by the vast majority. The price of them is usually from 5 dollars and up.
These raspberry pizero They are usually much more compact with fewer components and fewer ports, so they are clearly going to be much smaller. In order to connect them to the Internet, you need to use a Ethernet port or connect it to a USB dongle for WiFi. However, this model would be replaced by the ZeroW, which had a cost of 10 eurosbut this board did implement Wi-Fi and Bluetoothsomething that is quite useful and important to use in projects.
To try to solve the failures of the previous models, then a new Zero model would be launched, it is being called Raspberry Pi Zero WH, which cost €14.60. Unlike the previous ones, this time it had the GPIO pins pre-soldered. Despite being basic models and not having many elements and options when compared to the plates of the other line, they can also work with Raspbianso they become a good option for it.
Computing