
Index:
UPDATED ✅ Do you want to know about Arduino boards and what are all their components? ⭐ ENTER HERE ⭐ and Learn Everything FROM ZERO! ✅
Day by day, Arduino is one of the most valuable elements to start in the field of electronicsgiven that was designed for artists, designers, hobbyists and anyone interested in creating electronic projects; both at the software level and also in terms of hardware. This, mainly, thanks to Arduino does not require a separate piece of hardware to upload new code to the microcontroller because it uses a USB cable.
In addition to this, thanks to use a simplified version of C++the Arduino IDE It is characterized by being easy to program. Additionally, said board has the ability to interact with buttons, motors, speakers, cameras, LEDs, GPS units, smartphones and the Internet. Which, makes it a flexible software and hardware to carry out educational projects or, any electronics project.
But, beyond its useful features for this, it is important to know what are each and every one of the components of an Arduino board. Since, these elements are essential to be able to start from scratch and thus program your first open source projects correctly. So then you will know the modules that make up an Arduino board.
All the components that make up an Arduino board that you must know to learn to program from scratch
While it is true, Arduino is an electronics prototyping platform based on a board that has several components from which it manages to operate as a device that connects the analog world with the digital world.
Therefore, to detail more what an Arduino board consists of, it is worth knowing what its parts are and what they are about, here:
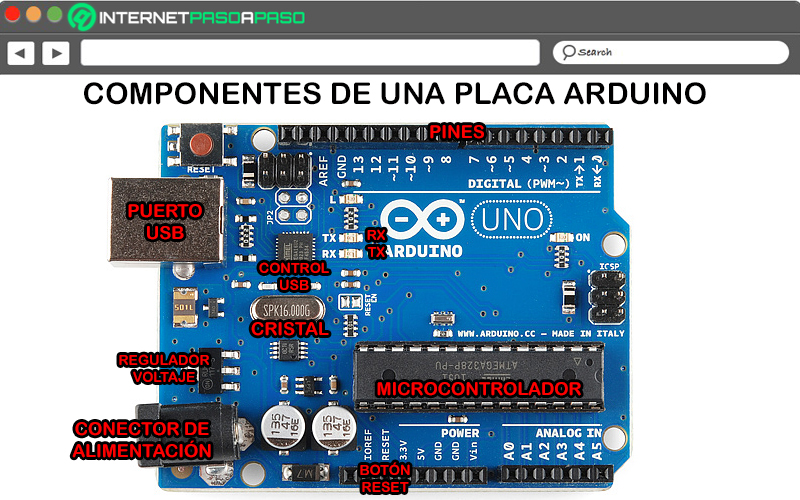
microcontroller
It’s a Integrated circuit which is defined as the party that has the power to process all information and, therefore, it is the area where the code is recorded that is known as “Sketch” in software Arduino. So that, is estimated as the brain of an Arduino board and is characterized by being a black element with metal legs.
In that sense, the microcontroller of a plate Arduino operates as a programmable integrated circuit that, by default, has the ability to perform complex mathematical operations at high speed.
digital pins
They are those who deal with detecting if there is a ZERO or a ONE logical and are used for both digital input and digital output. Whether, for example, to press a button and to light an LED, respectively. Which means, the digital pins are used for button presses or devices that send and/or receive digital information. These pins range from 0 to 13.
analog pins
They correspond to the pin area on the frame of the “analog” and thanks to this, they are able to detect analog signals (temperature or light, for example). To do this, they have an operating voltage segment that fluctuates between 0 and 5 volts. As a consequence, analog pins are pins that can read the signal from an analog sensor and transform it into a digital value that can be visualized. Which means that, by means of the analog pins, it is possible measure things in the real world.
Sensor Power Pins
They provide a power supply between 6 and 12 volts which, directly, goes to the voltage regulator. By means of these pins, there is also the possibility to power Arduino with batteries or batteries. However, in that way, there is no polarity protection diode and no over current protection.
PWM pins
They are specific pins that act as normal digital pins and, at the same time, can be used for “Pulse Width Modulation” or what is known as “PWM” in English. Physically, these pins are distinguished by containing a tilde (~) next to some of the digital pins, such as: 3, 5, 6, 9, 10 and 11.
AREF Pin
It’s a single pin which, most of the time, can be left alone instead. Basically, it refers to an element that has analog reference support and, sometimes, it is used to be able to establish an external reference voltage between 0 and 5 volts. Which, works as the upper limit of the analog input pins.
Pin GND
on a plate Arduino, there are always several GND pins and any of them, can be used for ground the circuit. Hence, its name, which is the abbreviation of “Earth” in English. For its part, when locating it, it is right next to the pin AREF.
reset button
Refers to the reset button that is connected to pin number one of the microcontroller, directly. which is better known as “Clear” either “Master Clear”. Now, once this button is pushed, it connects the reset pin to ground temporarily, in order to be able to restart any code that is uploaded to the Arduino board.
It should be noted that this requires 5 volts to run the program, while, the button interrupts the voltage to 0 volts in order to stop the very program that the Arduino is runningin order to start it again.
USB port
It is a component that is also identified as “Usb connector” and it is the one that allows you to connect the Arduino board to a certain computer. Thus, it offers the possibility of load the required code and feed the card correctly.
usb control
Basically, USB control consists in a moderator that operates between the microcontroller and the software. Reason why, this focuses on converting the information transmitted by the microcontroller to the data that goes to the used equipment.
Power connector
As its name indicates, it is an element that offers the possibility of power the board with DC voltage which can be from 7 to 12 volts. Appreciating that, every time the Arduino board is connected to an electrical outlet, the power LED should light up. If not, something is probably wrong.
Voltage regulator
On an Arduino board, the voltage regulator takes care of control the amount of stress left on that plate. In other words, it practically acts as a watchdog that will prevent the entry of an additional voltage that could cause damage to the circuit. Generally, this voltage regulator supports a stable 5 volt output without relying on input voltage.
Receive (RX) and Transmit (TX) Serial
They are a kind of marks that, in electronics, are used to indicate the pins responsible for serial communication. As a consequence, it consists of a component of arduino uno board which focuses on externalizing when said board is receiving or transmitting data, visually. Taking into account that it consists of a transmission that It is carried out by means of pins Zero and One..
Crystal
Specifically, this element has the ability to mark the pulse or work time to the microcontroller with the aim of operating perfectly on an Arduino board. Thus, a crystal is a kind of electronic oscillator circuit that creates an electrical signal with a precise frequency in order to control exact working time.
List of the best Arduino kits to create your first OpenSource projects
To build circuits in Arduino, it is necessary to have an Arduino kit through which manage to create your projects in a more pertinent way. Given that, with all the necessary material, this will help you speed up the learning process remarkably and to experiment with all kinds of components.
Currently, there are numerous kits of this type that are offered on the market and several of them are very well positioned in terms of purchase rates. Therefore, so that you can build your first open source projects with the help of a arduino kit.
Next, we will introduce you to 5 of the best models available today, specifying their main characteristics:
Elegoo MEGA 2560
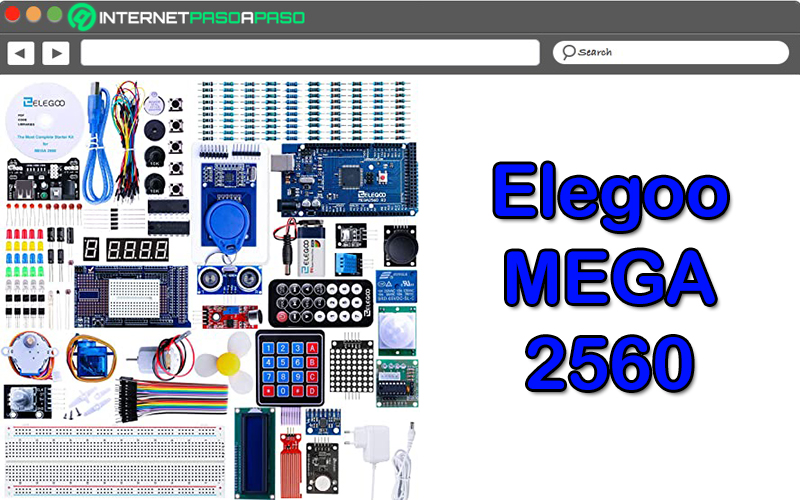
In the first place, we locate this quite complete kit for practitioners that has a GY-61 sensor, works with the LCD1602 module and It is made up of more than 200 components.. Reason why, it has the capacity to process all kinds of tests and thus, he is able to carry out dozens of projects of different kinds.
In this sense, it has striking tools such as a step-by-step servo motor to carry out mobilization practices of different pieces, an ultrasound sensor for distance measurement and motion detection. Like, a small fan to do power transmission tests, a total of 25 multi-color LED bulbsetc.
Therefore, to start from scratch in a practical way, it is advised to make use of this Arduino kit. Thanks to the fact that, due to its excessive number of elements and variety of accessories, gives users the freedom to create all kinds of projects and let their imagination run wild. But unfortunately, it doesn’t have a built-in gyroscope to run projects that need directional insights.
XCSOURCE Arduino TE167
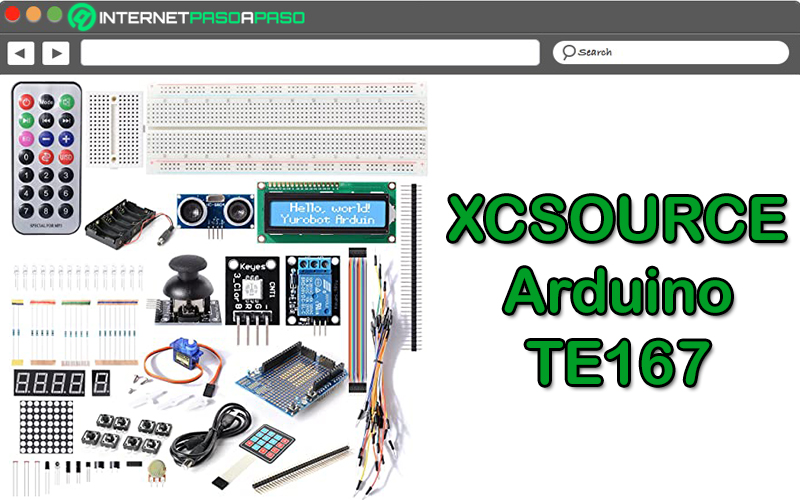
This is an alternative that has more than 100 pieces and adds different types of accessories so that users have the facility to develop varied projects. In this way, it is a model intended both for beginners who have basic knowledge and also for a medium term, that is, between beginner and expert level.
Now, evaluating its most striking components, it should be noted that XCSOURCE Arduino TE167 It has the mini breadboard, the shield prototype, sensors, buttons, resistors, display segments, transfer cables and many more compendia that are assembled together to obtain a truly technical final result. Among other features, we point out that has a box in which you can store all the components to transport them comfortably, despite the fact that it does not have a storage case.
In addition, among its main advantages, we specify that it is appropriate for beginners who want to know more about an Arduino board and, apart from that, manages to stimulate your creativity thanks to the number of tools it provides (15 LEDs, 8 buttons, flame, tilt and temperature sensors, etc.). Nevertheless, does not add an instruction manual explain how to use it correctly.
Arduino Starter Kit
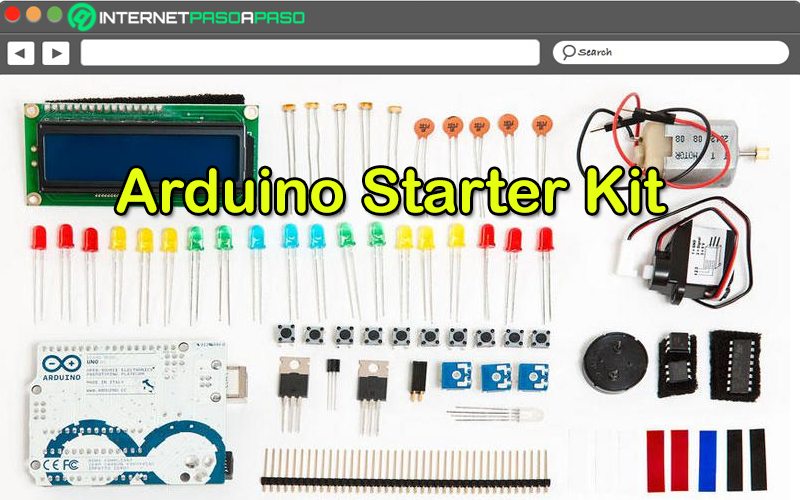
It is an Arduino pack that it is interesting to start in this world. Which is considered one of the most basic kits because it only allows you to develop a total of 15 projects with the help of a manual that contains practical and direct explanations to facilitate the design processes. Since it is ideal for beginners, in most cases, no welding required and this is advantageous for users.
For its part, it has pieces that offer various types of accessories that are essential to carry out any project from scratch, such as: mounting base, prototyping board, buttons, sensors, jumper wires, potentiometers, resistors and diodes. Thanks to this, not many extra pieces are required to obtain an effective final project.
However, in terms of its main benefits, we specify that It is suitable for all ages (between 9 and 99 years old), has a physical manual of 170 pages that details the projects that can be done through this kit. In addition to that, it allows you to control the physical world through sensors and actuators when making use of all the components of the section. Additionally, the pack supports a 9-volt battery and, therefore, serves to feed independently designed projects.
Elegoo MEGA 2560 NANO
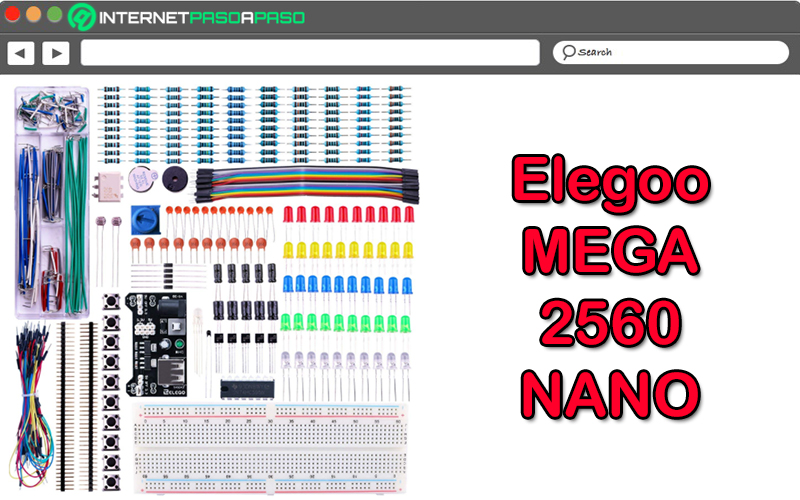
It corresponds to an Arduino kit that offers a total of 300 pieces and thanks to this, it is considered a very complete solution. In addition, it stands out from the rest by offering an optimal relationship between quality and price because, although it includes so many components, it is characterized by being one of the cheapest packs available on the market. Valuing that, This model costs only 20 euros.
Among other details, Elegoo MEGA 2560 NANO is an Arduino kit that has been recommended by numerous experts, thanks to the fact that allows you to start in this world in a relevant way and, in addition, all the components that it adds manage to improve the user experience. Regarding its instructions, we emphasize that it does not provide a physical manual, but offers a website with different information resources in favor of users orienting themselves and handling the kit perfectly.
Now, among its advantages, we find that is highly compatible, so it is possible to use it with both Arduino IDE and starter kits without any problem. Additionally, since it has 300 pieces, adapts to any type of project and does not reveal the use of extra components. However, the power supply does not have an adapter and it is recommended to use it with a DC 9V connector or via USB.
Kuman K4-UK
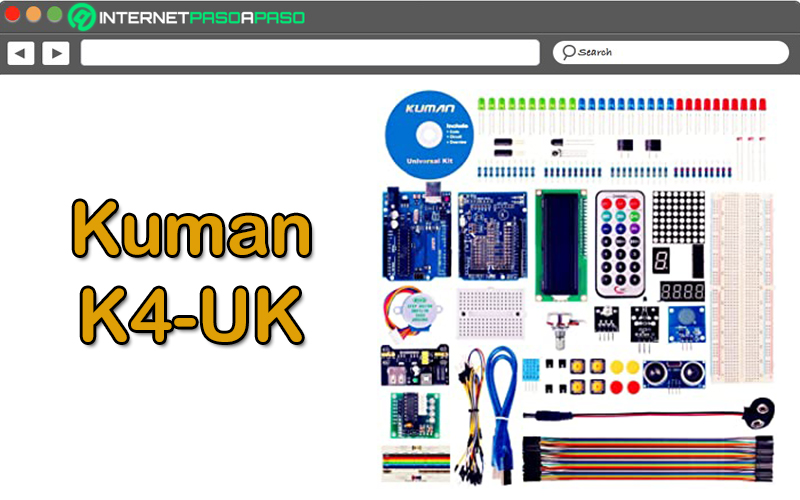
It consists of a model that provides a total of 44 pieces through which various projects can be developed easily. which has been considered as one of the best options for users who want to get familiar with the Arduino environment quickly, without requiring the inclusion of an excessive number of elements. Since, only the most strategic ones are needed to obtain optimal results.
In this sense, this kit is composed of mini boards, multi-color LED lights, breadboards, buzzers, temperature sensors, resistors, remote control, etc.. In addition, the package has a CD ROM that houses different instructions for use, tutorials and steps to develop projects, in order to significantly simplify processes. Apart from this, it stands out as one of the cheapest packs at the moment.
That’s why, it is a good option for those who want to buy an economical and efficient kit at the same time. One of his greatest attractions, without a doubt, is the LCD screen with an LED backlight that has and in which up to two lines of 16 characters can be displayed. Additionally, also stands out from the rest for its versatility and thanks to this, it can be used from novices without knowledge of electronics to students or engineers, in view of the variety it provides.
Learn how to choose the best Arduino kit
To decide which is the best Arduino kit on the marketit is necessary to take into account several aspects that allow it to be qualified as an optimal option, above the other solutions.
Therefore, so that you know how to select the right Arduino kit for you, we recommend you assess the following parameters when making that choice:
- Quantity of pieces or elements: It is the most important aspect to classify an Arduino pack as the most competent of all. Whereas, if you have a large number of parts, It will allow you to test numerous forms of programming and this will be useful for creating various projects.. In addition, it will not be necessary to add extra elements.
- component types: It is essential that the Arduino pack has the most basic elements to obtain a good project as a result. Either resistors, sensors, connectors, pushbuttons, LED diodes, LCD screen, etc..
- User guides or tutorials: To carry out the projects much more easily and quickly, it is of great help that the kit provides tutorials or user manuals so that use the components in the most pertinent way and be able to avoid mistakes.
- Case to store the parts: If the kit in question has a briefcase or a box to store the elements that make it up, it will be more comfortable. Since, apart from having everything well organized, you can transport it without much effort.
Hardware